In today’s digital world, taking screenshots has become an essential skill for iPhone users. Whether you want to capture a memorable moment from a video call, save an important message, or share an interesting image with your friends, knowing how to take a screenshot on your iPhone 14 is invaluable. In this article, we will walk you through the entire process, from understanding the basics of iPhone 14 to troubleshooting common issues.
Understanding the Basics of iPhone 14
Before diving into the screenshot-taking process, it’s important to familiarize yourself with the key features of the iPhone 14. This cutting-edge device offers a range of advanced functionalities that enhance the user experience.
The iPhone 14 is the latest flagship smartphone from Apple, designed to provide users with a seamless and intuitive experience. With its sleek and modern design, it is not only a powerful device but also a stylish accessory. The device is packed with innovative features that make it stand out from its predecessors and competitors.
Key Features of iPhone 14
The iPhone 14 boasts an impressive array of features, including a high-resolution Super Retina XDR display. This display offers vibrant colors, deep blacks, and sharp details, allowing users to enjoy their favorite content with stunning visuals. Whether you are watching movies, playing games, or browsing the web, the Super Retina XDR display ensures a captivating viewing experience.
Powering the iPhone 14 is the A15 Bionic chip, a powerful and efficient processor that delivers exceptional performance. With its advanced architecture and neural engine, the A15 Bionic chip enables faster app launches, smoother multitasking, and improved overall responsiveness. Whether you are editing photos, playing graphics-intensive games, or running demanding apps, the A15 Bionic chip ensures a lag-free experience.
In addition to the impressive display and powerful processor, the iPhone 14 features a dual-camera system with advanced computational photography capabilities. This camera setup allows users to capture stunning photos and videos with ease. Whether you are a photography enthusiast or simply love taking pictures, the iPhone 14’s camera system will exceed your expectations.
Another standout feature of the iPhone 14 is Face ID, a secure and effortless authentication method. With Face ID, you can unlock your device, make secure payments, and access sensitive information with just a glance. This advanced facial recognition technology ensures that only you can access your iPhone 14, providing peace of mind and convenience.
Furthermore, the iPhone 14 supports 5G connectivity, enabling lightning-fast data speeds. With 5G, you can download apps, stream high-quality content, and browse the web at incredible speeds. Say goodbye to buffering and slow loading times – the iPhone 14 ensures a seamless and lag-free online experience.
Navigating the iPhone 14 Interface
Getting comfortable with the iPhone 14 interface is crucial for efficient screenshot-taking. Tap, swipe, and use multitouch gestures to navigate through apps, menus, and screens effortlessly. Familiarize yourself with the Control Center, which provides quick access to essential settings and features.
The iPhone 14 interface is designed to be intuitive and user-friendly. With its simple and elegant layout, you can easily find and access your favorite apps, settings, and features. The Control Center, accessible with a swipe from the top-right corner of the screen, allows you to adjust brightness, toggle Wi-Fi and Bluetooth, control media playback, and much more.
Additionally, the iPhone 14 introduces new gestures that enhance the overall user experience. For example, you can swipe up from the bottom of the screen to go to the home screen, swipe down from the top-right corner to access the Control Center, and swipe left or right on the home screen to switch between apps.
By familiarizing yourself with these gestures and the overall interface of the iPhone 14, you can navigate through the device effortlessly and efficiently. Whether you are taking screenshots, browsing the web, or using your favorite apps, the iPhone 14 interface ensures a smooth and seamless experience.
Preparing to Take a Screenshot
Before capturing the perfect screenshot, it’s essential to ensure your iPhone’s settings are optimized and to navigate to the desired screen.
When it comes to taking a screenshot on your iPhone 14, there are a few steps you can take to ensure you capture exactly what you want. Let’s dive into the details!
Checking Your Settings
First, check that your iPhone 14 is configured to suit your screenshot needs. Open the Settings app and navigate to “Display & Brightness” to adjust the brightness level. It’s important to find the right balance of brightness so that your screenshot appears clear and vibrant.
Additionally, ensure that the “Auto-Lock” feature is set to a timeframe that allows you enough time to take the screenshot without the screen turning off. There’s nothing more frustrating than trying to capture a moment only to have your screen go black before you can press the necessary buttons.
By customizing these settings, you can create an optimal environment for capturing your screenshots with ease.
Opening the Desired Screen
Next, navigate to the screen or app you want to capture in the screenshot. Whether it’s a funny conversation in your messaging app or a breathtaking view on a website, make sure the content you wish to capture is displayed on your iPhone 14 screen.
Take a moment to explore the various apps and websites on your iPhone 14. From social media platforms to news articles, there’s a world of captivating content waiting to be captured in a screenshot.
Once you’ve found the perfect screen, take a moment to appreciate the details. Is it a stunning landscape photo that you want to remember forever? Or perhaps it’s a hilarious meme that you want to share with your friends. Whatever it may be, make sure it’s something that brings you joy and captures a moment worth remembering.
Now that you’ve prepared your settings and found the desired screen, you’re ready to capture the perfect screenshot on your iPhone 14. Get ready to press those buttons and immortalize the moment!
The Process of Taking a Screenshot on iPhone 14
Now that you’re ready to take your screenshot, let’s explore the two methods available on the iPhone 14: the button method and the AssistiveTouch method.
Using the Button Method
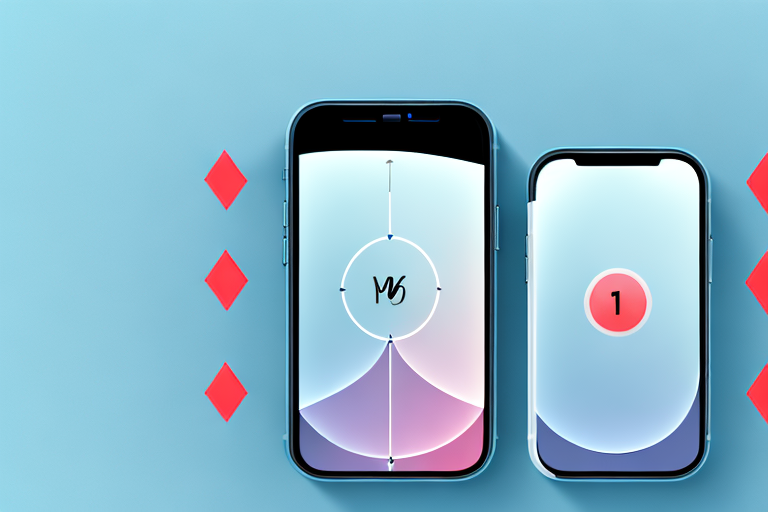
The most straightforward way to capture a screenshot on the iPhone 14 is by using physical buttons. Simply press the Side Button (located on the right side of the device) and the Volume Up Button (located on the left side) simultaneously. You’ll see a quick flash on the screen, accompanied by a satisfying camera shutter sound, indicating that the screenshot has been successfully taken.
But have you ever wondered how these physical buttons work? The Side Button and Volume Up Button are meticulously designed to provide a tactile and responsive experience. When you press both buttons simultaneously, the iPhone’s operating system recognizes this action as a command to capture the current screen. The flash and shutter sound are added feedback elements to let you know that the screenshot has been successfully saved.
Additionally, the physical button method offers a sense of familiarity and control. By relying on physical buttons, you can feel the click and pressure, enhancing the overall user experience. This method is ideal for those who prefer a more tactile approach to taking screenshots.
Using the AssistiveTouch Method
If using physical buttons is challenging for you due to accessibility reasons or device placement, the AssistiveTouch method provides a convenient alternative. To activate AssistiveTouch, go to “Accessibility” in the Settings app and toggle on “AssistiveTouch.” A small floating button will appear on your screen. Tap the AssistiveTouch button, select “Device,” and choose “Screenshot.” The screenshot will be instantly captured, and you will find it in your Photos app.
But how does AssistiveTouch work behind the scenes? AssistiveTouch is a feature designed to assist users with physical or motor challenges. When enabled, it creates a floating button overlay on the screen, providing easy access to various functions. By selecting “Device” and then “Screenshot,” you are essentially triggering the same command as the physical button method. The iPhone’s software interprets this action and captures the screen, saving it as a screenshot in your Photos app.
Furthermore, AssistiveTouch offers customization options, allowing you to personalize the floating button’s appearance and behavior. You can adjust its size, transparency, and even assign specific actions to different gestures. This flexibility ensures that AssistiveTouch caters to individual preferences and accessibility needs.
Whether you choose the button method or the AssistiveTouch method, capturing screenshots on the iPhone 14 is a simple and versatile process. With these two options at your disposal, you can effortlessly capture and save important moments, share information, or troubleshoot technical issues with ease.
Viewing and Sharing Your Screenshot
Now that you’ve successfully captured a screenshot, it’s time to view and share your masterpiece with others.
Accessing Your Screenshots
To view your screenshots, open the Photos app on your iPhone 14. Head to the “Albums” tab and select “Screenshots.” Here, you’ll find all your captured screenshots neatly organized and ready for viewing or editing.
Sharing Screenshots via Different Platforms
Sharing screenshots is a breeze on the iPhone 14. Simply locate the desired screenshot in your Photos app, tap the “Share” button, and choose the platform or app through which you want to share it. Whether it’s iMessage, Mail, or your favorite social media platform, your screenshot will be ready to captivate your friends and followers.
Troubleshooting Common Issues
While taking a screenshot on the iPhone 14 is usually a seamless experience, there may be times when you encounter issues. Let’s explore some common problems and their solutions.
What to Do When Screenshots Aren’t Saving
If you find that your screenshots are not saving in the Photos app, ensure that you have sufficient storage space on your iPhone 14. Delete unnecessary files or apps to free up storage. Additionally, make sure you have the latest iOS update installed, as software updates often include bug fixes.
Fixing Unresponsive Buttons
In rare cases, the physical buttons may become unresponsive or difficult to press. If this happens, try cleaning the buttons gently with a soft cloth. If the issue persists, contact Apple Support for further assistance.
With these simple steps, you are now equipped with the knowledge to take a screenshot on your iPhone 14 effortlessly. Capture and share your favorite moments, important information, or funny conversations with ease. Happy screenshotting!
Enhance Your Screenshots with GIFCaster
Now that you’ve mastered the art of taking screenshots on your iPhone 14, why not take it a step further with GIFCaster? With GIFCaster, you can add a touch of personality and fun to your screenshots by incorporating animated GIFs. Transform a simple work message into a delightful celebration, or make your social shares stand out. Ready to express yourself creatively? Use the GIFCaster App today and bring your screenshots to life!