In today’s digital age, screenshots have become an essential tool for communication and documentation. Whether you need to capture an error message, share an interesting article, or provide visual instructions, screenshots offer a convenient way to capture and share information. However, raw screenshots often require some editing to enhance their clarity and effectively convey the desired message. In this article, we will explore the various methods and techniques for editing screenshots to make them visually appealing and informative.
Understanding Screenshots and Their Importance
Before diving into the world of screenshot editing, it’s important to understand what exactly a screenshot is and why it holds significant value in today’s tech-driven world.
In today’s digital age, screenshots have become an integral part of our lives. Whether it’s capturing a funny conversation, preserving important information, or documenting a bug in a software, screenshots play a crucial role in our daily interactions with technology.
A screenshot is essentially a digital image or snapshot captured from the display screen of a computer, smartphone, or any other electronic device. It captures the visible content displayed on the screen at a specific point in time and preserves it as an image file.
But why do we need to capture screenshots? The answer lies in their ability to capture and preserve information in a visual format. Screenshots allow us to capture moments that are otherwise fleeting, enabling us to revisit and analyze them at our convenience.
What is a Screenshot?
A screenshot, as mentioned earlier, is a snapshot of the content displayed on a screen. It acts as a visual record of what was visible on the screen at a particular moment. This can include web pages, software interfaces, social media posts, error messages, and much more.
When you take a screenshot, you are essentially freezing a moment in time, capturing a digital representation of what you see on your screen. This can be incredibly useful for a variety of purposes, such as sharing information, troubleshooting technical issues, or simply preserving memories.
Why Do We Need to Edit Screenshots?
While unedited screenshots may convey the basic information, editing them offers numerous advantages. Firstly, editing enables you to emphasize specific areas, draw attention to important details, and effectively communicate your message.
Imagine you are trying to explain a complex process to someone, and a screenshot can help simplify the explanation. By editing the screenshot, you can highlight the relevant steps, add annotations, and make it easier for the recipient to understand the instructions.
Additionally, editing allows you to crop out unnecessary elements, resize the image, annotate with text, arrows, or shapes, and make the screenshot more visually clear and appealing. This can be particularly useful when creating presentations, tutorials, or documentation.
Moreover, editing screenshots can also help maintain privacy and confidentiality. By blurring or redacting sensitive information, you can share the screenshot without compromising personal or confidential data.
Overall, screenshot editing is a powerful tool that enhances the usability and visual impact of screenshots. It allows you to customize and optimize the captured image to better serve your purpose, whether it’s for personal use or professional communication.
Different Methods to Take a Screenshot
Before we jump into editing, let’s briefly explore the methods available to capture screenshots, depending on the device or operating system you are using.
Screen capture is a useful tool that allows you to capture and save what is currently displayed on your screen. Whether you want to capture an important moment, save an error message for troubleshooting, or simply share something interesting with others, knowing how to take a screenshot is essential.
Taking a Screenshot on Windows
If you are using a Windows computer, there are multiple ways to capture screenshots. One method is by pressing the “Print Screen” key on your keyboard, which captures the entire screen. This key is often labeled as “PrtScn” or “PrtSc”. Once you press the key, the screenshot is copied to your clipboard. You can then paste it into an image editing program, such as Paint, to save it as an image file.
Alternatively, you can use the “Windows Key + Print Screen” combination to save a screenshot directly to a folder on your computer’s hard drive. This method automatically saves the screenshot as an image file, usually in the “Pictures” folder. It makes it easier to locate and organize your screenshots without the need for additional steps.
Taking a Screenshot on Mac
Mac users can take screenshots using different key combinations. Pressing “Command + Shift + 3” captures the entire screen, including all open windows and the menu bar. The screenshot is automatically saved as a PNG file on your desktop. This method is quick and convenient for capturing everything on your screen.
If you want to capture a specific area of your screen, you can use the “Command + Shift + 4” combination. This allows you to select a specific area by dragging the cursor. Once you release the mouse button, the selected area is captured and saved as a PNG file on your desktop. This method gives you more control over what you capture, especially if you only need a portion of the screen.
Taking a Screenshot on Mobile Devices
When it comes to mobile devices, the methods for taking screenshots vary depending on the operating system. On an iPhone or iPad, simultaneously pressing the “Home” button and the “Lock” button captures a screenshot. You will hear a camera shutter sound, and a thumbnail of the screenshot will appear in the bottom left corner of the screen. Tapping on the thumbnail allows you to edit or share the screenshot immediately.
On Android devices, the combination for taking a screenshot may vary slightly depending on the manufacturer and the version of Android. However, a common method involves pressing the “Volume Down” and “Power” buttons together. After pressing the buttons, you will see a brief animation or hear a sound indicating that the screenshot has been captured. The screenshot is then saved in your device’s gallery, where you can access it and share it as needed.
Now that you are familiar with the various methods for taking screenshots on different devices and operating systems, you can choose the one that suits your needs best. Whether you are a Windows user, a Mac enthusiast, or a mobile device aficionado, capturing screenshots has never been easier. So go ahead, start capturing and sharing your screen!
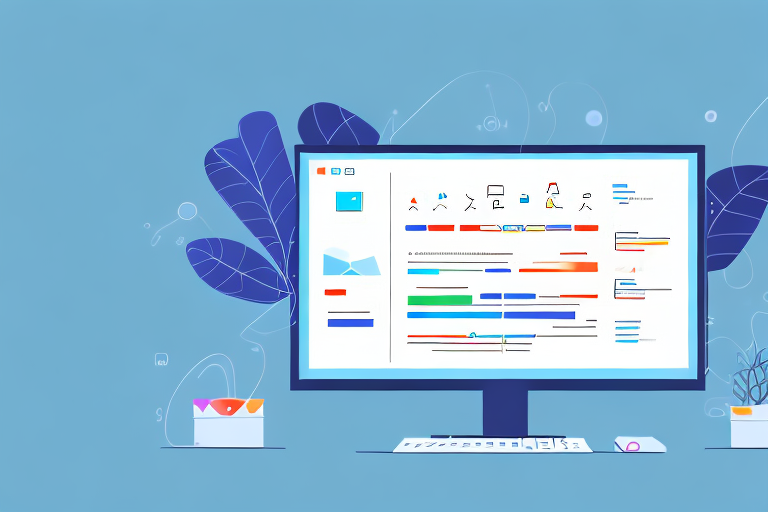
Basic Editing Tools for Screenshots
Now that you are familiar with capturing screenshots, let’s explore the basic editing tools at your disposal. These tools allow you to refine and enhance the captured images.
Built-in Editing Tools
Many operating systems and devices come with built-in screenshot editing tools that provide basic editing capabilities. These tools often allow you to crop, annotate, add text, and highlight areas of the screenshot. They are usually simple and intuitive to use, making them a convenient option for quick edits.
Third-party Editing Tools
If you seek more advanced editing features and greater control over your screenshots, there are numerous third-party editing tools available. These tools offer a wide range of functionalities, such as image filters, advanced annotations, layering, and integration with other applications. Some popular third-party tools include Adobe Photoshop, Snagit, and Lightshot.
Step-by-Step Guide to Edit a Screenshot
Now let’s dive into a step-by-step guide on how to edit a screenshot using basic editing techniques. We will cover common editing tasks that will enhance the clarity and impact of your screenshots.
Cropping a Screenshot
When editing a screenshot, one of the first tasks you may want to perform is cropping. Cropping allows you to eliminate unwanted areas, remove distractions, and focus the viewer’s attention on the essential content. To crop a screenshot, open the image in any image editing software, select the crop tool, and adjust the selection to capture the desired area. Once satisfied, apply the crop and save the edited screenshot.
Adding Text to a Screenshot
Adding text annotations to a screenshot provides valuable context and clarifies your message. Many editing tools offer the ability to add text boxes, enabling you to insert explanatory text overlaying the screenshot. Choose a font, size, and color that is easy to read and complements the overall design. Position the text strategically to guide the viewer’s attention to specific elements within the image.
Highlighting Areas in a Screenshot
To draw attention to specific details or elements in a screenshot, you can use highlighting techniques. This can be achieved by adding arrows, circles, or rectangles around the relevant areas of the image. By doing so, you are guiding the viewer’s focus and emphasizing the essential aspects of the screenshot.
Advanced Editing Techniques for Screenshots
If you have mastered the basic editing techniques, you may want to explore advanced editing techniques to take your screenshots to the next level.
Using Filters on Screenshots
Applying filters to screenshots can dramatically change their appearance and enhance their visual impact. Filters allow you to adjust colors, brightness, contrast, and other aspects of the image to achieve a desired effect. Experiment with different filters to find the perfect look that aligns with your overall message and enhances the screenshot’s appeal.
Adding Shapes and Icons to Screenshots
Shapes and icons provide an effective way to visually communicate information in a screenshot. Whether it’s an arrow to indicate a specific direction or a checkmark to mark completed tasks, adding shapes and icons can improve the clarity and understanding of the screenshot. Many editing tools offer a library of pre-designed shapes and icons that you can easily insert into your screenshot.
Editing screenshots is a skill that can greatly enhance your ability to communicate and share information effectively. Whether you are editing screenshots for professional or personal use, understanding the tools and techniques available will help you create captivating and informative visuals. So, the next time you need to edit a screenshot, follow this guide and unleash your creativity to produce visually appealing images that make an impact.
Take Your Screenshots to the Next Level with GIFCaster
Ready to add a dash of fun to your screenshots? With GIFCaster, you’re not just editing; you’re enhancing your visual communication with the magic of GIFs. Turn your standard screenshots into engaging, creative expressions that capture attention and bring smiles. Whether it’s celebrating a team win or just brightening someone’s day, GIFCaster is your go-to tool for making every message memorable. Don’t settle for the mundane—use the GIFCaster App today and transform your screenshots into fun, animated conversations.