Screenshots are a great way to capture and share visual information on your MacBook. However, often the entire screen is not necessary to convey your message. Cropping a screenshot allows you to focus on specific content, making it more visually appealing and informative. In this step-by-step guide, we will explore the importance of cropping screenshots, how to take a screenshot on your MacBook, and the process of cropping and saving your desired content. Let’s dive in!
Understanding the Importance of Cropping Screenshots
When it comes to visual communication, less is often more. Cropping screenshots plays a vital role in enhancing the clarity and impact of your message. By eliminating unnecessary elements, you can direct the viewer’s attention to the most important parts of the screen. Whether you are showcasing a software feature or providing instructions, cropping allows you to convey your message efficiently.
Let’s delve deeper into the benefits of cropping screenshots. When you capture a screenshot, it captures the entire screen, including icons, taskbars, and other elements that may not be relevant to your message. By cropping the screenshot, you can remove these distractions and create a focused image that highlights the key information you want to convey.
Enhancing Visual Communication with Cropped Screenshots
By cropping screenshots, you can eliminate distractions that might confuse or overwhelm viewers. With a clear focus on the relevant content, you can enhance the overall clarity and understanding of your visuals. Cropped screenshots make it easier for your audience to absorb information quickly, resulting in better communication and engagement.
Imagine you are creating a tutorial on how to use a specific feature in a software application. Instead of including a full-screen screenshot that may contain unnecessary elements, you can crop the image to show only the relevant buttons, menus, or options. This focused image will guide your audience’s attention directly to the steps they need to follow, making it easier for them to understand and replicate the process.
Saving Space and Time with Cropped Screenshots
In addition to improving visual communication, cropping screenshots also saves valuable screen space. When including screenshots in documents, presentations, or emails, cropped images take up less room, allowing you to include more content in a limited space. Moreover, by cropping out unnecessary elements, you reduce the time required for viewers to comprehend your messages.
Consider a scenario where you need to create a user manual for a complex software application. Including full-screen screenshots for each step would take up a significant amount of space, making the manual lengthy and overwhelming. However, by cropping the screenshots to show only the essential elements, you can save space and present the information in a more concise and digestible manner.
Furthermore, cropped screenshots can save time for both the creator and the viewer. When you crop a screenshot, you remove irrelevant parts, making it easier for viewers to focus on the important details. This streamlined presentation of information allows them to grasp the content quickly and efficiently. As a result, they can complete tasks or follow instructions more effectively, saving time and increasing productivity.
In conclusion, cropping screenshots is a powerful technique that enhances visual communication by eliminating distractions and focusing on the key elements. It not only improves clarity and understanding but also saves valuable screen space and reduces the time required for viewers to comprehend information. So, the next time you need to convey a message using screenshots, remember the importance of cropping to make your visuals more impactful and efficient.
Preparing for the Screenshot
Before taking a screenshot on your MacBook, it is essential to prepare the content and the settings for the best result. Here’s how:
Choosing the Right Screen Content
Prioritize the specific content you want to capture in your screenshot. Consider what information is essential and what can be excluded to maintain clarity. By focusing on the key elements, you can create screenshots that effectively emphasize your message.
When choosing the right screen content, think about the purpose of your screenshot. Are you capturing a specific error message to troubleshoot a problem? Or are you capturing a beautiful image or design for your personal collection? Understanding the purpose will help you determine the most relevant content to include in your screenshot.
Additionally, consider the context in which the screenshot will be used. Will it be shared with colleagues, clients, or friends? If so, ensure that the content you capture is appropriate and relevant to the intended audience. This will help you avoid any confusion or miscommunication when sharing your screenshots.
Setting Up Your MacBook for the Screenshot
Ensure that your MacBook settings are optimized for screenshot taking. You can adjust settings such as keyboard shortcuts, screenshot file format, and destination folders. Taking the time to set up your preferences will save you time and effort in the long run.
Start by exploring the keyboard shortcuts available for taking screenshots on your MacBook. These shortcuts can vary depending on the model and operating system version. Familiarize yourself with the options and choose the ones that are most convenient for you. For example, you can use the Command + Shift + 3 shortcut to capture the entire screen or Command + Shift + 4 to capture a specific area.
Next, consider the file format in which you want your screenshots to be saved. macOS offers various options, including PNG, JPEG, and PDF. Each format has its advantages and disadvantages, so choose the one that best suits your needs. For instance, PNG is ideal for capturing high-quality images, while JPEG is more suitable for compressing screenshots and reducing file size.
Lastly, determine the destination folder for your screenshots. By default, macOS saves screenshots on the desktop, but you can change this location to a folder of your choice. Organizing your screenshots in a dedicated folder will help you keep them easily accessible and prevent clutter on your desktop.
Remember to periodically review and adjust your screenshot settings as your needs change. By optimizing your MacBook settings, you can streamline the screenshot-taking process and ensure that you capture the desired content efficiently.
Taking a Screenshot on Your MacBook
Now that you have prepared your content and settings, it’s time to capture your screenshot on your MacBook. There are two primary methods you can use:
Using Keyboard Shortcuts for Screenshots
MacBooks provide convenient keyboard shortcuts that allow you to capture screenshots quickly. Whether you want to capture the entire screen, a specific window, or a portion of the screen, keyboard shortcuts make the process efficient and straightforward. Familiarize yourself with these shortcuts to speed up your workflow.
One of the most commonly used keyboard shortcuts for taking a screenshot on a MacBook is Command + Shift + 3. This captures the entire screen and saves it as a PNG file on your desktop. It’s a quick and easy way to capture everything you see on your screen in one go.
If you want to capture a specific window or menu, you can use the Command + Shift + 4 shortcut. This turns your cursor into a crosshair, allowing you to select the area you want to capture. Simply click and drag your cursor to create a selection box around the desired window or menu, and release the mouse button to capture the screenshot.
For even more precision, you can use the Command + Shift + 4 shortcut followed by the Spacebar. This changes the cursor into a camera icon, allowing you to capture a specific window or menu by clicking on it. This method ensures that you capture only the desired element without any surrounding distractions.
Utilizing the Screenshot Toolbar
If you prefer a more visual approach, you can use the built-in screenshot toolbar on macOS Mojave (or later) versions. The toolbar provides various options for capturing screenshots, including capturing a window or recording a video. It is a user-friendly alternative to keyboard shortcuts.
To access the screenshot toolbar, simply press Shift + Command + 5 on your keyboard. This will bring up the toolbar at the bottom of your screen, displaying options such as capturing the entire screen, a selected portion, or a specific window.
Once the toolbar is visible, you can click on the desired capture option to initiate the screenshot. For example, if you want to capture the entire screen, click on the “Capture Entire Screen” button. If you prefer to capture a specific window, click on the “Capture Selected Window” button, and then select the window you want to capture.
In addition to capturing screenshots, the toolbar also offers options for recording videos. You can choose to record the entire screen or a selected portion by clicking on the respective buttons in the toolbar. This feature is particularly useful for creating tutorials or capturing gameplay.
Whether you choose to use keyboard shortcuts or the screenshot toolbar, taking a screenshot on your MacBook is a straightforward process. Experiment with both methods to find the one that suits your workflow best, and start capturing those important moments on your screen.
Cropping the Screenshot
Now that you have your screenshot captured, it’s time to crop it and focus on the essential elements. Follow these steps:
Opening the Screenshot in Preview
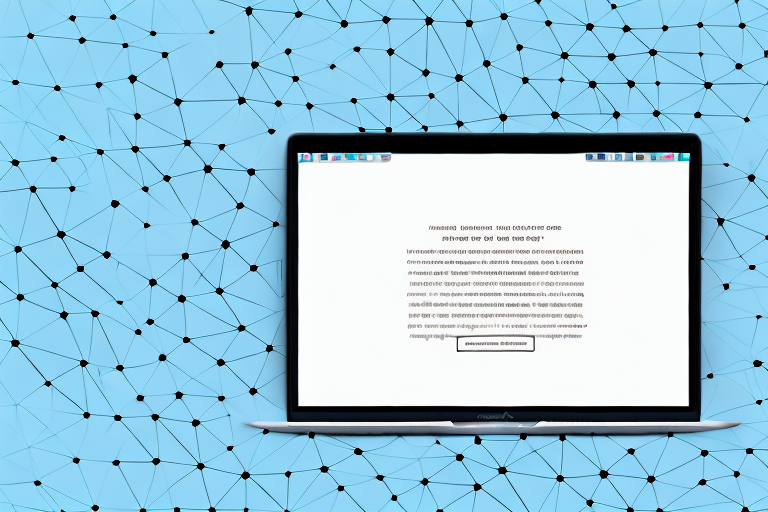
Locate the screenshot file on your MacBook and open it using Preview, which is the default image viewer. Preview provides various tools and features to help you modify your screenshot.
Using the Selection Tools for Cropping
Once your screenshot is open in Preview, use the selection tools to choose the area you want to keep. You can use the rectangular selection tool, the freehand selection tool, or the lasso tool to create a custom selection. After selecting the desired area, crop the image to remove the unwanted parts.
Saving and Sharing Your Cropped Screenshot
Now that you have successfully cropped your screenshot, it’s time to save and share it with others. Here’s what you need to consider:
Choosing the Right Format for Your Screenshot
Consider the purpose of your screenshot and choose an appropriate file format. Whether it’s JPEG, PNG, or PDF, selecting the right format ensures compatibility and quality. Additionally, you can adjust the image resolution and compression levels based on your requirements.
Sharing Your Screenshot Effectively
Depending on your needs, you can share your cropped screenshot in various ways. You can attach it to an email, upload it to a cloud storage service, or embed it in a document or presentation. Consider the most accessible and convenient method for your audience to access and view your screenshot.
By following this step-by-step guide, you now have the knowledge and skills to crop screenshots effectively on your MacBook. Remember to consider the importance of cropping in visual communication, prepare the screenshot content and settings, capture the screenshot using keyboard shortcuts or the screenshot toolbar, and finally, crop and save your screenshot for optimal impact. Happy screenshotting!
Take Your Screenshots to the Next Level with GIFCaster
Now that you’ve mastered the art of cropping screenshots on your MacBook, why not add a touch of creativity and fun to your visual communication? With GIFCaster, you can enhance your screenshots by adding lively GIFs, transforming mundane work messages into engaging and enjoyable visuals. Embrace the power of GIFCaster and let your screenshots express more than just words. Get started with the GIFCaster App today and make every capture an opportunity for creative expression!