Taking screenshots has become an integral part of our digital lives. Whether it’s capturing important information, saving moments from a video, or simply sharing something funny with friends, screenshots have become a powerful tool that allows us to capture and preserve moments digitally.
Understanding the Basics of Screenshot Editing
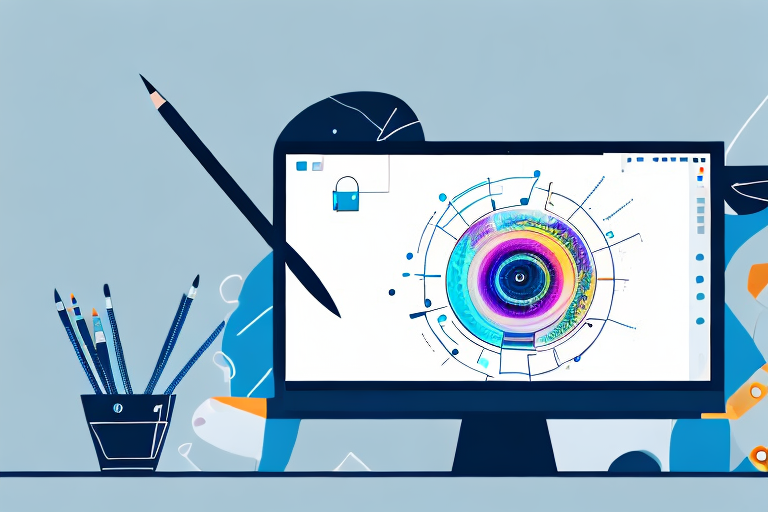
Screenshot editing involves enhancing and modifying the captured image to make it more visually appealing or convey a specific message. It goes beyond the simple act of capturing a screenshot and allows you to add annotations, adjust colors, crop unwanted elements, or highlight important details.
When it comes to screenshot editing, there are various techniques and tools available that can help you achieve the desired results. One popular tool is the use of annotation features, which allow you to add text, arrows, shapes, or highlights to draw attention to specific areas of the screenshot. This can be particularly useful when creating tutorials or instructional materials, as it helps guide the viewer’s attention and makes the information more digestible.
Another important aspect of screenshot editing is color adjustment. By tweaking the colors and contrast of the screenshot, you can enhance its overall appearance and make it more visually appealing. This can be especially useful when dealing with screenshots that have poor lighting or color balance, as it allows you to correct these issues and improve the overall quality of the image.
Importance of Screenshot Editing
Editing screenshots has several advantages. It helps you communicate your ideas more effectively by emphasizing specific elements or adding explanatory annotations. By highlighting important details or adding text, you can ensure that your audience understands the key points you are trying to convey.
Furthermore, screenshot editing allows you to enhance the clarity and quality of the screenshot, making it more visually appealing and professional-looking. This can be particularly important when sharing screenshots with clients, colleagues, or on social media platforms. A well-edited screenshot not only looks more polished, but it also reflects positively on your attention to detail and professionalism.
Different Types of Screenshots
Screenshots come in various forms, each serving a different purpose. There are screenshots of web pages, software interfaces, error messages, gameplays, social media posts, and more. Understanding the different types of screenshots will help you tailor your editing techniques accordingly.
For example, when editing a screenshot of a web page, you may want to focus on highlighting specific sections or elements to guide the viewer’s attention. This could include adding arrows or circles around important buttons or text, or using text annotations to explain certain features or functionalities.
On the other hand, when editing a screenshot of a software interface, you may want to remove any unnecessary elements or distractions to create a cleaner and more focused image. This could involve cropping out irrelevant menus or toolbars, or adjusting the color balance to make the interface more visually appealing.
When it comes to editing screenshots of error messages, the goal is often to make the message more understandable and user-friendly. This could involve adding explanatory text or highlighting specific error codes or instructions to help the viewer troubleshoot the issue more effectively.
Understanding the different types of screenshots and their specific editing requirements will allow you to approach each editing task with a clear plan and achieve the best possible results.
Tools for Screenshot Editing
When it comes to editing screenshots, you have a range of tools at your disposal. Whether you’re looking to make basic adjustments or dive into advanced editing features, there are options available to suit your needs.
Built-in Tools in Your Device
Most devices, whether it’s a computer, smartphone, or tablet, come equipped with built-in screenshot editing tools. These tools are designed to provide users with a quick and convenient way to edit their screenshots without the need for additional software.
With built-in tools, you can easily crop your screenshots to remove any unnecessary elements and focus on the important details. This can be particularly useful when you want to highlight a specific section or remove any sensitive information before sharing the screenshot.
In addition to cropping, these tools also allow you to annotate your screenshots. You can add text, arrows, shapes, and even draw freehand to emphasize certain areas or provide additional context. This can be helpful when you’re creating tutorials or explaining a concept through screenshots.
Furthermore, built-in screenshot editing tools often offer basic adjustment options. You can adjust the brightness, contrast, and saturation of your screenshots to enhance their visual appeal. This can be especially useful when you want to make your screenshots more vibrant or correct any lighting issues.
Third-Party Screenshot Editing Software
If you’re looking for more advanced editing features and greater flexibility, third-party screenshot editing software is worth exploring. These tools go beyond the basic editing options provided by built-in tools and offer a wide range of functionalities to enhance your screenshots.
One of the key advantages of using third-party software is the availability of advanced filters. These filters allow you to apply various effects to your screenshots, such as vintage, black and white, or cinematic looks. By experimenting with different filters, you can give your screenshots a unique and professional touch.
Another notable feature of third-party screenshot editing software is the support for layers. Layers enable you to work on different elements of your screenshot separately, making it easier to make precise edits and adjustments. You can add text, graphics, or even combine multiple screenshots into one cohesive image.
Furthermore, third-party software often offers specialized tools for specific editing needs. For example, some tools provide advanced retouching options to remove blemishes or unwanted objects from your screenshots. Others offer advanced selection tools, allowing you to isolate specific areas for further editing or apply effects selectively.
Additionally, many third-party screenshot editing software also provide options for sharing your edited screenshots directly to social media platforms or cloud storage services. This can save you time and effort by eliminating the need to manually save and upload your screenshots to different platforms.
In conclusion, whether you choose to utilize the built-in tools on your device or explore the capabilities of third-party screenshot editing software, you have a variety of options to enhance your screenshots. From basic adjustments to advanced editing features, these tools empower you to create visually appealing and informative screenshots for various purposes.
Step-by-Step Guide to Editing Screenshots
Now that you understand the importance of screenshot editing and the tools available, let’s dive into a step-by-step guide on how to edit screenshots effectively.
Editing screenshots can be a powerful way to enhance your visual communication and convey information more effectively. Whether you’re using screenshots for work, personal projects, or social media, knowing how to edit them can make a significant difference in the impact they have on your audience.
Taking a Screenshot
Before you can start editing a screenshot, you need to capture it. The process for taking screenshots varies depending on your device and operating system. Familiarize yourself with the specific methods for capturing screenshots on your device.
On a Windows computer, you can use the “Print Screen” key to capture the entire screen or the “Alt + Print Screen” combination to capture only the active window. Mac users can press “Command + Shift + 3” to capture the entire screen or “Command + Shift + 4” to select a specific area.
Mobile devices also have different methods for taking screenshots. For example, on an iPhone, you can press the side button and the volume up button simultaneously, while Android users can usually press the power button and the volume down button together.
Opening the Screenshot in an Editor
Once you have captured the screenshot, locate it on your device and open it in the editor of your choice. This could be a built-in editing tool or a third-party software you have installed.
Many devices come with basic editing tools that allow you to make quick adjustments without needing to install additional software. These built-in editors often provide options for cropping, rotating, and resizing images, as well as adjusting brightness, contrast, and saturation.
If you’re looking for more advanced editing features, there are numerous third-party software options available. Some popular choices include Adobe Photoshop, GIMP, and Canva. These tools offer a wide range of editing capabilities, allowing you to unleash your creativity and achieve professional-looking results.
Basic Editing Techniques
Start by assessing the screenshot and identifying any areas that need improvement. Common basic editing techniques include cropping unwanted elements, adjusting brightness and contrast, and resizing the image to fit your purpose.
Cropping is a useful technique to remove any unnecessary elements from the screenshot and focus the viewer’s attention on the most important parts. By eliminating distractions, you can create a cleaner and more visually appealing image.
Adjusting the brightness and contrast can help enhance the overall quality of the screenshot. If the image appears too dark or washed out, you can increase the brightness to make it more vibrant. Similarly, adjusting the contrast can make the different elements in the screenshot stand out more clearly.
Resizing the image is essential if you plan to use it in a specific context, such as on a website or in a presentation. Ensure that the screenshot fits the desired dimensions without distorting the content or losing important details.
Advanced Editing Techniques
If you want to take your screenshot editing skills to the next level, explore more advanced techniques. This could involve removing background distractions, adding visual effects, or applying filters to enhance the overall look of the screenshot.
Removing background distractions can be particularly useful if you want to isolate a specific element in the screenshot or create a more professional and polished appearance. This technique allows you to focus the viewer’s attention on the main subject of the image.
Adding visual effects, such as shadows, highlights, or gradients, can give your screenshot a more dynamic and engaging look. These effects can help create depth and make the image visually appealing.
Applying filters can also be a fun and creative way to enhance the overall mood or style of the screenshot. Filters can give your image a vintage, black and white, or vibrant look, depending on the effect you choose.
Remember, the key to effective screenshot editing is to strike a balance between enhancing the image and maintaining its authenticity. Avoid over-editing, as it can make the screenshot look unrealistic or misleading.
By following these step-by-step instructions and experimenting with different editing techniques, you’ll be able to transform your screenshots into compelling visuals that effectively convey your message.
Tips for Effective Screenshot Editing
Editing screenshots requires both technical skills and a creative eye. Here are some tips to help you create impactful and well-edited screenshots.
Enhancing the Clarity of Your Screenshot
When editing a screenshot, it’s essential to ensure that the details are clear and easy to understand. Adjust the brightness, contrast, and sharpness to bring out the important elements and make the screenshot visually appealing.
Adding Annotations to Your Screenshot
Annotations can provide valuable context and explanations within a screenshot. Use arrows, shapes, text boxes, and highlighters to emphasize specific areas or provide instructions within the screenshot.
Saving and Sharing Your Edited Screenshots
Once you have completed the editing process, it’s time to save and share your masterpiece.
Best Formats for Saving Screenshots
When saving your edited screenshots, consider the purpose and usage. For general sharing or uploading online, JPEG or PNG formats are widely supported and maintain good image quality. However, if you need high-resolution screenshots for professional purposes, consider saving them in lossless formats like TIFF or BMP.
Platforms for Sharing Screenshots
There are various platforms and methods to share your edited screenshots, depending on your preference and the purpose of sharing. Social media platforms like Instagram, Twitter, and Facebook are popular choices. Alternatively, you can use cloud storage services, email, or instant messaging apps to share your screenshots with specific individuals or groups.
Editing screenshots is a skill that can greatly enhance your ability to communicate and convey information visually. With the right tools and techniques, you can transform ordinary screenshots into powerful visuals that capture attention and deliver your message effectively.
Bring Your Screenshots to Life with GIFCaster
Ready to elevate your screenshot game? With GIFCaster, not only can you edit your screenshots to perfection, but you can also infuse them with dynamic, animated GIFs that capture the essence of your message. Whether it’s a celebratory moment or a creative twist on a work update, GIFCaster allows for a fun and engaging way to express yourself. Don’t let your screenshots be static and dull—make them memorable with GIFCaster. Use the GIFCaster App today and start sharing screenshots that truly stand out!