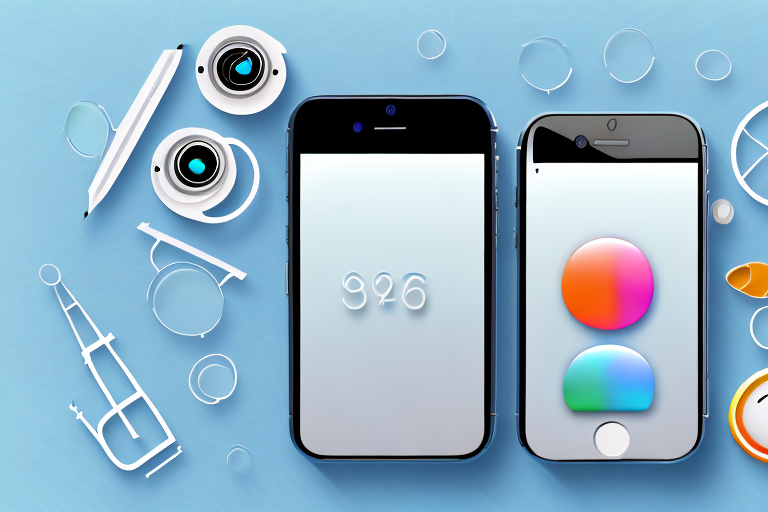
In today’s digital world, capturing and sharing screenshots has become an integral part of our lives. Whether you want to capture a funny meme, an interesting article, or an important conversation, screenshots help us preserve and share valuable moments. However, when it comes to iPhone screenshots, many users find themselves struggling with low-resolution images. In this article, we will explore how to make a screenshot high resolution on an iPhone, ensuring that you capture every detail with utmost clarity.
Understanding iPhone Screenshot Resolution
Before we dive into the steps of capturing high resolution screenshots, let’s take a moment to understand what resolution actually means. In simple terms, resolution refers to the clarity and sharpness of an image. In the context of iPhone screenshots, resolution determines how detailed and crisp your captured image will appear.
When you take a screenshot on your iPhone, you are essentially capturing a snapshot of what is currently displayed on your screen. This includes everything from app interfaces to web pages, photos, and more. The resolution of your screenshot plays a crucial role in how well the captured image represents the original content.
What is Resolution?
Resolution is typically measured in pixels, which are tiny dots that form an image on your iPhone screen. The more pixels there are, the higher the resolution and the more detailed the image will be. For example, an iPhone with a resolution of 1920×1080 means that there are 1920 pixels horizontally and 1080 pixels vertically on the screen.
Higher resolution means more pixels are packed into each inch of your screen, resulting in a sharper and more detailed image. This is particularly important when capturing screenshots of text, as higher resolution ensures that the text remains crisp and legible even when zoomed in.
Importance of High Resolution Screenshots
High resolution screenshots are essential, especially if you want to share them online or use them for professional purposes. A low-resolution screenshot may appear blurry or pixelated when viewed on larger screens or printed in larger sizes. In contrast, a high resolution screenshot ensures that every detail is preserved and the image remains sharp regardless of its usage.
When sharing screenshots on social media platforms or websites, a high resolution image will make a better impression on your audience. It allows them to see the finer details of your screenshot, enhancing the overall viewing experience.
In professional settings, high resolution screenshots are often required for presentations, reports, or documentation. Whether you are showcasing an app design, demonstrating a bug, or providing visual instructions, high resolution ensures that your audience can clearly see what you are presenting.
Furthermore, high resolution screenshots can be useful for personal purposes as well. If you want to preserve a memory, capture a funny conversation, or save an important message, a high resolution screenshot will ensure that the details are not lost over time.
It’s worth noting that capturing high resolution screenshots may result in larger file sizes. This means that you may need more storage space on your device or consider compressing the image before sharing it, especially if you are dealing with limited internet bandwidth or storage capacity.
Preparing Your iPhone for High Resolution Screenshots
To capture high resolution screenshots on your iPhone, you need to prepare your device accordingly. Let’s explore the necessary steps to ensure optimal screenshot quality.
High resolution screenshots are essential for showcasing the finest details of your iPhone’s screen. Whether you’re capturing a stunning app interface, a beautiful website, or a game-winning moment, having crisp and clear screenshots can make all the difference.
Checking Your iPhone Model
Not all iPhone models support the same screenshot resolutions. To determine the maximum resolution your iPhone can capture, you’ll need to check your device’s model. Go to the Settings app, tap on General, then tap on About. Look for the Model Name or Model Number and refer to Apple’s official documentation to identify your iPhone model’s screenshot capabilities.
Apple continuously introduces new iPhone models with improved camera technology and higher resolution screens. By identifying your specific iPhone model, you can ensure that you’re taking advantage of the best screenshot capabilities available.
Adjusting Display Settings
Another important step is to adjust your iPhone’s display settings to support high resolution screenshots. Go to the Settings app, tap on Display & Brightness, and ensure that your device is set to the highest possible resolution. This will maximize the quality of the screenshots you capture.
By setting your iPhone’s display to the highest resolution, you’re allowing the device to render images and text with incredible clarity. This ensures that every pixel is captured accurately when taking screenshots, resulting in stunning visuals that truly showcase the quality of your iPhone’s screen.
Additionally, adjusting the display settings can also enhance your overall viewing experience, making everything on your iPhone appear sharper and more vibrant. Whether you’re browsing the web, watching videos, or playing games, optimizing the display resolution can elevate your enjoyment of every activity.
Steps to Capture High Resolution Screenshots
Now that your iPhone is prepared, let’s dive into the steps to actually capture high resolution screenshots.
Using iPhone Buttons to Take Screenshots
The simplest and most common method to capture a screenshot on an iPhone is by using the physical buttons on the device. Press the side button (previously known as the Sleep/Wake button) located on the right side of your iPhone, along with the volume up button, simultaneously. Release both buttons quickly, and you’ll see a preview of your screenshot in the lower-left corner of the screen. Tap on the preview to access various editing options.
When using the physical buttons to take screenshots, it’s important to note that the timing of pressing and releasing the buttons is crucial. If you hold the buttons for too long, you may accidentally trigger other actions, such as turning off your device or activating Siri. Therefore, it’s recommended to practice the button combination a few times to get the timing right.
Additionally, using the physical buttons to capture screenshots allows for a quick and seamless process. With just a simple press and release, you can capture a high resolution screenshot of your iPhone screen, preserving the moment exactly as it appears.
Using Assistive Touch for Screenshots
If reaching the physical buttons on your iPhone is inconvenient or difficult, you can use the Assistive Touch feature. Assistive Touch is designed to provide accessibility options for users with physical disabilities, but it can also be utilized by anyone who prefers an alternative method for taking screenshots.
To enable Assistive Touch, go to the Settings app, tap on Accessibility, then tap on Touch. From there, toggle on Assistive Touch. Once Assistive Touch is enabled, you’ll see a semi-transparent button on your screen. This button can be moved around to a location that is most comfortable for you.
When using Assistive Touch for taking screenshots, the process is simple and convenient. Tap on the Assistive Touch button, and a menu will appear. Tap on Device, and another menu will appear. Finally, tap on More and select Screenshot. With just a few taps, a screenshot will be taken instantly, and you can find it in your Photos app.
One advantage of using Assistive Touch for screenshots is that it eliminates the need to press physical buttons, which can be beneficial for individuals with limited dexterity or mobility. It provides an alternative method that is accessible to a wider range of users, ensuring that everyone can capture high resolution screenshots on their iPhones.
Editing and Saving Your High Resolution Screenshot
Capturing the screenshot is just the first step. To enhance and save your high resolution screenshot, follow these instructions.
Using iPhone’s Built-in Editing Tools
Once you capture a screenshot, you can utilize iPhone’s built-in editing tools to enhance your image. Tap on the screenshot preview in the lower-left corner of your screen and select the Edit option. From here, you can crop, rotate, add text, draw, and adjust various other settings to perfect your screenshot. Once you are satisfied with the edits, tap on Done to save the changes.
Saving and Sharing Your Screenshot
After editing your high resolution screenshot, it’s time to save and share it with others. To save the screenshot, simply tap on the Done button mentioned earlier, and your edited screenshot will be saved to your Photos app automatically. From there, you can share it via email, messaging apps, social media platforms, or any other preferred method.
Troubleshooting Common Issues
Even after following the above instructions, you may encounter some common issues with your high resolution screenshots. Let’s address a couple of these issues.
Dealing with Blurry Screenshots
If your screenshots appear blurry, it could be due to a couple of reasons. Firstly, ensure that your iPhone’s lens is clean and free from smudges or dust. Additionally, make sure that you are holding your device steady while capturing the screenshot to prevent any motion blur. If the problem persists, consider restarting your iPhone or updating to the latest iOS version.
Fixing Screenshots Not Saving Correctly
If you find that your screenshots are not saving correctly or are missing from your Photos app, try these troubleshooting steps. Firstly, verify that you have enough storage space available on your iPhone. If the storage is full, delete unnecessary files or transfer them to iCloud. Additionally, check your Camera & Photos settings to ensure that screenshots are set to save to the Photos app. If the issue persists, it might be helpful to restart your device or contact Apple Support for further assistance.
By following these guidelines, you can ensure that your iPhone screenshots are captured in high resolution, allowing you to relive and share your favorite moments with exceptional clarity. So go ahead, capture that stunning image or save that important information, and make every screenshot count!
Enhance Your High-Resolution Screenshots with GIFCaster
Now that you know how to capture high-resolution screenshots on your iPhone, why not take them to the next level with GIFCaster? Add a touch of fun and creativity to your images by incorporating GIFs with GIFCaster, making your screenshots not just clearer, but also more engaging and expressive. Whether it’s a celebratory moment or just adding a spark to your daily communications, use the GIFCaster App to transform your high-res captures into memorable, animated conversations.