In today’s digital age, taking screenshots has become an essential skill for many users. Whether you want to capture a funny meme, save important information, or share something interesting with others, knowing how to take a screenshot on your Chromebook is a valuable trick to have up your sleeve. In this guide, we will explore the various methods and tools available to capture and manage screenshots on a Chromebook.
Understanding the Basics of a Chromebook
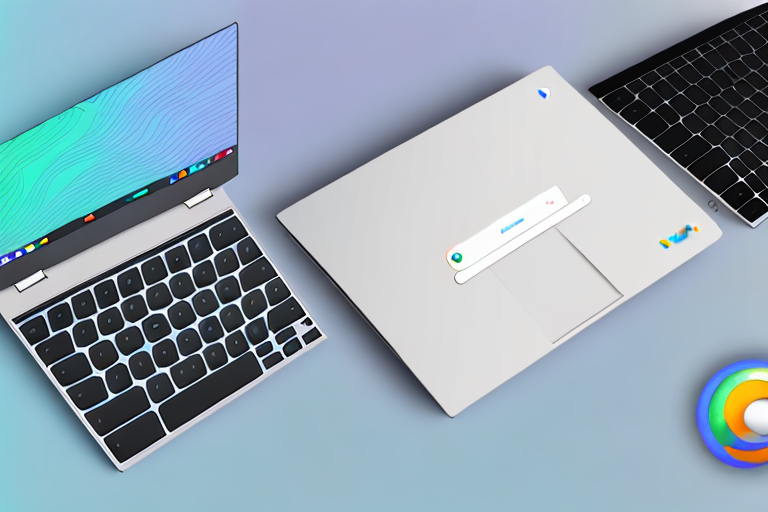
Before we dive into the world of screenshots, let’s take a moment to familiarize ourselves with the basics of a Chromebook. Chromebooks are lightweight laptops that run on Google’s Chrome OS. They offer a simple and secure computing experience, designed to primarily work with the internet and cloud-based applications.
Chromebooks have gained popularity in recent years due to their affordability, ease of use, and seamless integration with Google’s suite of productivity tools. Whether you’re a student, professional, or casual user, a Chromebook can be a great choice for your computing needs.
Key Features of a Chromebook
Chromebooks come with a range of features that make them unique and user-friendly. Some of the key features include:
- Long battery life: Chromebooks are known for their impressive battery life, allowing you to work or play for extended periods without worrying about running out of power.
- Fast boot-up times: Thanks to the lightweight nature of Chrome OS, Chromebooks boot up quickly, allowing you to get started with your tasks in no time.
- Apps and data stored in the cloud: Unlike traditional laptops, Chromebooks rely heavily on cloud storage. This means that your files, documents, and applications are stored securely online, accessible from any device with an internet connection.
- Automatic updates: Chromebooks receive regular automatic updates from Google, ensuring that you always have the latest security patches and features without any manual intervention.
- Google Play Store access: With access to the Google Play Store, Chromebook users can download and install a wide range of apps, including productivity tools, entertainment apps, and games.
These features make Chromebooks ideal for users who value simplicity, convenience, and the ability to stay connected wherever they go.
Navigating the Chromebook Interface
Getting around the Chromebook interface is intuitive and straightforward. The primary interface consists of the desktop, launcher, and shelf.
The desktop is where you can place shortcuts to your favorite apps or files, providing quick and easy access to your most-used resources. You can customize the desktop to suit your preferences, arranging icons in a way that makes sense to you.
The launcher allows you to access all your installed apps with a single click. It can be accessed by clicking on the circular icon located in the bottom-left corner of the screen. From the launcher, you can search for specific apps, browse through different categories, and launch your desired applications effortlessly.
The shelf, located at the bottom of the screen, contains the system tray and app icons. The system tray displays the time, Wi-Fi status, battery level, and other system notifications. The app icons represent the applications currently running or pinned to the shelf for easy access.
Overall, the Chromebook interface is designed to be clean, minimalistic, and user-friendly. It allows you to focus on your tasks without distractions, providing a seamless and efficient computing experience.
Preparing Your Chromebook for Screenshots
Before we begin capturing screenshots, it’s important to ensure that your Chromebook is up to date and ready to go. Let’s go through a quick checklist of preparatory steps:
First, let’s check if your Chromebook is running the latest version of Chrome OS. Keeping your operating system up to date is crucial for optimal performance and compatibility. To check the version of Chrome OS on your Chromebook, follow these steps:
- Click on the system tray located in the bottom-right corner of the screen. The system tray is the area where you can find the time, Wi-Fi status, and other system-related icons.
- Next, click on the “Settings” gear icon. This will open the Chromebook settings menu.
- In the “Settings” menu, scroll down until you find the “About Chrome OS” option. Click on it to access the Chrome OS information.
- Under the “Google Chrome OS” section, you will find the current version number. Take note of this number as we will refer to it later.
Now that you know the current version of Chrome OS on your Chromebook, let’s move on to updating the software if necessary. Updating your Chromebook is essential to ensure that you have the latest features, bug fixes, and security patches. To update your Chromebook, follow these steps:
- Click on the system tray located in the bottom-right corner of the screen.
- Once again, click on the “Settings” gear icon to access the Chromebook settings.
- In the “Settings” menu, scroll down and find the “About Chrome OS” option. Click on it to open the Chrome OS information.
- Within the “About Chrome OS” section, you will see a button labeled “Check for updates.” Click on this button to initiate the update process.
- If there is an update available, you will be prompted to click on the “Update” button. This will start the download and installation of the update.
- Depending on the size of the update and your internet connection speed, the download may take some time. It’s important to have a stable internet connection during this process.
- Once the update is downloaded and installed, you will be prompted to restart your Chromebook. Click on the “Restart” button to apply the update.
After the restart, your Chromebook will be running the latest version of Chrome OS, ensuring that you have the most up-to-date features and improvements. Now that your Chromebook is prepared, you can proceed with capturing screenshots with confidence!
Different Methods to Take a Screenshot on a Chromebook
Now that your Chromebook is up to date, let’s explore the various methods you can use to capture screenshots:
Using Keyboard Shortcuts for Screenshots
One of the quickest ways to take a screenshot on a Chromebook is by using keyboard shortcuts. Here are some commonly used shortcuts:
- Full Screen: Press the “Ctrl” key and the “Switch window” key.
- Partial Screen: Press the “Ctrl,” “Shift,” and “Switch window” keys.
- Window: Press the “Ctrl,” “Shift,” and “I” keys.
Using the Stylus for Screenshots
If your Chromebook supports a stylus, you can use it to take screenshots. Simply press the stylus button and tap on the screen to capture a screenshot. The screenshot will be saved in your Downloads folder.
Using the Screen Capture Tool
Chromebooks also have a built-in screen capture tool that allows you to capture and annotate screenshots. To access the screen capture tool, follow these steps:
- Press the “Ctrl,” “Shift,” and “Show windows” keys simultaneously.
- The screen capture tool will appear at the bottom of the screen.
- Click on the desired capture option: “Selection,” “Partial screenshot,” or “Full screenshot.”
- After capturing the screenshot, you can annotate it with the available tools.
- Click on “Save” to save the annotated screenshot to your Downloads folder.
Editing and Sharing Your Screenshots
Once you have captured a screenshot, you may want to make some edits or share it with others. Let’s explore the options available for editing and sharing screenshots on a Chromebook:
Locating Your Screenshots
All screenshots captured on a Chromebook are automatically saved to the Downloads folder. To access your screenshots, follow these steps:
- Click on the “Launcher” in the bottom-left corner of the screen.
- Click on the “Files” app icon.
- In the “Files” app, click on “Downloads” in the left sidebar.
- You will find your screenshots listed here.
Basic Editing Tools for Your Screenshots
If you want to make some basic edits to your screenshots, you can use the default image viewer on your Chromebook. Simply double-click on a screenshot to open it, and then click on the “Edit” button to access the basic editing tools.
Sharing Screenshots from Your Chromebook
Sharing screenshots from your Chromebook is incredibly easy. Here are a few methods you can use:
- Email: Attach the screenshot file to an email and send it to the desired recipient.
- Cloud Storage: Upload the screenshot to a cloud storage service like Google Drive or Dropbox and share the link.
- Social Media: Share the screenshot directly to your favorite social media platforms using the respective apps or websites.
Troubleshooting Common Screenshot Issues
Despite the simplicity of taking screenshots on a Chromebook, you may encounter a few issues along the way. Let’s look at some common problems and their solutions:
What to Do When Keyboard Shortcuts Don’t Work
If the keyboard shortcuts for screenshots are not working, try restarting your Chromebook and attempting the shortcuts again. If the issue persists, check for any conflicting applications or extensions that may be interfering with the shortcuts.
Solving Stylus-Related Problems
If you are experiencing difficulties using the stylus to take screenshots, make sure your stylus is properly connected or paired with your Chromebook. Additionally, check if there are any firmware or software updates available for your stylus.
Addressing Screen Capture Tool Issues
If you encounter any issues with the screen capture tool, such as it not appearing or not functioning properly, try restarting your Chromebook. If the problem persists, check for any pending software updates and install them.
With these methods, tools, and troubleshooting tips in your arsenal, you are now equipped to effortlessly capture and manage screenshots on your Chromebook. So go ahead, capture those memorable moments, save important information, and share your discoveries with ease!
Enhance Your Screenshots with GIFCaster
Ready to take your Chromebook screenshots to the next level? With GIFCaster, not only can you capture your screen, but you can also add a touch of personality and fun by incorporating GIFs. Transform your standard screenshots into engaging, creative expressions with ease. Whether it’s a celebratory moment or just adding flair to your daily communications, use the GIFCaster App to make every capture memorable. Start making your screenshots more exciting today!