In today’s digital age, capturing screenshots has become an essential skill for many computer users. Whether you want to show someone an error message, share a funny meme, or keep a record of important information, knowing how to take a screenshot can be incredibly useful. If you’re a Chromebook user, you might be wondering how to capture screenshots on your device. Don’t worry! In this article, we will guide you through the process step by step, ensuring that you become a screenshot pro in no time.
Understanding the Basics of a Chromebook
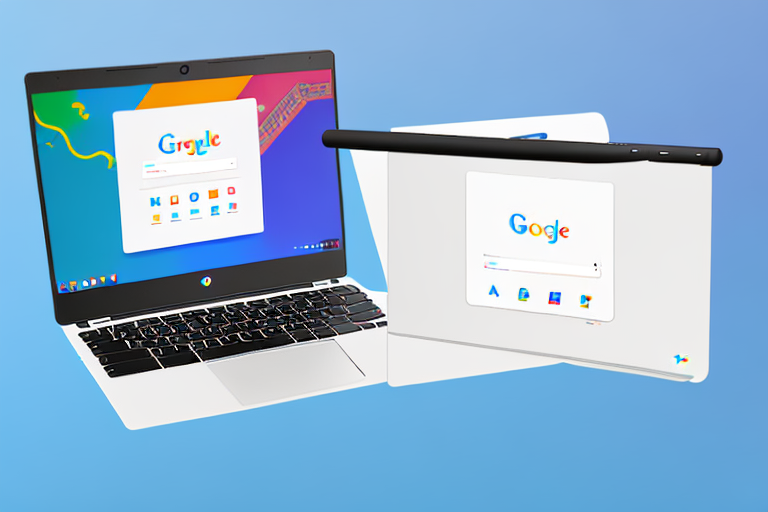
Before we dive into the nitty-gritty of taking screenshots on a Chromebook, it’s important to familiarize ourselves with the device. Chromebooks are lightweight laptops designed to run on the Google Chrome operating system (Chrome OS). They come with several advantages, such as fast boot times, automatic updates, and impressive security features. The user interface is minimalistic and heavily relies on web-based applications, making Chromebooks perfect for tasks like web browsing, document editing, and media consumption.
When it comes to the hardware, Chromebooks often feature sleek designs with thin bezels and lightweight bodies, making them highly portable. The keyboards are comfortable to type on, and the trackpads are responsive, ensuring a smooth user experience. Some Chromebooks even come with touchscreens, allowing for more versatile interactions.
Key Features of a Chromebook
Chromebooks have gained popularity due to their unique set of features. Some of the standout features include:
- Long battery life: Chromebooks are known for their impressive battery life, allowing users to work or play for extended periods without worrying about running out of power.
- Cloud-based storage: With Chromebooks, you can save your files directly to the cloud, eliminating the need for physical storage devices. This ensures that your data is easily accessible from any device with an internet connection.
- Integration with Google services: As Chrome OS is developed by Google, it seamlessly integrates with various Google services, such as Google Drive, Gmail, and Google Calendar. This integration enhances productivity and simplifies tasks.
- G Suite compatibility: Chromebooks are fully compatible with G Suite, which includes popular productivity tools like Google Docs, Sheets, and Slides. This makes it easy to collaborate with others and work on projects in real-time.
- Android app support: Chromebooks have the ability to run Android apps, expanding their functionality beyond web-based applications. This opens up a world of possibilities, allowing users to enjoy their favorite mobile apps on a larger screen.
Operating System and User Interface
The Chrome OS is a lightweight operating system developed by Google. Its user interface is designed to be simple and intuitive, with an emphasis on using web-based applications. The desktop environment consists of a taskbar, app launcher, and a notification area. Navigating around the operating system is a breeze, even for those new to Chromebooks.
One of the key advantages of the Chrome OS is its fast boot times. Chromebooks can start up in a matter of seconds, allowing users to quickly get to work or entertainment without any delays. Additionally, the automatic updates feature ensures that your Chromebook is always up to date with the latest security patches and software improvements.
Security is another area where Chromebooks excel. The Chrome OS is built with multiple layers of security, including sandboxing, verified boot, and automatic system updates. These measures help protect against malware and ensure that your data remains safe and secure.
In conclusion, Chromebooks offer a unique computing experience with their lightweight design, fast performance, and seamless integration with Google services. Whether you’re a student, professional, or casual user, a Chromebook can be a reliable and efficient companion for your daily tasks.
Preparing Your Chromebook for Screenshots
Before you start taking screenshots, it’s important to ensure that your Chromebook is properly set up.
One of the first steps in preparing your Chromebook for screenshots is to check its settings. By doing so, you can make sure that your Chromebook allows screenshots to be taken. This is an essential step, as without the proper settings, you may encounter difficulties when trying to capture screenshots.
Checking Your Chromebook’s Settings
To check your Chromebook’s settings, follow these simple steps:
- Click on the clock in the bottom-right corner of the screen. This will open a drop-down menu with various options.
- Select the gear icon from the drop-down menu. This will open the Settings menu.
- Scroll down the Settings menu until you find the “Device” section. Click on it to access the device settings.
- Within the “Device” section, locate the “Google Play Store” option. If it is not already enabled, toggle the switch to enable Android app support.
By following these steps, you can ensure that your Chromebook is ready to capture screenshots. Enabling Android app support is particularly important, as it allows you to utilize a wider range of screenshot tools and applications.
Once you have checked and adjusted your Chromebook’s settings, you can move on to exploring the necessary tools for taking screenshots.
Necessary Tools for Taking Screenshots
Chromebooks come equipped with built-in tools that enable you to capture screenshots without the need for additional software. Familiarizing yourself with these tools will empower you to easily and efficiently capture screenshots on your Chromebook.
The three main methods for taking screenshots on a Chromebook are:
- Using keyboard shortcuts: Chromebooks have specific keyboard shortcuts that allow you to capture screenshots with just a few key presses. These shortcuts are designed to be intuitive and easy to remember, making the process of taking screenshots a breeze.
- Using the stylus (if applicable): If your Chromebook has a touchscreen and stylus support, you can utilize the stylus to capture screenshots. This method provides a more hands-on approach and can be particularly useful for precise and detailed screenshots.
- Using the side buttons (depending on your Chromebook model): Some Chromebook models have dedicated side buttons that can be used to capture screenshots. These buttons are conveniently located and offer a quick and straightforward way to capture what’s on your screen.
By learning and mastering these different methods, you will have the flexibility to choose the most suitable approach for capturing screenshots based on your preferences and the specific circumstances.
Now that you are aware of the necessary settings and tools, you are well-prepared to embark on your screenshot-taking journey with your Chromebook. Whether you need to capture an important moment, document an issue, or simply share something interesting, the ability to take screenshots will undoubtedly enhance your overall Chromebook experience.
Different Methods to Take a Screenshot
Now that your Chromebook is ready, let’s explore the different methods you can use to take a screenshot.
Using Keyboard Shortcuts
Keyboard shortcuts are a quick and efficient way to take a screenshot on a Chromebook. Follow these steps:
- Press the “Ctrl” and “Show Windows” keys simultaneously. The “Show Windows” key is usually located in the top row, with a square or rectangle icon.
- Your screen will flash, indicating that the screenshot has been captured. The screenshot is automatically saved in the “Downloads” folder.
Using keyboard shortcuts is great for capturing screenshots on the go.
Using the Stylus
If your Chromebook has a touchscreen and stylus support, using the stylus to take a screenshot can be very convenient. Here’s how:
- Hold the stylus on the screen and press the button on the stylus.
- A screenshot will be captured, and you’ll notice a notification indicating that the screenshot has been saved.
This method is perfect for precise selections and annotations.
Using the Side Buttons
Depending on your Chromebook model, you may have dedicated side buttons for taking screenshots. Here’s what you need to do:
- Locate the screenshot button on the side of your Chromebook.
- Press the button once to capture a screenshot.
- You’ll hear a camera shutter sound, indicating that the screenshot has been saved.
This method is convenient if you prefer tactile buttons for capturing screenshots.
Taking a Full-Screen Screenshot
Now that you know the various methods to take a screenshot, let’s focus on capturing the entire screen.
Steps to Capture the Entire Screen
To take a full-screen screenshot on your Chromebook, follow these simple steps:
- Choose a method from the ones we discussed earlier: keyboard shortcuts, stylus, or side buttons.
- Perform the necessary action using the chosen method. For example, if you’re using keyboard shortcuts, press “Ctrl” and “Show Windows” simultaneously.
- Your Chromebook will capture a screenshot of the entire screen and save it in the “Downloads” folder by default.
You now have a full-screen screenshot ready to be used or shared.
Saving and Accessing Full-Screen Screenshots
All the screenshots you capture will be saved in the “Downloads” folder. To access your screenshots, follow these steps:
- Click on the “Launcher” icon in the bottom-left corner of the screen.
- Type “Downloads” in the search bar and press “Enter.”
- The “Downloads” folder will open, containing all your captured screenshots. From here, you can preview, organize, or share them as needed.
Remember to periodically clean up your “Downloads” folder to keep it organized.
Taking a Partial Screenshot
While capturing the entire screen is often sufficient, there will be times when you only need to capture a specific area. Let’s explore how to do that.
Selecting a Specific Area of the Screen
If you want to take a partial screenshot on your Chromebook, follow these steps:
- Choose a method from the ones we discussed earlier: keyboard shortcuts, stylus, or side buttons.
- Before capturing the screenshot, press “Shift” along with the chosen method. For example, if you’re using keyboard shortcuts, press “Ctrl,” “Shift,” and “Show Windows” simultaneously.
- Your cursor will change to a crosshair, allowing you to select the desired area of the screen. Click and drag to create a rectangle around the area you want to capture.
- Release the mouse button. The selected area will be captured and saved as a screenshot.
A partial screenshot gives you more control over what you capture.
Saving and Accessing Partial Screenshots
Similar to full-screen screenshots, partial screenshots are saved in the “Downloads” folder. To access them:
- Click on the “Launcher” icon in the bottom-left corner of the screen.
- Type “Downloads” in the search bar and press “Enter.”
- Navigate to the “Downloads” folder and locate the captured partial screenshot. From here, you can view or manipulate the screenshot as needed.
Remember to give your partial screenshots meaningful names for easy identification.
Conclusion
Knowing how to take screenshots on your Chromebook is a valuable skill that will enhance your digital communication and productivity. Whether you’re sharing information with colleagues, troubleshooting technical issues, or simply capturing special moments, being able to capture and share screenshots effortlessly will make your life easier. By following the methods outlined in this article, you can become a screenshot pro in no time. Happy capturing!
Enhance Your Screenshots with GIFCaster
Ready to take your Chromebook screenshots to the next level? With GIFCaster, not only can you capture your screen, but you can also add a touch of personality and fun to your images. Make your screenshots stand out by incorporating animated GIFs, turning a standard image into an engaging and creative expression. Whether it’s a celebratory moment or just adding a bit of humor to your day, GIFCaster is the perfect tool to liven up your communications. Start using the GIFCaster App today and transform your screenshots into captivating stories!