The Galaxy A51, produced by Samsung, is a popular smartphone that offers an array of features. One of the most commonly used features is taking screenshots, which allows users to capture images of their screen for various purposes. Whether you want to capture a memorable moment, save important information, or seek assistance with troubleshooting, knowing how to make a screenshot on your Galaxy A51 is essential. In this article, we will walk you through the process step by step, starting from understanding the basics of the Galaxy A51 to troubleshooting common screenshot issues.
Understanding the Basics of Galaxy A51
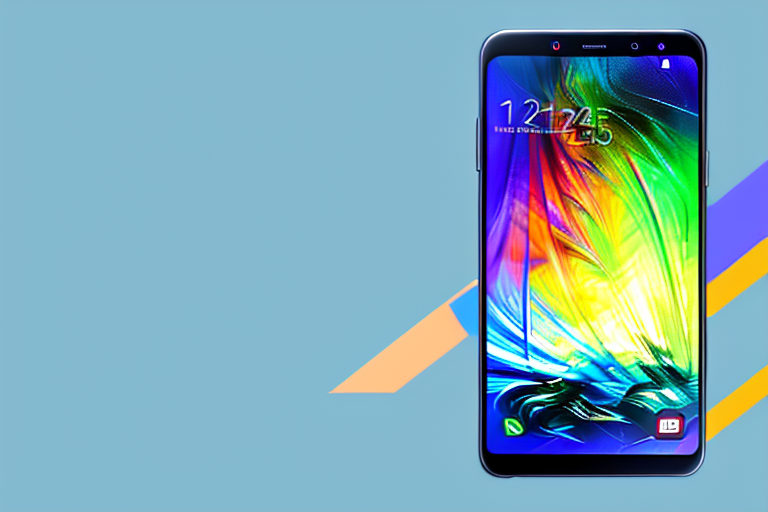
Before we delve into the intricacies of taking screenshots on your Galaxy A51, it’s important to familiarize yourself with its basic functions. The Galaxy A51 is equipped with several features that make it a popular choice among smartphone users. Its large high-resolution display, powerful processor, and advanced camera capabilities are just a few of the key features that set it apart from other devices.
The Galaxy A51 offers a multitude of features that enhance the overall user experience. Let’s explore some of its key features:
- Large Super AMOLED display with vibrant colors and high clarity
- Quad-camera system for capturing stunning photos and videos
- Long-lasting battery life to keep you connected throughout the day
- Expandable storage options for storing all your photos, videos, and files
- User-friendly interface with customizable settings to suit your preferences
The large Super AMOLED display of the Galaxy A51 provides an immersive viewing experience. Whether you’re watching movies, playing games, or browsing through your photo gallery, the vibrant colors and high clarity of the display bring everything to life. You’ll be able to see every detail with stunning precision.
With the quad-camera system, the Galaxy A51 allows you to capture stunning photos and videos. The main camera delivers sharp and vibrant images, while the ultra-wide-angle lens lets you capture a wider perspective. The depth sensor creates beautiful bokeh effects, and the macro lens enables you to take close-up shots with incredible detail.
One of the standout features of the Galaxy A51 is its long-lasting battery life. You can go through your day without worrying about running out of power. Whether you’re browsing the web, streaming videos, or using multiple apps simultaneously, the battery will keep you connected for hours on end.
Storage is never an issue with the Galaxy A51. With expandable storage options, you can easily store all your photos, videos, and files without worrying about running out of space. You can also transfer files to your computer or other devices seamlessly.
The user-friendly interface of the Galaxy A51 ensures a smooth and intuitive user experience. You can customize the settings to suit your preferences and easily access your favorite apps and features. Navigating through the interface is a breeze, with simple swipes and taps to access your apps, settings, and various features.
Navigating the Galaxy A51 Interface
Getting familiar with the Galaxy A51’s user interface is crucial for efficient usage. The device runs on Android, which offers a user-friendly and intuitive interface. You can access your apps, settings, and various features by swiping, tapping, and navigating through the interface. Now that you have a basic understanding of the Galaxy A51, let’s move on to preparing your device for taking screenshots.
Preparing Your Galaxy A51 for Screenshots
Before you can start capturing screenshots, it’s important to ensure that your Galaxy A51 is set up correctly. Let’s go through the necessary steps to prepare your device:
Checking Your Device’s Software Version
It’s always a good idea to keep your device’s software up to date to ensure optimal performance and compatibility. To check if your Galaxy A51 is running the latest software version, follow these steps:
- Go to the Settings app on your device.
- Scroll down and tap on “Software update”.
- Tap on “Download and install” to check for any available updates.
- Follow the on-screen instructions to install any updates.
Enabling Necessary Settings for Screenshots
By default, the Galaxy A51 is already equipped with the necessary settings to capture screenshots. However, it’s a good idea to double-check and ensure these settings are enabled. Follow these steps to enable the necessary settings:
- Open the Settings app on your device.
- Scroll down and tap on “Advanced features”.
- Look for the “Motion and gestures” section and tap on “Motions and gestures”.
- Ensure that “Palm swipe to capture” and “Smart capture” are toggled on.
Different Methods to Take a Screenshot
Now that you have prepared your Galaxy A51, it’s time to explore the different methods you can use to capture screenshots. The Galaxy A51 offers multiple options to suit various preferences and needs. Let’s take a look at each method:
Using the Button Shortcut for Screenshots
The most common method for taking a screenshot on the Galaxy A51 is by using the button shortcut. Follow these steps:
- Open the screen you want to capture on your device.
- Simultaneously press and hold the Power button and Volume Down button for a few seconds.
- You will see a brief animation and hear a sound, indicating that the screenshot has been captured.
- You can access your captured screenshot in the Gallery app under the “Screenshots” folder.
Taking a Screenshot Using Palm Swipe
If using physical buttons is not your preferred method, the Galaxy A51 offers an alternative option called Palm swipe to capture. Here’s how you can use this feature:
- Open the screen you want to capture on your device.
- Place the edge of your hand vertically on either side of the screen.
- Swipe your hand across the screen, ensuring contact with the surface.
- Your device will capture the screenshot, indicated by a flash and sound.
- You can find your screenshot in the Gallery app, ready for editing or sharing.
Using the Assistive Menu for Screenshots
If you prefer a floating menu for quick access to screenshot options, you can use the Assistive Menu on your Galaxy A51. Here’s how:
- Go to the Settings app on your device.
- Scroll down and tap on “Accessibility”.
- Tap on “Interaction and dexterity”.
- Find and toggle on the “Assistive Menu” option.
- A floating menu will appear on your screen.
- Tap on the Assistive Menu icon and select “Screenshot” to capture a screenshot.
Editing and Sharing Your Screenshots
Once you have successfully captured a screenshot on your Galaxy A51, you may want to make some edits or share it with others. The Galaxy A51 provides some basic editing tools and easy sharing options. Let’s explore these functions:
Accessing Your Screenshots
All your captured screenshots are conveniently stored in the Gallery app on your Galaxy A51. To access your screenshots, follow these steps:
- Open the Gallery app on your device.
- Navigate to the “Screenshots” folder.
- You will find all your captured screenshots listed here.
Basic Editing Tools for Your Screenshots
The Galaxy A51 offers basic editing tools that allow you to enhance your screenshots before sharing them. Here are some editing options you can consider:
- Crop: Trim your screenshot to focus on a specific area.
- Rotate: Adjust the orientation of your screenshot if needed.
- Draw and annotate: Add drawings or text to highlight specific details.
- Filters: Apply filters to enhance the overall look of your screenshot.
Sharing Your Screenshots Directly
Sharing your screenshots directly from your Galaxy A51 is a breeze. Follow these steps to share your screenshot:
- Open the Gallery app on your device.
- Find the screenshot you want to share.
- Tap on the share button (usually represented by an arrow icon).
- Select the desired sharing method, such as email, messaging apps, or social media.
- Follow the prompts to complete the sharing process.
Troubleshooting Common Screenshot Issues
While capturing screenshots on your Galaxy A51 is generally a smooth process, you may encounter some issues along the way. Here are some common issues you may face and their solutions:
What to Do When Screenshot Shortcut Isn’t Working
If the button shortcut for taking screenshots is not functioning as expected, try the following troubleshooting steps:
- Restart your device and attempt to capture a screenshot again.
- Ensure that your device is not in a low battery or power-saving mode.
- Check if any third-party apps are interfering with the screenshot functionality and temporarily disable them.
- If the issue persists, contact Samsung support for further assistance.
Solutions for Insufficient Storage Issues
If you encounter insufficient storage errors when attempting to capture a screenshot, consider these solutions:
- Delete unnecessary files or apps to free up storage space on your device.
- Move files, such as photos or videos, to an external storage solution, such as an SD card or cloud storage.
- Consider upgrading your device’s storage capacity if the issue persists.
Addressing Quality Issues in Screenshots
If your screenshots appear blurry or low in quality, try the following troubleshooting steps:
- Ensure that your device’s screen is clean and free of smudges or dirt.
- Check if the screen brightness and display settings are properly adjusted.
- Consider capturing the screenshot again, ensuring a steady hand or using a different method.
- If the issue persists, contact Samsung support to investigate any hardware-related issues.
Now that you have a comprehensive understanding of how to make a screenshot on your Galaxy A51, you can confidently capture and share important moments, information, and troubleshooting details. Enjoy exploring all the possibilities this feature offers and make the most out of your Galaxy A51!
Enhance Your Galaxy A51 Screenshots with GIFCaster
Ready to take your Galaxy A51 screenshots to the next level? With GIFCaster, not only can you capture your screen, but you can also add a touch of fun and creativity by incorporating GIFs. Transform your standard screenshots into engaging, expressive, and entertaining images with ease. Don’t just share a moment—make it a celebration with the GIFCaster App. Start using GIFCaster today and see the difference for yourself!