In today’s digital age, taking screenshots has become an essential part of our daily lives. Whether for work or personal purposes, capturing and sharing screenshots allows us to save important information, document conversations, or simply share something interesting with others. If you are a proud owner of the Samsung Galaxy S3, one of the most popular Android smartphones of its time, you might be wondering how to make a screenshot on this device. In this article, we will walk you through step-by-step instructions on how to take screenshots on your Galaxy S3, as well as provide some troubleshooting tips for common issues that may arise.
Understanding the Basics of Galaxy S3
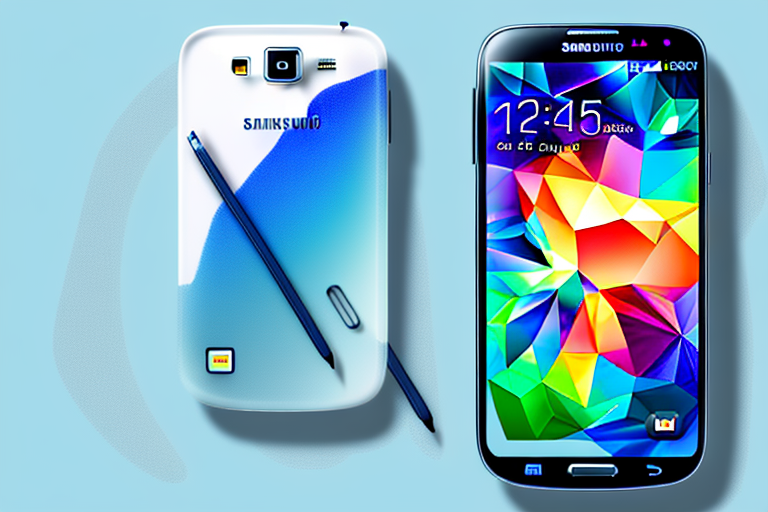
Before diving into the process of taking a screenshot on your Galaxy S3, it’s essential to familiarize yourself with the key features of this device. Here’s a brief overview:
Key Features of Galaxy S3
The Galaxy S3 boasts an impressive array of features that made it a favorite among smartphone enthusiasts:
- A vibrant 4.8-inch Super AMOLED display with a resolution of 720 x 1280 pixels.
- A powerful 1.4 GHz quad-core Exynos processor for smooth performance.
- An 8-megapixel camera capable of capturing high-quality photos and videos.
- Ample storage space, with options for 16GB, 32GB, or 64GB of internal storage, expandable up to 64GB via a microSD card.
- The Android operating system, which provides a user-friendly interface and access to a wide range of apps.
Navigating the Galaxy S3 Interface
Getting around the Galaxy S3 interface is relatively straightforward. The device has a physical home button located at the bottom center of the screen, flanked by capacitive touch buttons for back and menu functions. The power button is on the right side, while the volume buttons are on the left side. Familiarizing yourself with these buttons will prove helpful when taking a screenshot.
Now, let’s delve deeper into the key features of the Galaxy S3. The 4.8-inch Super AMOLED display is not only vibrant but also offers excellent color reproduction, making it a joy to use for multimedia consumption. Whether you’re watching videos, browsing photos, or playing games, the display on the Galaxy S3 will immerse you in a visually stunning experience.
Under the hood, the Galaxy S3 is powered by a 1.4 GHz quad-core Exynos processor, which ensures smooth performance and snappy responsiveness. Whether you’re multitasking between apps, streaming content, or playing graphics-intensive games, the Galaxy S3 can handle it all without breaking a sweat.
One of the standout features of the Galaxy S3 is its 8-megapixel camera. With this camera, you can capture high-quality photos and videos that rival those taken with dedicated digital cameras. The camera app offers various shooting modes and settings, allowing you to unleash your creativity and capture stunning moments with ease.
Storage space is often a concern for smartphone users, but the Galaxy S3 addresses this issue with its ample internal storage options. You can choose between 16GB, 32GB, or 64GB of internal storage, depending on your needs. Additionally, the device supports expandable storage of up to 64GB via a microSD card, giving you even more space to store your favorite apps, photos, videos, and music.
Running on the Android operating system, the Galaxy S3 provides a user-friendly interface that is easy to navigate. You can customize your home screen with widgets, shortcuts, and wallpapers to personalize your device. Additionally, the Android ecosystem offers access to a wide range of apps through the Google Play Store, allowing you to enhance your smartphone experience with the latest games, productivity tools, social media apps, and more.
Now that you have a better understanding of the key features of the Galaxy S3, let’s explore how to take a screenshot on this device. But before we do that, it’s important to note that the process may vary slightly depending on the specific model and software version of your Galaxy S3.
Preparing Your Galaxy S3 for Screenshots
Before you can start capturing screenshots on your Galaxy S3, there are a couple of essential preparatory steps to ensure a smooth and hassle-free experience:
Checking Your Device’s Software Version
It’s essential to check if your device’s software is up to date. Keeping your software updated ensures that you have access to the latest features and improvements. To check your software version and update if necessary, follow these simple steps:
- Open the Settings app on your Galaxy S3. You can find the Settings app in your app drawer or by swiping down from the top of your screen and tapping the gear icon.
- Scroll down and tap on “About device.” This option may be located under the “System” or “Software” section.
- Select “Software update.” This option may also be labeled as “System updates” or “Software information.”
- Tap on “Update now” if an update is available, and follow the on-screen instructions. Your device will check for available updates and prompt you to download and install them if necessary.
By keeping your device’s software up to date, you ensure that you have the latest security patches, bug fixes, and performance enhancements. This will help optimize your device for capturing screenshots and provide a better overall user experience.
Ensuring Sufficient Storage Space
Another crucial aspect to consider is the availability of sufficient storage space on your device. Screenshots are saved as image files, and if your device’s storage is full, you may encounter issues when trying to capture and save screenshots. To check your device’s storage space and free up space if needed, follow these steps:
- Open the Settings app on your Galaxy S3.
- Scroll down and tap on “Device maintenance.” This option may be located under the “Device” or “Storage” section.
- Select “Storage.” This will provide you with an overview of your device’s storage usage.
- Review the storage breakdown and delete any unnecessary files or apps to free up space if needed. You can tap on individual categories to see a detailed breakdown of what is taking up space on your device.
Deleting unnecessary files, such as old photos, videos, or unused apps, can help create more space for capturing and storing screenshots. Additionally, consider transferring files to an external storage device or cloud storage service to further optimize your device’s storage capacity.
By following these preparatory steps, you ensure that your Galaxy S3 is ready to capture screenshots without any hindrances. Whether you need to capture important information, share interesting content, or troubleshoot issues, having a well-prepared device will make the process seamless and efficient.
The Process of Taking a Screenshot
Now that you’ve completed the necessary preparations, let’s dive into the exciting part: taking screenshots on your Galaxy S3. There are two primary methods you can use: utilizing the hardware buttons or taking advantage of the palm swipe feature. Let’s explore both options:
Using the Hardware Buttons
One of the most straightforward ways to take a screenshot on your Galaxy S3 is by using a combination of hardware buttons. Here’s how:
- Navigate to the screen you want to capture.
- Press and hold the “Home” button located at the bottom center of the device.
- Simultaneously press the “Power/Lock” button on the right side of the phone.
- You will hear a shutter sound, indicating that the screenshot has been successfully captured.
The screenshot will be saved in the “Screenshots” folder in your Gallery app. From there, you can access, share, or delete it as needed.
Utilizing the Palm Swipe Feature
If you prefer a touch-based method, the Galaxy S3 also offers a convenient palm swipe feature to capture screenshots. Here’s how to enable and use it:
- Open the Settings app on your Galaxy S3.
- Scroll down and tap on “Advanced features.”
- Select “Palm swipe to capture.”
- Toggle the switch to enable the feature.
- Navigate to the screen you want to capture.
- Place the side of your hand vertically on either side of the screen.
- Swipe horizontally across the screen with the side of your hand.
- A shutter sound will indicate that the screenshot has been successfully captured.
Just like with the hardware button method, the screenshot will be saved in the “Screenshots” folder in your Gallery app.
Accessing and Managing Your Screenshots
Now that you’ve successfully taken screenshots on your Galaxy S3, it’s essential to know how to access and manage them. Follow these simple steps:
Finding Your Screenshots in the Gallery
To access your screenshots, open the Gallery app on your Galaxy S3. Look for a folder named “Screenshots,” where all your captured screenshots are stored. From there, you can view, organize, or edit your screenshots to your liking.
Sharing and Deleting Screenshots
If you wish to share a screenshot with others, open the screenshot in the Gallery app and tap on the share button. You will then be presented with various options to send the screenshot via email, messages, social media platforms, and more. On the other hand, if you want to delete a screenshot, open the screenshot in the Gallery app, tap on the menu button, and select the delete option.
Troubleshooting Common Issues
While capturing screenshots on your Galaxy S3 is generally a straightforward process, you may encounter some issues along the way. Let’s explore a couple of common problems and their possible solutions:
What to Do When Screenshots Aren’t Saving
If you find that your screenshots aren’t saving properly, try the following solutions:
- Restart your device and try capturing the screenshot again.
- Ensure that you have sufficient storage space available.
- Clear the cache of the Gallery app by going to the app settings and selecting the appropriate option.
Resolving Issues with Screenshot Shortcuts
If the palm swipe or hardware button shortcuts are not working as expected, try these troubleshooting steps:
- Ensure that the palm swipe feature is enabled in the settings.
- Check if any third-party apps or settings are interfering with the screenshot functionality and disable them if necessary.
- Perform a factory reset if the issue persists, but make sure to back up your data first.
With these troubleshooting tips, you should be able to resolve most screenshot-related issues on your Galaxy S3 and capture screenshots seamlessly.
In conclusion, knowing how to take a screenshot on your Galaxy S3 is a valuable skill that allows you to capture and share important information with ease. By following the step-by-step instructions provided in this article, you’ll be able to master this feature and make the most out of your device. So go ahead, start capturing those screenshots, and embrace the power of visual communication in the digital era!
Enhance Your Screenshots with GIFCaster
Now that you’re adept at capturing screenshots on your Galaxy S3, why not take them to the next level with GIFCaster? With GIFCaster, you can add a touch of fun and creativity to your screenshots by incorporating animated GIFs. Whether you’re looking to spice up a work message or just want to express yourself in a more engaging way, GIFCaster makes it easy and enjoyable. Ready to transform your screenshots into captivating visuals? Use the GIFCaster App today and start sharing your enhanced screenshots with the world!