In today’s digital world, taking screenshots has become an essential feature for many smartphone users. Whether you want to capture a memorable conversation, save important information, or share a funny meme, knowing how to make a screenshot on your Galaxy S7 can be extremely useful. In this article, we will guide you through the entire process, from understanding the basics of your Galaxy S7 to troubleshooting common issues. So, let’s dive in and explore the world of screenshots on your Galaxy S7!
Understanding the Basics of Your Galaxy S7
Before we delve into the details of capturing a screenshot on your Galaxy S7, let’s familiarize ourselves with some of the key features of this remarkable device.
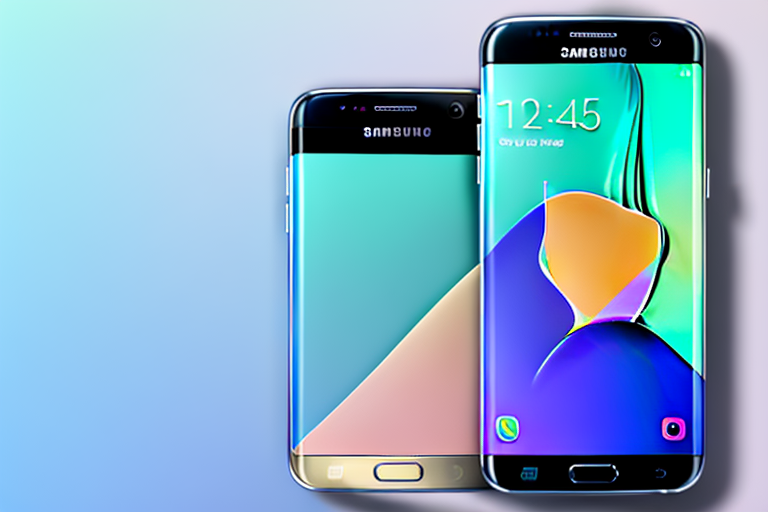
The Galaxy S7 is a flagship smartphone that has garnered immense popularity due to its exceptional performance and innovative features. It is designed to provide a seamless user experience, combining cutting-edge technology with elegant design.
Key Features of the Galaxy S7
The Galaxy S7 boasts an impressive array of features that make it a highly sought-after smartphone. Let’s take a closer look at some of these features:
Super AMOLED Display: The Galaxy S7 features a stunning Super AMOLED display that delivers vibrant colors, deep blacks, and excellent contrast. Whether you’re watching videos, browsing photos, or playing games, the display offers an immersive visual experience.
Powerful Processor: Equipped with a powerful processor, the Galaxy S7 ensures smooth multitasking and effortless performance. It can handle resource-intensive tasks with ease, allowing you to switch between apps seamlessly.
Long-lasting Battery Life: With its efficient battery management system, the Galaxy S7 offers impressive battery life. You can enjoy using your phone throughout the day without worrying about running out of power.
Advanced Camera Capabilities: The Galaxy S7 is equipped with a high-quality camera that captures stunning photos and videos. Its low-light performance is particularly impressive, allowing you to take clear and detailed shots even in challenging lighting conditions.
Expandable Storage Options: In addition to its built-in storage, the Galaxy S7 supports expandable storage through a microSD card slot. This means you can easily increase the storage capacity of your device to accommodate more apps, photos, videos, and other files.
Water-resistant Design: The Galaxy S7 features a water-resistant design that provides added durability and peace of mind. It is designed to withstand accidental spills, splashes, and even brief submersion in water.
Navigating Your Galaxy S7 Interface
Getting around your Galaxy S7 is a breeze. The intuitive interface allows for effortless navigation, ensuring you can quickly access the features you need. Understanding how to navigate the interface is crucial, as it forms the foundation for capturing screenshots and utilizing other functions effectively.
The Galaxy S7 interface is based on Android, the world’s most popular mobile operating system. It offers a user-friendly experience with a range of customizable options to suit your preferences.
The home screen is where you’ll find your most frequently used apps and widgets. You can easily add, remove, or rearrange them to create a personalized layout. Swiping left or right on the home screen allows you to access additional pages, where you can organize your apps into folders or place shortcuts to your favorite contacts.
The navigation buttons at the bottom of the screen are essential for interacting with your device. The back button takes you back to the previous screen, while the home button returns you to the home screen. The recent apps button displays a list of your recently used apps, allowing you to switch between them effortlessly.
Furthermore, the Galaxy S7 offers various gestures and shortcuts to enhance your navigation experience. For example, you can swipe down on the home screen to access the notification panel, where you can view and respond to notifications. Swiping up from the bottom of the screen opens the app drawer, where all your installed apps are located.
In conclusion, understanding the key features and navigating the interface of your Galaxy S7 is crucial for maximizing your smartphone experience. With its impressive capabilities and user-friendly design, the Galaxy S7 is a device that offers both style and substance.
Preparing to Take a Screenshot
Now that you have familiarized yourself with the basics, let’s discuss the steps you need to take before capturing a screenshot on your Galaxy S7.
Checking Your Phone’s Settings
Before diving into the screenshot process, it’s essential to ensure that your phone’s settings are correctly configured. This will guarantee a seamless and efficient screenshot experience. To check this, navigate to the “Settings” menu by swiping down from the top of the screen and tapping the gear icon.
Once you are in the “Settings” menu, take a moment to explore the various options available. The Galaxy S7 offers a wide range of customization features, allowing you to personalize your device according to your preferences. From adjusting the display brightness to selecting a unique ringtone, the “Settings” menu is your gateway to a tailored smartphone experience.
Now, let’s focus on the specific setting we need to configure for screenshot purposes. From the “Settings” menu, locate the “Advanced features” option and select it. This section houses a collection of advanced functionalities that enhance your smartphone experience. It’s like unlocking a hidden treasure trove of features!
Within the “Advanced features” menu, you will find the “Palm swipe to capture” feature. This nifty option allows you to capture screenshots by simply swiping your palm across the screen. It’s a convenient and intuitive way to preserve moments on your device. Make sure the toggle switch for this feature is turned on. If it’s already enabled, great! You are one step closer to becoming a screenshot pro.
Ensuring Screen Content
When capturing a screenshot, it’s important to ensure that the desired content is displayed on your screen. Whether it’s a funny meme that made you burst into laughter, an important message you want to refer back to, or a breathtaking image that took your breath away, make sure it is visible on your display before proceeding.
Take a moment to appreciate the content you wish to capture. Is it a heartwarming photo of your loved ones? Or perhaps it’s a recipe for a mouthwatering dish that you want to try later. Whatever it may be, make sure it is in full view on your screen. This will ensure that you capture precisely what you want to preserve, without any unwanted elements creeping into the screenshot.
Remember, the beauty of screenshots lies in their ability to freeze a moment in time. They allow you to revisit cherished memories, share important information, or simply capture something visually captivating. So take a deep breath, align the content perfectly on your screen, and get ready to immortalize it with a screenshot.
Different Methods to Capture a Screenshot
Now that you have prepared your Galaxy S7 for the screenshot, let’s explore the different methods you can use to capture that perfect image.
Using the Button Combination Method
The most common way to take a screenshot on your Galaxy S7 is by using a simple button combination. To do this, simultaneously press and hold the “Power” button located on the right side of the device and the “Home” button located at the bottom of the screen. Hold the buttons for a few seconds until you see a brief animation and hear a distinctive sound, indicating that the screenshot has been successfully captured.
Utilizing the Palm Swipe Feature
Another convenient method to capture a screenshot on your Galaxy S7 is by utilizing the palm swipe feature. To enable this feature, go to the “Settings” menu, tap on “Advanced features,” and ensure that the “Palm swipe to capture” option is toggled on. Once enabled, simply swipe your hand across the screen from right to left or left to right, making sure your palm and fingers touch the screen gently. When done correctly, you will see a quick animation and hear a sound, indicating that the screenshot has been captured.
Editing and Sharing Your Screenshot
Now that you have successfully captured the screenshot, let’s explore how you can edit and share it with others.
Accessing Your Screenshot from the Gallery
After capturing a screenshot on your Galaxy S7, it is automatically saved to the device’s gallery. Accessing your screenshot is as simple as opening the gallery app, which can typically be found among your other apps or by swiping up from the bottom of the screen, depending on your device’s settings. Once in the gallery, locate the “Screenshots” folder, where you will find your recently captured screenshot.
Basic Editing Tools for Your Screenshot
The Galaxy S7 provides you with a variety of editing tools to enhance your screenshot. These tools allow you to crop, rotate, adjust brightness, add filters, and even draw on your screenshot. To access these editing options, open your screenshot in the gallery and tap on the “Edit” button. Experiment with these features to make your screenshot truly stand out.
Sharing Your Screenshot via Different Platforms
The Galaxy S7 makes it incredibly easy to share your screenshots with friends, family, or colleagues. Once you have edited your screenshot to perfection, tap on the “Share” button, typically represented by an icon depicting an arrow pointing upward. From there, you can choose from various platforms such as social media, email, messaging apps, and more. Select your preferred platform, follow the prompts, and share your screenshot effortlessly.
Troubleshooting Common Issues
Although capturing a screenshot on your Galaxy S7 is typically a straightforward process, you may encounter some occasional issues. Here are a couple of common problems you might face and how to resolve them.
What to Do When Screenshot Feature Doesn’t Work
If you find that the screenshot feature on your Galaxy S7 isn’t working as expected, don’t worry, there are several potential solutions. First, ensure that the “Palm swipe to capture” feature is enabled in your phone’s settings. If it’s already enabled and the problem persists, try restarting your device. In most cases, these simple steps should resolve any difficulties you may be experiencing.
Resolving Issues with Screenshot Quality
If the quality of your screenshots does not meet your expectations, there are a few things you can try to improve it. Make sure your display brightness is set to an appropriate level, as this can affect the overall quality. Additionally, ensure that your phone’s screen is clean, as smudges or fingerprints can impact the clarity of your screenshots. By following these suggestions, you should be able to enhance the quality of your screenshots.
Now that you have a comprehensive understanding of how to make a screenshot on your Galaxy S7, you can capture and preserve those memorable moments with ease. Whether you’re a seasoned tech enthusiast or a new Galaxy S7 user, the screenshot feature is a valuable tool that adds versatility and convenience to your smartphone experience. So, go ahead, take a screenshot, and share your world!
Enhance Your Screenshots with GIFCaster
Ready to take your Galaxy S7 screenshots to the next level? With GIFCaster, you can infuse your captures with the excitement of animated GIFs, making every share a moment of joy and creativity. Whether it’s a celebratory message or just adding a touch of fun to your conversations, GIFCaster is the perfect tool for vibrant self-expression. Don’t just capture your screen; animate it with personality! Use the GIFCaster App today and transform your screenshots into engaging stories.