In today’s digital age, capturing and sharing moments from our devices has become an integral part of our daily lives. Whether it’s capturing a hilarious meme or documenting important information, screenshots play a crucial role in preserving and sharing content. In this article, we will walk you through the process of taking screenshots on the iPad Air, along with some handy tips and tricks to enhance your screenshot-taking experience.
Understanding the Basics of iPad Air Screenshots
Before we dive into the nitty-gritty details, it’s essential to understand the importance and features of screenshots on the iPad Air.
When it comes to capturing moments, the iPad Air goes beyond its primary function as a tablet. With the ability to take screenshots, this versatile device allows users to immortalize important information, save receipts for future reference, document errors for troubleshooting, or even share funny conversations with friends. Screenshots provide a visual reference that can be easily shared, making them invaluable for both personal and professional use.
The Importance of Screenshots
Screenshots serve various purposes, catering to the diverse needs of users. For students, screenshots can be a helpful tool for capturing important information from online lectures or e-books. By taking a screenshot, they can create a visual summary that aids in studying and revision.
For professionals, screenshots are a valuable asset in the workplace. They can be used to document software bugs or errors, providing developers and IT support teams with a clear visual representation of the issue at hand. This makes troubleshooting more efficient and effective, ultimately leading to faster problem resolution.
Moreover, screenshots can also be used for archiving purposes. By capturing receipts or important documents, individuals can create a digital record that is easily accessible and searchable. This eliminates the need for physical storage and reduces the risk of losing important paperwork.
iPad Air Screenshot Features
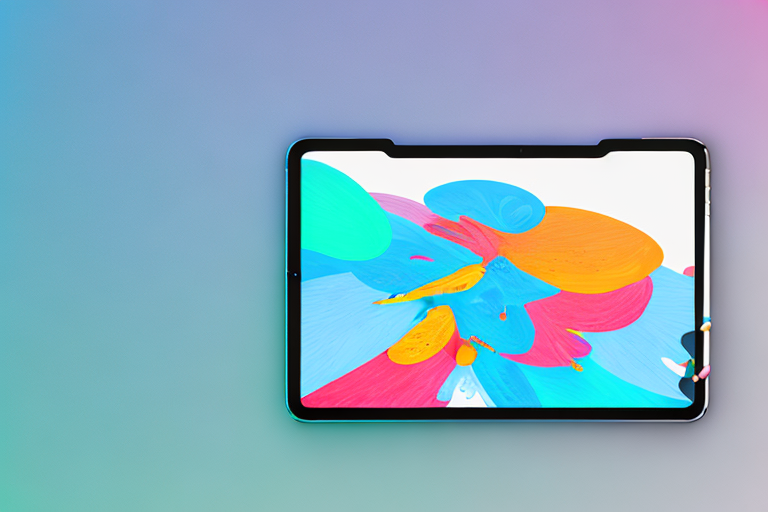
The iPad Air boasts an array of features that make taking screenshots a breeze. With its lightweight design, stunning Retina display, and powerful processors, capturing screenshots on the iPad Air is seamless and efficient.
The lightweight design of the iPad Air ensures that users can comfortably hold the device with one hand while capturing screenshots with the other. This ergonomic advantage makes it easy to quickly capture moments without any discomfort or strain.
The stunning Retina display of the iPad Air ensures that screenshots are captured with exceptional clarity and detail. Whether it’s a vibrant image, a detailed webpage, or a colorful chart, the Retina display ensures that every pixel is faithfully reproduced, resulting in visually stunning screenshots.
Furthermore, the powerful processors of the iPad Air enable swift and smooth screenshot capturing. With minimal lag and instant response, users can effortlessly capture screenshots without any interruption or delay. This ensures that no moment is missed, allowing users to capture the perfect screenshot every time.
In conclusion, screenshots on the iPad Air are not just a basic feature but a powerful tool that enhances productivity, creativity, and communication. Whether it’s for personal or professional use, the ability to capture and share visual references provides users with a versatile and invaluable resource.
Preparing Your iPad Air for Screenshots
Before you start taking screenshots, it’s essential to ensure that your iPad Air is optimized for this purpose.
When it comes to capturing screenshots on your iPad Air, there are a few steps you can take to enhance the quality and clarity of your images. By checking your settings and adjusting your screen brightness, you can ensure that your screenshots accurately represent the content you want to capture.
Checking Your Settings
Firstly, check your settings to ensure that the screenshot function is enabled. To do this, navigate to Settings > General > Accessibility > AssistiveTouch. Make sure the AssistiveTouch toggle is enabled, as this will allow you to take screenshots using a virtual button on your screen.
Enabling the AssistiveTouch feature provides you with a convenient way to capture screenshots without having to press physical buttons on your iPad Air. This virtual button can be positioned anywhere on your screen, making it easily accessible for capturing screenshots with a single tap.
Additionally, exploring the Accessibility settings on your iPad Air can reveal other useful features that can enhance your overall user experience. Take some time to familiarize yourself with the various options available and customize them to suit your preferences.
Ensuring Optimal Screen Brightness
Having an optimal screen brightness setting is crucial for capturing clear and vibrant screenshots. Adjust your iPad Air’s screen brightness to a level that suits your needs, ensuring that you can clearly see the content you want to capture without any glare or shadows.
By finding the perfect balance between brightness and visibility, you can ensure that your screenshots accurately represent the colors and details of the content on your iPad Air’s screen. Whether you’re capturing a screenshot of a stunning landscape, an important document, or a captivating moment in a game, optimal screen brightness can make a significant difference in the quality of your screenshots.
Remember to consider the lighting conditions in your surroundings when adjusting your screen brightness. If you’re in a dimly lit room, you may want to decrease the brightness to avoid straining your eyes. On the other hand, if you’re in a well-lit environment, increasing the brightness can help prevent any loss of detail in your screenshots.
Furthermore, experimenting with different screen brightness levels can also give your screenshots a unique aesthetic appeal. Depending on the mood or atmosphere you want to convey, adjusting the brightness can help you achieve the desired effect.
Step-by-Step Guide to Taking a Screenshot
Now that your iPad Air is primed and ready, let’s walk you through the process of taking a screenshot step by step.
Before we dive into the different methods of capturing screenshots on your iPad Air, let’s explore why you might want to take a screenshot in the first place. Screenshots can be incredibly useful for a variety of reasons. Whether you want to capture a funny meme, save important information, or document a software bug, knowing how to take a screenshot is a valuable skill.
Using the Button Combination
To capture a screenshot using the button combination method:
- Open the app or content you wish to capture on your iPad Air.
- Simultaneously press and hold the Sleep/Wake button and the Home button.
- Release both buttons when you see a flash on your screen or hear a camera shutter sound. This indicates that the screenshot has been successfully taken.
The button combination method is the most traditional way of taking a screenshot on an iPad Air. By pressing and holding the Sleep/Wake button and the Home button at the same time, you can capture whatever is currently displayed on your screen. This method is quick and easy, making it a popular choice for many users.
Using AssistiveTouch
If you prefer a more convenient method, you can use AssistiveTouch to capture screenshots:
- Enable the AssistiveTouch feature by going to Settings > General > Accessibility > AssistiveTouch and toggling the switch to enable it.
- A virtual button will appear on your screen. Tap on it to access the AssistiveTouch menu.
- Select “Device” and then “More” to reveal additional options.
- Tap on “Screenshot” to capture a screenshot instantly.
AssistiveTouch is a feature designed to assist users with physical or motor challenges, but it can also be a handy tool for taking screenshots. By enabling AssistiveTouch, you gain access to a virtual button that floats on your screen. This button provides quick access to various functions, including taking screenshots. With just a few taps, you can capture a screenshot without needing to press any physical buttons.
Now that you know two different methods for taking screenshots on your iPad Air, you can choose the one that suits your preferences and needs. Whether you opt for the traditional button combination or the convenient AssistiveTouch, capturing screenshots is a breeze. So go ahead, start capturing and saving those important moments or information with ease!
Editing Your Screenshot on iPad Air
Once you’ve captured a screenshot, you can easily enhance it by editing it using the built-in editing tools on the iPad Air.
Accessing the Screenshot Editor
To access the screenshot editor:
- Immediately after taking a screenshot, a thumbnail preview will appear at the bottom left corner of your screen. Tap on the thumbnail to open the editor.
- If you miss the preview, don’t worry! You can also access the editor by going to Photos > Albums > Screenshots and selecting the desired screenshot.
Basic Editing Tools
The screenshot editor provides various editing tools to customize your screenshot:
- Markup: Use the Markup tool to draw, write, or highlight specific areas of your screenshot.
- Crop: Crop your screenshot to eliminate any unnecessary content.
- Text: Add text overlays to label or caption your screenshot.
- Shapes: Use shapes to emphasize certain elements within your screenshot.
- Filters: Apply filters to enhance the overall look of your screenshot.
Sharing and Saving Your Screenshot
Now that your screenshot is perfect, it’s time to share and save it for future use.
How to Share Your Screenshot
You can easily share your screenshot using various methods:
- Social Media: Share your masterpiece directly to popular social media platforms like Facebook, Instagram, or Twitter.
- Email: Send the screenshot as an attachment via email to friends, family, or colleagues.
- Messaging Apps: Share your screenshot instantly through messaging apps such as WhatsApp or iMessage.
Saving Options for Your Screenshot
Additionally, you have several options for saving your screenshot:
- Photos App: By default, your screenshot will be saved to the Photos app, allowing you to access it whenever you need.
- iCloud: If you have iCloud enabled, your screenshot will be automatically synced across all your Apple devices.
- Third-Party Cloud Storage: Save your screenshot to cloud storage platforms like Google Drive or Dropbox for easy access from any device.
Now that you have mastered the art of capturing, editing, and sharing screenshots on the iPad Air, the possibilities are endless. Whether you want to capture precious memories, showcase new app features, or troubleshoot technical issues, the ability to take screenshots on your iPad Air empowers you to do so with ease. So go ahead, snap away, and share your amazing moments with the world!
Enhance Your Screenshots with GIFCaster
Ready to take your iPad Air screenshots to the next level? With GIFCaster, you can add a burst of fun and creativity to your captures. Transform even the most mundane images into engaging, animated conversations. Don’t just share a screenshot; express yourself and delight your friends with a GIFCaster-enhanced image. Use the GIFCaster App now and start turning your screenshots into memorable, gif-tastic moments!