The iPhone 11 Pro is a powerful device with a range of features, and one useful function is the ability to take screenshots. Whether you want to capture a memorable moment in a game or save important information, screenshots can come in handy in various situations. In this article, we will explore the different methods and techniques for taking, editing, and sharing screenshots on the iPhone 11 Pro.
Understanding the Basics of iPhone 11 Pro
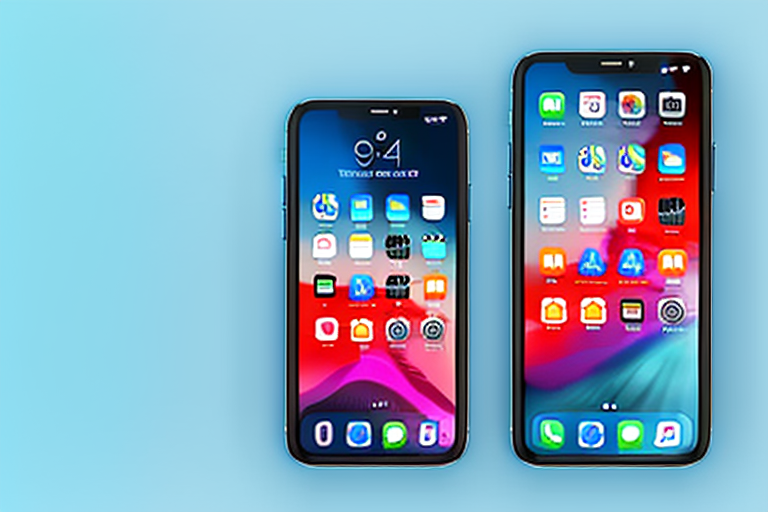
Before we delve into the specifics of taking screenshots, let’s quickly familiarize ourselves with the key features of the iPhone 11 Pro. This device boasts a stunning Super Retina XDR display, a powerful A13 Bionic chip, and a triple-camera system. Its intuitive interface and advanced technology make it a popular choice among smartphone users.
The Super Retina XDR display on the iPhone 11 Pro is truly a sight to behold. With vibrant colors and deep blacks, this display offers an immersive visual experience like no other. Whether you’re watching movies, playing games, or browsing through your photo gallery, every image will come to life with stunning clarity and detail.
Powering the iPhone 11 Pro is the A13 Bionic chip, a marvel of engineering. This chip is known for its exceptional performance and efficiency, allowing you to effortlessly multitask, run demanding apps, and enjoy smooth gameplay. With the A13 Bionic chip, you can expect lightning-fast speeds and seamless user experience.
One of the standout features of the iPhone 11 Pro is its triple-camera system. This system consists of three lenses – wide, ultra-wide, and telephoto – that work together to capture stunning photos and videos in various lighting conditions. Whether you’re capturing a breathtaking landscape or a close-up portrait, the iPhone 11 Pro’s camera system will deliver exceptional results every time.
Navigating the iPhone 11 Pro Interface
The iPhone 11 Pro’s interface is designed to be user-friendly and intuitive. With the removal of the home button, Apple has introduced gesture-based navigation, which involves swiping and tapping on the screen to access different functions and features.
Swiping up from the bottom of the screen will take you to the home screen, while swiping down from the top right corner will open the Control Center. To access the App Switcher, simply swipe up from the bottom and pause for a moment. These gestures make navigating through your iPhone 11 Pro a breeze, allowing you to seamlessly switch between apps and perform various actions with ease.
Furthermore, the iPhone 11 Pro supports Face ID, Apple’s facial recognition technology. This means that you can unlock your device, authenticate purchases, and access secure apps with just a glance. Face ID is incredibly secure and works in various lighting conditions, ensuring that your personal information remains safe and protected.
In addition to the intuitive gestures and Face ID, the iPhone 11 Pro also offers a range of accessibility features. These features include VoiceOver, which provides spoken descriptions of what’s happening on your screen, and Magnifier, which turns your iPhone into a digital magnifying glass. With these accessibility features, the iPhone 11 Pro is designed to be inclusive and cater to the needs of all users.
Preparing to Take a Screenshot
Before you capture a screenshot, it’s essential to ensure that your settings are optimized for the best possible result.
When it comes to taking a screenshot on your iPhone 11 Pro, there are a few things you should keep in mind to ensure you get the perfect shot. From checking your settings to adjusting your screen brightness, these tips will help you capture screenshots with ease and clarity.
Checking Your Settings
To check your screenshot settings, go to the “Settings” app on your iPhone 11 Pro. From there, scroll down and tap on “General” and then “Accessibility.”
Once you’re in the Accessibility settings, look for the “AssistiveTouch” option and make sure it is turned on. This feature enables a floating button that can assist you in taking screenshots.
By enabling AssistiveTouch, you’ll have quick and easy access to the screenshot function, making it more convenient to capture any moment you want to save.
Ensuring Optimal Screen Brightness
Another factor to consider is the brightness of your screen. Adjusting the brightness level to an optimal setting can significantly improve the quality of your screenshots.
To adjust the brightness, simply swipe down from the top-right corner of the screen to access the Control Center. From there, you’ll see a brightness slider that allows you to increase or decrease the brightness according to your preference.
By setting the brightness to an optimal level, you’ll ensure that the details in your screenshots are clear and vibrant. Whether you’re capturing a screenshot of a webpage, a text conversation, or a beautiful landscape, the right brightness can make a noticeable difference in the overall quality of your screenshots.
Remember, taking a screenshot is not just about capturing an image; it’s about preserving a moment or important information. By following these tips and optimizing your settings, you’ll be able to take screenshots that truly reflect the beauty and significance of what you’re capturing.
Step-by-Step Guide to Taking a Screenshot
Now that you’ve prepared your iPhone 11 Pro, let’s explore the different methods for taking screenshots.
Using the Side and Volume Buttons
The most straightforward method is to simultaneously press the Side button (previously known as the Sleep/Wake button) and the Volume Up button on your iPhone 11 Pro. Quickly press and release both buttons, and you will see a flash on the screen, accompanied by a camera shutter sound indicating that the screenshot has been successfully captured.
But did you know that this method works not only on the iPhone 11 Pro but also on other recent iPhone models? Whether you have an iPhone XS, iPhone XR, or even an iPhone X, you can use the same combination of buttons to take a screenshot. It’s a convenient feature that Apple has carried over across multiple generations of their smartphones.
Additionally, this method is not limited to capturing what’s on your iPhone’s screen. If you have an Apple Watch paired with your iPhone, you can also take a screenshot of your Apple Watch by pressing the Side button and the Digital Crown simultaneously.
Using AssistiveTouch
If you enabled the AssistiveTouch feature earlier, you can take a screenshot by tapping on the floating button and selecting “Device.” From the menu that appears, choose “More” and then “Screenshot.” The same flash and shutter sound will confirm the screenshot capture.
AssistiveTouch is a powerful accessibility feature that offers much more than just taking screenshots. It provides a floating button on your iPhone’s screen, giving you quick access to a range of functions. You can customize the AssistiveTouch menu to include shortcuts to commonly used features, such as adjusting volume, locking the screen, or even activating Siri.
Furthermore, AssistiveTouch is not exclusive to iPhone 11 Pro or even the iPhone series. It is available on all iOS devices, including iPads and iPod Touch. So, if you have multiple Apple devices, you can enjoy the convenience of AssistiveTouch across all of them.
Editing and Sharing Your Screenshots
Once you’ve taken a screenshot, you can access and edit it using the Photos app on your iPhone 11 Pro. But did you know that there are a variety of editing and sharing options available to make your screenshots even more impressive?
Accessing your screenshots is a breeze. Simply open the Photos app and navigate to the “Screenshots” album. This dedicated album stores all your captured screenshots, making it easy to find and manage them. No more searching through your camera roll!
Now that you have your screenshot in front of you, let’s dive into the editing tools available in the Photos app. The app provides a range of editing options that allow you to enhance and customize your screenshots to your heart’s content.
One of the most useful tools is the crop feature. With this tool, you can trim away any unwanted elements in your screenshot, ensuring that the focus remains on the most important parts. You can also rotate your screenshot if it was captured at an awkward angle.
But that’s not all! The Photos app also allows you to adjust the brightness and contrast of your screenshot. This feature comes in handy when you want to make certain details stand out or create a specific mood. You can even apply filters to give your screenshot a unique and artistic look.
Experimenting with these editing tools is a must. Don’t be afraid to play around and see what works best for your screenshot. You might discover a combination of adjustments that transforms an ordinary screenshot into something extraordinary.
Once you’re satisfied with your edited screenshot, it’s time to share it with the world. Sharing your screenshots is simple and convenient with the Photos app. After selecting the screenshot you want to share, tap on the “Share” button. A whole world of sharing options will unfold before you.
Do you want to send your screenshot to a friend via a messaging app? No problem. The Photos app offers integration with popular messaging apps, allowing you to share your screenshot with just a few taps. You can also share your screenshot on social media platforms, such as Facebook, Instagram, or Twitter, to showcase your creativity to a wider audience.
If you prefer a more traditional approach, you can share your screenshot via email. The Photos app seamlessly integrates with your email accounts, making it easy to attach your screenshot and send it off to colleagues, friends, or family members.
So, whether you want to impress your social media followers, collaborate with colleagues, or simply share a funny moment with friends, the Photos app on your iPhone 11 Pro has got you covered. Take advantage of its editing and sharing features to make your screenshots truly shine.
Troubleshooting Common Issues
It’s not uncommon to encounter issues while taking screenshots on your iPhone 11 Pro. Let’s address some common problems and provide solutions.
What to Do if Screenshots Aren’t Saving
If you can’t find your screenshots in the Screenshots album, check the “Recently Deleted” album. It’s possible that the screenshots were accidentally deleted, and they can be recovered from here within a designated timeframe.
Resolving Issues with Screen Brightness or Clarity
If your screenshots appear too dark or blurry, ensure that your screen brightness is set to an optimal level. Additionally, clean your device’s screen and camera lens regularly to maintain clarity in your screenshots.
By following these steps and utilizing the features and tools available on the iPhone 11 Pro, you can easily capture, edit, and share impressive screenshots. Whether you’re a casual user or a professional, screenshots can be a valuable tool to document and share information effectively.
Enhance Your Screenshots with GIFCaster
Ready to take your iPhone 11 Pro screenshots to the next level? With GIFCaster, you can infuse your captures with animated fun and express yourself creatively. Transform a simple work message into an exciting celebration or add a personal touch to your shared moments. Make your screenshots stand out by adding GIFs that reflect your mood and style. Don’t just share a screenshot, share an experience. Use the GIFCaster App today and start turning your captures into engaging stories.