In today’s digital world, capturing and sharing screenshots has become an integral part of our daily lives. Whether you want to save a funny conversation, document an important piece of information, or simply share a beautiful moment with friends and family, knowing how to take a screenshot on your iPhone 4 is a skill worth mastering. In this article, we will guide you through the process step by step, ensuring that you become a pro at capturing those precious moments on your iPhone 4.
Understanding the Basics of iPhone 4
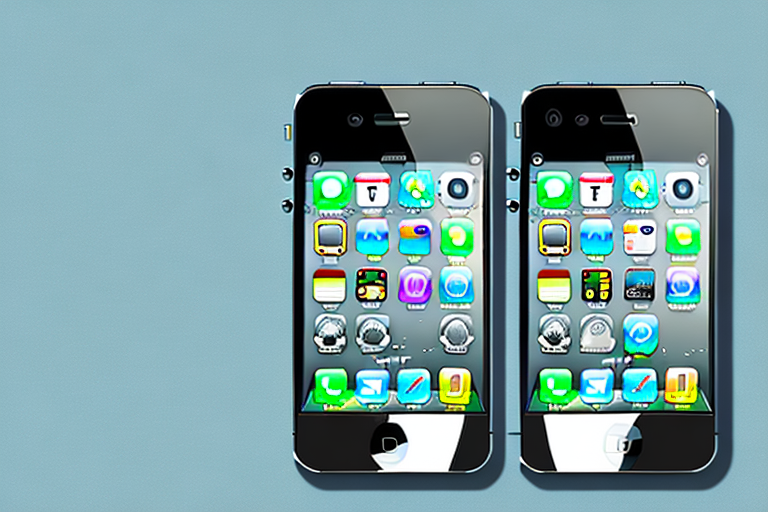
Before we delve into the intricacies of taking a screenshot on your iPhone 4, it is essential to have a basic understanding of this iconic device. Released by Apple in 2010, the iPhone 4 boasts a sleek design, cutting-edge features, and a user-friendly interface. Despite its age, the iPhone 4 remains a popular choice among tech enthusiasts and smartphone users worldwide.
The iPhone 4 revolutionized the smartphone industry with its innovative design and advanced capabilities. Its sleek glass and stainless steel body exudes a sense of elegance and sophistication, making it a timeless piece of technology. The device’s 3.5-inch Retina display, with a resolution of 960 x 640 pixels, offers stunning visuals and vibrant colors, providing users with an immersive viewing experience.
Under the hood, the iPhone 4 is powered by the A4 chip, Apple’s first custom-designed system-on-a-chip. This powerful processor ensures smooth performance and efficient multitasking, allowing users to seamlessly switch between apps and handle resource-intensive tasks with ease.
Key Features of iPhone 4
Although there have been significant advancements in iPhone technology since the release of the iPhone 4, this device still offers a plethora of impressive features. From its high-resolution Retina display and powerful A4 chip to its 5-megapixel camera and intuitive operating system, the iPhone 4 continues to deliver a seamless user experience.
The iPhone 4’s 5-megapixel camera, equipped with an LED flash, allows users to capture stunning photos and record high-definition videos. With advanced features like autofocus, face detection, and geotagging, users can unleash their creativity and document precious moments with exceptional clarity.
One of the standout features of the iPhone 4 is its operating system, iOS 4. This intuitive and user-friendly platform provides a seamless and fluid experience, allowing users to effortlessly navigate through apps, access important information, and customize their device to suit their preferences.
Navigating the iPhone 4 Interface
Before we get into the nitty-gritty of taking a screenshot, let’s familiarize ourselves with the iPhone 4 interface. The iPhone 4 utilizes a touch screen, allowing users to navigate through various apps and features effortlessly. The iconic home button, located at the bottom center of the device, acts as the primary means of interaction.
By simply tapping or swiping on the screen, users can access their favorite apps, browse the web, send messages, and much more. The iPhone 4’s interface is designed to be intuitive and user-friendly, making it easy for both tech-savvy individuals and newcomers to navigate and explore the device’s capabilities.
In addition to the touch screen, the iPhone 4 also features physical buttons that provide quick access to essential functions. The volume buttons, located on the left side of the device, allow users to adjust the audio output, while the sleep/wake button, situated on the top right corner, enables users to lock or wake up their device with a simple press.
Furthermore, the iPhone 4 incorporates various sensors, such as the proximity sensor, ambient light sensor, and accelerometer, to enhance the user experience. These sensors enable features like automatic screen brightness adjustment, screen rotation based on device orientation, and the ability to answer calls simply by bringing the phone close to the ear.
Preparing Your iPhone 4 for Screenshots
In order to successfully capture screenshots on your iPhone 4, it is important to ensure that your device is properly configured. Let’s take a look at a few key steps to prepare your iPhone 4 for screenshot-taking bliss.
Checking Your iPhone 4 Settings
First and foremost, make sure that your iPhone 4 settings are optimized for screenshot functionality. To do this, navigate to the “Settings” app on your device and select “General.” From there, scroll down and tap on “Accessibility.” Finally, locate and enable the “AssistiveTouch” option. This handy feature will provide you with a virtual home button, making it easier to capture screenshots.
Once you have enabled AssistiveTouch, you’ll notice a small semi-transparent button floating on your screen. This button acts as a substitute for the physical home button, allowing you to perform various actions, including taking screenshots, with just a tap.
By enabling AssistiveTouch, you no longer have to worry about wearing out your physical home button or struggling to press it simultaneously with the power button to capture a screenshot. It’s a convenient and efficient solution that enhances your screenshot-taking experience.
Ensuring Sufficient Storage Space
Before embarking on your screenshot-taking journey, it is crucial to ensure that your iPhone 4 has sufficient storage space. Screenshots, like any other media files, consume storage. To avoid any potential issues, take a moment to free up space by deleting unwanted photos, videos, or apps.
Deleting unnecessary files not only creates more room for your screenshots but also improves the overall performance of your iPhone 4. It’s a win-win situation! You can easily identify and remove unwanted files by going to the “Settings” app, selecting “General,” and then tapping on “iPhone Storage.”
Within the iPhone Storage menu, you’ll find a detailed breakdown of the storage usage on your device. It provides insights into which apps and files are taking up the most space. Take this opportunity to declutter your iPhone 4 and make way for the amazing screenshots you’re about to capture.
Remember, screenshots are a fantastic way to capture and share memorable moments, important information, or even showcase your creative designs. With the right settings and sufficient storage space, you’ll be ready to unleash your screenshot-taking skills on your iPhone 4!
Step-by-Step Guide to Taking a Screenshot
Now that your iPhone 4 is prepared for screenshot capturing, let’s dive into the step-by-step process of taking a screenshot on your device.
But before we begin, let’s explore the fascinating history of screenshots. Did you know that the concept of capturing what’s on your screen dates back to the early days of computing? In the early 1970s, researchers at the Xerox Palo Alto Research Center developed the first screenshot capability as part of their pioneering work on graphical user interfaces. Since then, screenshots have become an integral part of our digital lives, allowing us to capture and share moments, information, and memories with just a few clicks.
Locating the Necessary Buttons
The first step in taking a screenshot on your iPhone 4 is to identify the necessary buttons. Position your device in such a way that the content you wish to capture is displayed on the screen. The buttons you need to press simultaneously to capture a screenshot are the sleep/wake button (located on the top right edge of the device) and the home button (the circular button on the front of the device).
Now, let’s take a closer look at these buttons. The sleep/wake button, also known as the power button, is responsible for turning your iPhone’s screen on and off. It’s conveniently located on the top right edge of the device, making it easily accessible with just a finger. The home button, on the other hand, is the central navigation button of your iPhone. It not only takes you back to the home screen but also serves as a fingerprint sensor for unlocking your device. Together, these buttons form the dynamic duo that enables you to capture the perfect screenshot.
Timing Your Screenshot Correctly
Timing is crucial when it comes to taking a screenshot. Ensure that the content you want to capture is perfectly displayed on your iPhone 4 screen before pressing the buttons. Whether it’s a funny text message, a stunning photo, or a game-winning moment, make sure to wait for the perfect time to hit the buttons and capture the screenshot.
But why is timing so important? Well, think about it like capturing a photograph. Just like in photography, timing plays a vital role in capturing the essence of a moment. You want to make sure that the screenshot captures the content exactly as you want it, without any distractions or imperfections. So take a deep breath, be patient, and wait for that perfect moment to immortalize it on your iPhone 4.
Now that you know the importance of timing, let’s talk about some tips and tricks to help you master the art of screenshot timing. One technique is to anticipate the moment. If you’re capturing a specific event or action on your screen, try to predict when it will happen and be ready to press the buttons at the right time. Another technique is to use burst mode. By quickly pressing and releasing the buttons multiple times, you can capture a series of screenshots and choose the best one later. Experiment with different timing strategies and find what works best for you.
So there you have it, a comprehensive guide to taking a screenshot on your iPhone 4. Armed with the knowledge of button locations and the importance of timing, you’re now ready to capture and share your favorite moments with ease. Whether it’s a hilarious meme, a breathtaking landscape, or a memorable conversation, screenshots allow you to preserve and relive those special moments whenever you want. So go ahead, start exploring the world of screenshots, and let your creativity shine!
Accessing and Sharing Your Screenshots
Now that you’ve successfully taken your screenshots, you might be wondering how to access and share them with others. Fear not, as we’ve got you covered!
Finding Your Screenshots in Photos
All the screenshots you take on your iPhone 4 are conveniently saved in the Photos app. To access your screenshots, simply navigate to the Photos app on your device. From there, tap on the “Albums” tab and locate the “Screenshots” album. Voila! Your screenshots are now easily accessible.
Sharing Screenshots via Different Platforms
Sharing your screenshots is a breeze on the iPhone 4. From the Photos app, select the screenshot you wish to share, and tap on the share button, represented by an arrow pointing upwards. You can then choose to share your screenshot via various platforms, including messaging apps, social media networks, email, or even save it to your cloud storage.
Troubleshooting Common Screenshot Issues
While taking screenshots on your iPhone 4 is generally a smooth process, you may encounter a few hiccups along the way. Here are a couple of common screenshot issues you might face and how to resolve them.
Dealing with Unresponsive Buttons
If you find that the sleep/wake button or the home button on your iPhone 4 is unresponsive, don’t panic. In such cases, you can rely on the AssistiveTouch feature we enabled earlier. Simply tap on the AssistiveTouch button on your screen, navigate to “Device,” and select “More.” From there, you will find a “Screenshot” option to capture your desired content.
Addressing Storage Issues
If you encounter storage issues when trying to take a screenshot, it’s time to clean up your device. Delete unnecessary apps, offload photos and videos to cloud storage platforms, or consider upgrading to a device with higher storage capacity to ensure you never miss out on capturing those precious moments.
Now that you have mastered the art of capturing screenshots on your iPhone 4, the possibilities are endless. So go ahead, start exploring, and immortalize your favorite moments with ease. Happy screenshotting!
Enhance Your Screenshots with GIFCaster
Now that you’re adept at taking screenshots on your iPhone 4, why not elevate your screenshot game with GIFCaster? With GIFCaster, you can add a touch of fun and creativity to your captures by incorporating GIFs. Transform a simple work message into a delightful celebration, or make your conversations more engaging. Ready to add some flair to your screenshots? Use the GIFCaster App today and start expressing yourself in a whole new way!