In today’s digital age, capturing and sharing moments from your iPhone has become an essential part of our daily lives. Whether it’s an entertaining conversation, an inspiring quote, or a memorable image, screenshots allow us to preserve and share these moments in a simple and convenient way. If you’re an owner of the impressive iPhone 8 and want to know how to make a screenshot, you’ve come to the right place. In this article, we’ll guide you through the process step by step, ensuring you’ll be a screenshot expert in no time.
Understanding the Basics of iPhone 8
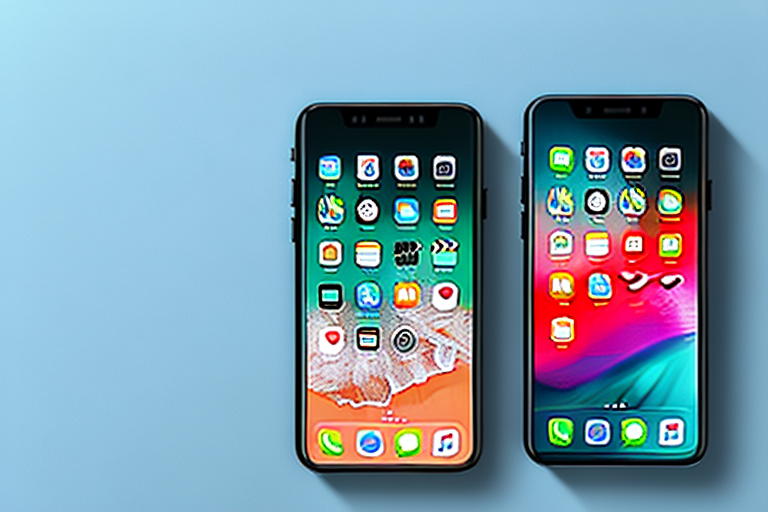
Before delving into screenshot techniques, it’s crucial to familiarize yourself with the key features and interface of your iPhone 8. This will help you navigate through the device effortlessly and make the most out of its capabilities. Let’s take a closer look.
Key Features of iPhone 8
With its sleek design and powerful features, the iPhone 8 has made a significant impact on the smartphone market. Notable features include the A11 Bionic chip, a 4.7-inch Retina HD display, a 12-megapixel camera, and Touch ID for added security. These features work harmoniously to enhance user experience and provide seamless performance.
The A11 Bionic chip is a powerhouse that ensures smooth multitasking and efficient performance. With its six-core CPU and three-core GPU, the iPhone 8 can handle demanding tasks effortlessly, whether it’s gaming, video editing, or running multiple apps simultaneously.
The 4.7-inch Retina HD display offers stunning visuals with vibrant colors and sharp details. Whether you’re browsing the web, watching videos, or viewing photos, the display provides an immersive experience that brings content to life.
The 12-megapixel camera on the iPhone 8 captures stunning photos with great detail and vibrant colors. With features like optical image stabilization and advanced pixel technology, you can take sharp and clear photos even in low-light conditions. The camera also supports 4K video recording, allowing you to capture precious moments in stunning detail.
Touch ID, a fingerprint recognition feature, adds an extra layer of security to your iPhone 8. By simply placing your finger on the home button, you can unlock your device and authorize purchases securely. It’s a convenient and reliable way to keep your personal information safe.
Navigating the iPhone 8 Interface
The iPhone 8 boasts a user-friendly interface, making it easy to navigate through its various functions. Familiarize yourself with the home button, power button, and volume buttons, as you will be using them to capture and edit your screenshots.
The home button, located at the bottom of the device, serves as the main control center. Pressing it once takes you to the home screen, where you can access your apps and widgets. Pressing it twice brings up the app switcher, allowing you to quickly switch between recently used apps. And pressing and holding the home button activates Siri, your virtual assistant.
The power button, located on the right side of the device, is used to turn the iPhone 8 on or off. Pressing and holding the power button also brings up the power-off slider, allowing you to shut down or restart your device.
The volume buttons, located on the left side of the device, control the volume of your iPhone 8. Pressing the top button increases the volume, while pressing the bottom button decreases it. These buttons also serve other functions, such as taking photos, recording videos, and answering or ending calls.
By familiarizing yourself with these buttons and their functions, you’ll be able to navigate through your iPhone 8 with ease and efficiency, making the most out of its features and capabilities.
Preparing to Take a Screenshot
Before diving into the process of capturing a screenshot, it’s essential to ensure that your phone’s settings and screen are optimized for the best possible results. Let’s walk through the necessary preparations.
Checking Your Phone’s Settings
First, navigate to the Settings app on your iPhone 8. Scroll down until you find the “Display & Brightness” option. Tap on it and adjust the brightness according to your preference. Setting it too high or too low can result in poor-quality screenshots. Finding the perfect balance is key.
While adjusting the brightness, it’s worth noting that different lighting conditions may require different settings. If you’re in a dimly lit room, lowering the brightness can help reduce glare and improve the clarity of your screenshot. On the other hand, if you’re in a well-lit environment, increasing the brightness can ensure that the details in your screenshot are vivid and easily visible.
Additionally, consider enabling the “Auto-Brightness” feature. This setting allows your iPhone 8 to automatically adjust the screen brightness based on the ambient light conditions. By enabling this feature, you can ensure that your screenshots are consistently well-lit, regardless of the environment you’re in.
Ensuring Your Screen is Ready
Position your screen in a way that eliminates any obstructions. This will ensure that the content you want to capture is easily visible and won’t be compromised by unwanted elements in the screenshot.
Take a moment to clean your screen as well. Dust, fingerprints, and smudges can obstruct the clarity of your screenshot. Use a microfiber cloth or a screen cleaning solution to wipe away any dirt or marks. This simple step can significantly enhance the quality of your screenshot.
Furthermore, consider the orientation of your screen. Depending on the content you want to capture, you may need to rotate your device to landscape or portrait mode. By selecting the appropriate orientation, you can ensure that your screenshot captures the desired elements in the most visually appealing way.
Lastly, double-check that your screen is displaying the exact content you want to capture. If you’re taking a screenshot of a specific webpage or app screen, make sure that it’s fully loaded and displaying the information you need. This attention to detail will help you avoid any disappointment or the need for retakes.
The Process of Taking a Screenshot on iPhone 8
Now that you’ve prepared your iPhone 8 for screenshot-taking success, let’s delve into the step-by-step process of capturing your desired images or content.
Using the Side and Volume Buttons
Locate the side button on the right-hand side of your iPhone 8 and the volume up button on the left-hand side. To take a screenshot, simultaneously press and quickly release both buttons. You will hear a familiar camera shutter sound and see a visual confirmation of the screenshot.
But have you ever wondered why the side button and volume up button are used for taking screenshots on the iPhone 8? Well, it’s all about convenience and accessibility. Apple designed the iPhone 8 with the idea of making it easy for users to capture their screen without having to navigate through complicated menus or settings. By using the side button and volume up button, which are easily accessible with one hand, taking a screenshot becomes a seamless and effortless process.
Furthermore, the choice of using the side button and volume up button also ensures that accidental screenshots are minimized. These buttons are positioned in a way that makes it unlikely for users to accidentally trigger a screenshot while using their iPhone 8 for regular tasks. This thoughtful design element adds to the overall user experience and prevents any unnecessary frustration.
Capturing the Screen
Ensure that you capture the entire screen by holding the buttons and releasing them simultaneously. If not, you might end up with cropped or incomplete screenshots, which might not convey the full essence of the content you want to capture.
When capturing the screen, it’s important to consider the context in which you’re taking the screenshot. Are you capturing a funny conversation with a friend? Or perhaps you’re documenting an important piece of information for future reference. Whatever the case may be, taking a screenshot allows you to preserve a moment in time, capturing it exactly as it appears on your iPhone 8’s screen.
It’s worth noting that the iPhone 8’s high-resolution Retina display plays a crucial role in the quality of the screenshots you capture. With its vibrant colors, sharp details, and excellent contrast, the Retina display ensures that the screenshots you take are true representations of the content being captured. Whether it’s a stunning photograph, a beautifully designed app interface, or an inspiring quote, the iPhone 8’s screen showcases it all with utmost clarity.
Editing Your Screenshot
Capturing the screenshot is only the first step in the process. Now, it’s time to edit and enhance your screenshot to showcase the content in the most impactful way possible.
Accessing Your Screenshot
To access your recently taken screenshot, locate the Photos app on your iPhone 8’s home screen. Open the app and navigate to the “Screenshots” album. There, you’ll find all the screenshots you’ve captured and have the ability to view, edit, and share them.
Using the Edit Tools
Once you’ve accessed your desired screenshot, tap on the “Edit” button located at the top-right corner of the screen. This will allow you to unleash your creativity and make necessary adjustments to enhance the overall appearance of your screenshot. Utilize tools such as crop, rotate, and markup to personalize your image to your liking.
Sharing Your Screenshot
After perfecting your screenshot, it’s time to share it with the world. Fortunately, the iPhone 8 provides various sharing options, allowing you to distribute your screenshot quickly and effortlessly.
Sending the Screenshot via Message or Email
If you wish to send your screenshot to a friend or colleague, simply tap on the share icon located at the bottom-left corner of the screen. From there, you can select the messaging or email app of your choice and effortlessly send your screenshot to the intended recipient.
Posting Your Screenshot on Social Media
If you want to expand your screenshot’s reach and make it accessible to a wider audience, consider sharing it across your social media platforms. By tapping on the share icon and selecting the appropriate social media app, you’ll be able to instantly upload and showcase your screenshot to friends, family, and followers.
The power to capture and share moments directly from your iPhone 8 is a convenient and efficient way to express yourself and communicate with others. By following these step-by-step instructions, you’ve successfully learned how to make a screenshot on your iPhone 8, edit it to your liking, and distribute it effortlessly. So go ahead, embark on your screenshot-taking journey and capture and share the moments that matter most to you.
Enhance Your Screenshots with GIFCaster
Ready to take your iPhone 8 screenshots to the next level? With GIFCaster, you can add a touch of personality and animation to your captures. Make your screenshots more fun and engaging by incorporating GIFs that reflect your mood or message. Whether it’s turning a mundane work update into a lively celebration or just adding some flair to your shared moments, GIFCaster is your go-to app for creative self-expression. Don’t just share a screenshot, share an experience. Use the GIFCaster App today and start spreading joy with your snapshots!