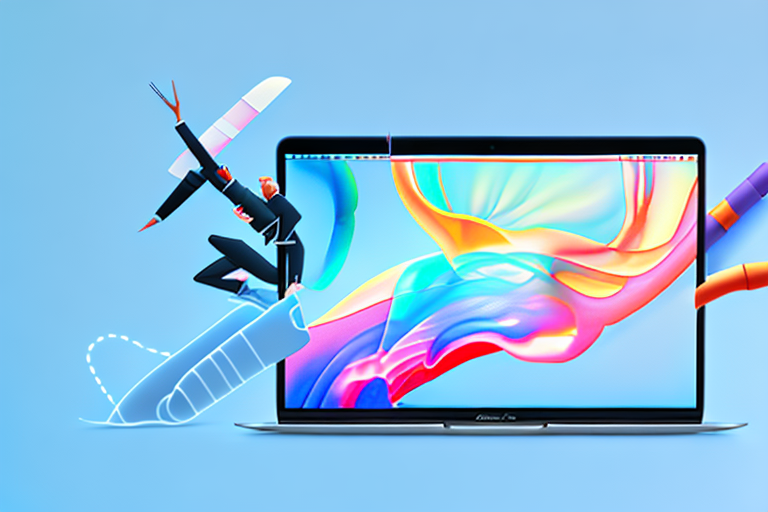
In today’s digital age, where visual communication has become increasingly important, knowing how to take a screenshot on your MacBook Air is a valuable skill. Whether you want to capture a funny meme, save an important document, or report an issue to tech support, screenshots are an excellent way to capture and share what you see on your screen.
Understanding the Basics of Screenshots
Before learning how to take a screenshot on your MacBook Air, it’s essential to understand what a screenshot is and why it is important.
When it comes to capturing a moment on your computer screen, a screenshot is your go-to tool. It allows you to freeze-frame any visual representation on your display and save it as an image file. Whether you want to capture a funny meme, share an error message with tech support, or document an important piece of information, screenshots are incredibly versatile.
What is a Screenshot?
A screenshot is essentially a digital image that captures the contents of your computer screen at a specific moment. It’s like taking a snapshot of your screen, preserving everything that is currently being displayed. This can include open windows, desktop icons, browser tabs, and any other visual elements on your screen.
Think of a screenshot as a visual record of what you see on your computer screen. It’s like taking a photograph, but instead of capturing a physical scene, you’re capturing a virtual one.
Importance of Screenshots
Screenshots can be incredibly useful in various situations. They can help you illustrate a point, provide evidence, or simply capture a moment that you want to remember. Whether you’re a student, professional, or casual user, having the knowledge of taking screenshots is invaluable.
For students, screenshots can be a valuable tool for studying and research. You can capture important information from online articles, textbooks, or lecture slides and refer back to them later. Screenshots can also be used to create visual aids for presentations or to share notes with classmates.
In a professional setting, screenshots can be essential for communication and problem-solving. They allow you to clearly demonstrate software issues to technical support or provide visual instructions to colleagues. Screenshots can also be used to document software bugs or capture important data for analysis.
Even for casual users, screenshots can be a fun and practical tool. You can capture memorable moments from your favorite video games, save inspiring quotes or images from the internet, or create personalized desktop backgrounds.
Overall, screenshots are a powerful and versatile tool that can enhance your digital experience. They provide a way to capture and share information, troubleshoot problems, and preserve memories. Now that you understand the basics of screenshots and their importance, let’s dive into how to take a screenshot on your MacBook Air!
Preparing Your MacBook Air for Screenshots
Before diving into the various methods of taking screenshots, it’s crucial to ensure that your MacBook Air is properly set up and equipped with the necessary tools. Taking screenshots can be a valuable tool for capturing and sharing information, whether it’s for work, school, or personal use. By following a few simple steps, you can optimize your MacBook Air for capturing screenshots effortlessly.
Checking Your MacBook’s Settings
Firstly, you need to make sure that your MacBook Air’s settings are configured to allow for easy capturing of screenshots. Fortunately, Apple provides a user-friendly interface to customize keyboard shortcuts specifically for screenshots. To access these settings, follow these steps:
- Click on the Apple menu in the top-left corner of your screen.
- Select “System Preferences” from the drop-down menu.
- In the System Preferences window, click on the “Keyboard” icon.
- Within the Keyboard settings, navigate to the “Shortcuts” tab.
- On the left-hand side, you will find a list of categories. Click on “Screen Shots.”
- Ensure that the screenshot commands are enabled and easily accessible. You can customize the shortcuts to your preference by clicking on each command and pressing the desired key combination.
By configuring your MacBook Air’s settings, you can streamline the process of taking screenshots and make it more convenient for your specific needs.
Necessary Tools for Screenshots
Aside from enabling the built-in screen capture options on your MacBook Air, you might want to have additional tools to enhance your screenshot capabilities. While the native screenshot features are sufficient for most users, installing third-party apps can provide added features and functionalities. Here are a couple of popular options:
- Snagit: Snagit is a powerful screen capture and image editing software that offers a wide range of tools to enhance your screenshots. With Snagit, you can capture screenshots, record videos, annotate images, and even create GIFs. It also provides advanced editing features like cropping, resizing, and adding text or shapes to your screenshots.
- Skitch: Skitch is a lightweight and user-friendly screenshot tool developed by Evernote. It allows you to capture screenshots, annotate them with arrows, shapes, and text, and quickly share them with others. Skitch also integrates seamlessly with Evernote, making it easy to organize and access your screenshots across different devices.
By installing these third-party apps, you can expand your screenshot capabilities and have more control over the editing and sharing process. Whether you need to capture screenshots for professional presentations, educational purposes, or simply to share funny moments with friends, these tools can greatly enhance your overall experience.
With your MacBook Air properly set up and equipped with the necessary tools, you are now ready to explore the various methods of taking screenshots and unleash your creativity!
Different Methods to Take a Screenshot on MacBook Air
Now that you have your MacBook Air ready, let’s explore the different methods available to capture screenshots.
When it comes to capturing screenshots on your MacBook Air, you have several options at your disposal. Whether you prefer using keyboard shortcuts, a dedicated app, or a built-in solution, there’s a method that suits your needs.
Using Keyboard Shortcuts
One of the quickest and most convenient ways to take a screenshot on your MacBook Air is by using keyboard shortcuts. Pressing the command key (⌘) in combination with specific function keys will capture different types of screenshots.
For example, Command + Shift + 3 captures the entire screen, preserving every detail in a single image. This method is perfect for capturing the entirety of a webpage, a software interface, or any other visual element you want to preserve for future reference.
If you prefer a more targeted approach, Command + Shift + 4 allows you to select a specific portion of the screen to screenshot. This is particularly useful when you only need to capture a specific area, such as a particular paragraph of text, an image, or a specific section of a webpage.
Utilizing the Screenshot App
If you’re looking for a more visual approach to taking screenshots, the Screenshot app on your MacBook Air can be a great option. This app offers a user-friendly interface that allows you to easily capture screenshots with just a few clicks.
With the Screenshot app, you have the flexibility to choose from various capture options. You can select specific areas to capture, capture the entire screen, or even record a video of your screen. This versatility makes it an excellent tool for creating tutorials, recording gameplay, or capturing any visual content you want to share or save.
Taking Screenshots with Preview
For those who prefer a built-in solution, Preview, the default image viewer on macOS, offers basic screenshot capabilities. This means you don’t need to install any additional software to capture screenshots on your MacBook Air.
To take a screenshot using Preview, open the app and go to the “File” menu. From there, select “Take Screenshot.” A drop-down menu will appear, giving you the option to capture the entire screen, a specific window, or a selected area.
Preview’s screenshot feature is a handy option for those who prefer a straightforward and no-frills approach to capturing screenshots. It’s a reliable tool that gets the job done without any unnecessary complexity.
Now that you’re familiar with the different methods available to capture screenshots on your MacBook Air, you can choose the one that best suits your preferences and needs. Whether you opt for keyboard shortcuts, the Screenshot app, or Preview, capturing screenshots has never been easier.
How to Edit and Save Your Screenshots
Capturing the perfect screenshot is just the beginning. To make your screenshots more effective, you may need to edit and save them in different formats.
Editing Screenshots on MacBook Air
Your MacBook Air is equipped with basic editing tools that allow you to enhance and annotate your screenshots. By opening the screenshot in the Preview app, you can crop, adjust colors, add text, shapes, and even draw freely on the image.
Saving Your Screenshots
Once you have edited your screenshot to perfection, it’s crucial to save it in a suitable format and location. You can save your screenshots as a PNG, JPEG, or other common image file formats. Consider organizing them in dedicated folders to ensure easy access and optimal workflow.
Troubleshooting Common Screenshot Issues
While taking screenshots on your MacBook Air is generally straightforward, sometimes you may encounter common issues or glitches. Here are a couple of troubleshooting tips to help you navigate through them.
Resolving Keyboard Shortcut Problems
If the keyboard shortcuts for screenshots are not functioning as expected, the first step is to check if the appropriate shortcuts are enabled in your system preferences. Alternatively, you can try restarting your MacBook Air or updating your macOS to the latest version to fix any potential bugs.
Fixing Screenshot App Glitches
If you encounter any problems with the Screenshot app or other third-party screenshot tools, a common troubleshooting step is to quit and restart the application. Additionally, ensure that the app is up to date by checking for updates in the App Store.
With this comprehensive guide, you are now equipped with the knowledge and tools to capture and manage screenshots on your MacBook Air effortlessly. Remember, practice makes perfect, so take some time to explore the various methods and features, and soon you’ll be a screenshot pro!
Enhance Your Screenshots with GIFCaster
Ready to take your screenshot game to the next level? With GIFCaster, not only can you capture moments on your MacBook Air, but you can also add a touch of personality and fun to your images. Transform a standard work message into an exciting celebration by incorporating animated GIFs with your screenshots. Embrace creative self-expression and make your visual communication more engaging. Ready to get started? Use the GIFCaster App today and add a spark of joy to your digital content!