Microsoft Surface is a versatile device that offers a range of features, including the ability to take screenshots. Whether you want to capture a moment from a video, save an important document, or share something interesting with others, knowing how to take a screenshot on Microsoft Surface is essential. In this article, we will guide you through the process step-by-step, so you can capture what you need with ease.
Understanding the Basics of Microsoft Surface
Before we delve into the details of taking screenshots, let’s familiarize ourselves with the key features of Microsoft Surface. This will help you navigate through the interface effortlessly and make the most out of your device.
Microsoft Surface is a versatile and powerful device that offers a wide range of features to enhance your computing experience. One of the standout features is its high-resolution display, which delivers stunning visuals and vibrant colors. Whether you’re watching movies, editing photos, or working on documents, the Surface’s display ensures a crisp and immersive viewing experience.
Another key feature of Microsoft Surface is its powerful processors. These processors provide the necessary speed and performance to handle demanding tasks, such as running multiple applications simultaneously or editing high-resolution videos. With a Surface device, you can expect smooth and efficient performance, even when tackling resource-intensive activities.
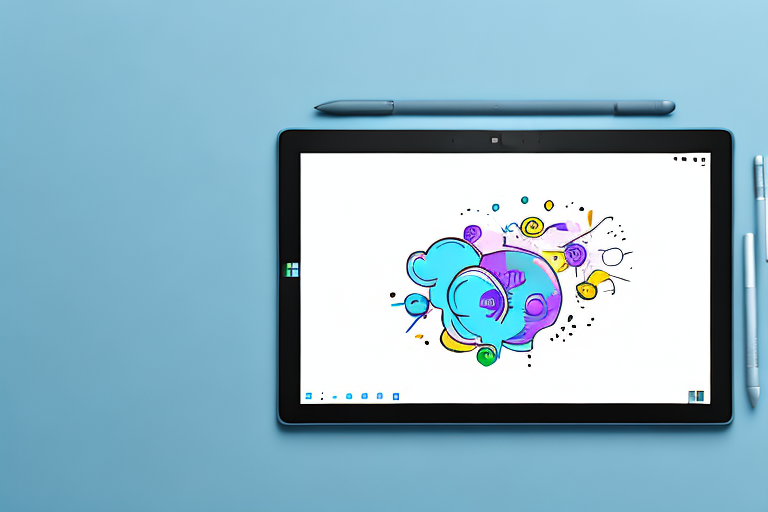
In addition to its display and processors, Microsoft Surface also offers touch and pen input capabilities. This means you can interact with the device using your fingers or a Surface Pen, allowing for a more natural and intuitive user experience. Whether you’re scrolling through webpages, drawing sketches, or taking handwritten notes, the Surface’s touch and pen input make it easy to express your creativity and productivity.
Furthermore, Microsoft Surface seamlessly integrates with Windows 10, the latest operating system from Microsoft. This integration ensures a cohesive and unified experience across devices, allowing you to easily switch between your Surface and other Windows devices. You can sync your files, settings, and apps, making it convenient to work on the go or transition from one device to another seamlessly.
Key Features of Microsoft Surface
Microsoft Surface comes equipped with a range of features that enhance your computing experience. These include a high-resolution display, powerful processors, touch and pen input capabilities, and seamless integration with Windows 10. Familiarizing yourself with these features will make using your Surface device a breeze.
With its high-resolution display, you can enjoy stunning visuals and vibrant colors, whether you’re watching movies, editing photos, or working on documents. The powerful processors ensure smooth and efficient performance, even when handling resource-intensive tasks. The touch and pen input capabilities offer a more natural and intuitive user experience, allowing you to interact with the device using your fingers or a Surface Pen. And with seamless integration with Windows 10, you can easily switch between your Surface and other Windows devices, syncing your files, settings, and apps.
Navigating the Microsoft Surface Interface
When it comes to navigating the Microsoft Surface interface, there are various methods you can use. From the Start menu to the taskbar and the action center, understanding how to access different features and applications is essential for smooth navigation. Take some time to explore and familiarize yourself with the interface before moving on.
The Start menu is your gateway to accessing all your apps, settings, and files. Simply click on the Start button, located at the bottom-left corner of the screen, to open the Start menu. From there, you can search for specific apps, browse through the list of installed apps, and access important system settings.
The taskbar, located at the bottom of the screen, provides quick access to frequently used apps and features. You can pin your favorite apps to the taskbar for easy access, and you can also switch between open apps by clicking on their respective icons on the taskbar.
The action center, located in the bottom-right corner of the screen, is where you can find notifications, quick settings, and other useful features. Simply click on the action center icon to expand it and view your notifications. You can also access quick settings, such as Wi-Fi, Bluetooth, and screen brightness, directly from the action center.
By familiarizing yourself with these key elements of the Microsoft Surface interface, you’ll be able to navigate through the device effortlessly and access the features and applications you need with ease.
Preparing Your Microsoft Surface for Screenshots
Before we jump into taking screenshots, it’s important to ensure that your device is properly set up and optimized for capturing images. Here are a few steps you should follow to prepare your Microsoft Surface:
Checking Your System Settings
To begin, verify that your system settings allow for taking screenshots. Go to the Settings menu and navigate to the “System” tab. Within the “System” tab, select “Multitasking” and ensure that the “Pressing Alt+PrtScn” option is enabled. This will allow you to take screenshots using keyboard shortcuts.
Once you have confirmed that the screenshot option is enabled, you can explore additional settings that can enhance your screenshot experience. For instance, you can customize the folder where your screenshots are saved, or choose to include or exclude the mouse cursor in your screenshots. These options can be found in the “Screen capture” section of the “System” tab.
Ensuring Your Screen Display is Optimal
Next, ensure that your screen display is optimal for capturing screenshots. Adjust the brightness and contrast settings if necessary to ensure that the desired image is clear and easily readable.
Additionally, consider the resolution of your screen. Higher resolutions can result in sharper and more detailed screenshots. However, keep in mind that higher resolutions may also result in larger file sizes. Find the balance that works best for your needs.
Furthermore, take a moment to clean your screen. Dust, fingerprints, and smudges can affect the quality of your screenshots. Use a microfiber cloth or screen cleaning solution to gently remove any dirt or marks.
Another aspect to consider is the aspect ratio of your screen. Different devices have different aspect ratios, and this can impact the composition of your screenshots. Take some time to experiment with different aspect ratios to find the one that best suits your needs.
Lastly, if you plan on capturing screenshots of specific applications or windows, make sure they are properly positioned and sized on your screen. This will help you achieve the desired composition in your screenshots.
Step-by-Step Guide to Taking a Screenshot
Now that your Microsoft Surface is ready for capturing screenshots, let’s explore the various methods you can use:
Using the Hardware Buttons
The easiest way to take a screenshot on Microsoft Surface is by using the hardware buttons. Simply press the Power button and the Volume Up button simultaneously. You will hear a shutter sound and see a flash on the screen, indicating that the screenshot has been successfully captured.
Utilizing the Snipping Tool
If you prefer more control over your screenshots, you can use the Snipping Tool. This built-in Windows application allows you to capture specific areas, full screens, or even free-form shapes. To access the Snipping Tool, simply search for it in the Start menu and open the application. From there, you can choose the desired snip type and save the captured image.
Taking a Screenshot with Surface Pen
If you own a Surface Pen, you can take advantage of its capabilities to capture screenshots. Simply double-click the top button of the pen, and the screen will dim momentarily. Afterward, a notification will appear, indicating that the screenshot has been saved.
Editing and Saving Your Screenshot
Once you have captured a screenshot on your Microsoft Surface, you may want to make some adjustments or save it in a specific format. Here’s how:
Basic Editing Tools on Microsoft Surface
Microsoft Surface offers basic editing tools that allow you to make quick adjustments to your screenshots. These tools include cropping, rotating, and adding annotations. To access the editing tools, locate the screenshot in your Photos app and select the “Edit & Create” option. From there, you can make the desired changes and save the edited screenshot.
Saving Your Screenshot in Different Formats
If you need to save your screenshot in a specific format, such as JPEG or PNG, you can do so by using the Save As option. Simply open the screenshot in an image editing software, select Save As, and choose the desired format from the available options. This ensures compatibility and flexibility when sharing or using the screenshots in different applications.
Troubleshooting Common Screenshot Issues
While capturing screenshots on Microsoft Surface is generally straightforward, you may encounter some issues along the way. Here are a few troubleshooting tips to help you overcome common problems:
What to Do When Screenshot is Not Working
If you find that the screenshot function is not working on your Microsoft Surface, try restarting your device. This simple step often resolves any temporary software glitches that may be affecting the capture functionality. If the issue persists, consider updating your device’s drivers and operating system to ensure compatibility.
Resolving Quality Issues in Screenshots
If your screenshots appear blurry or pixelated, it may be due to the screen resolution settings or the image format you are using. Try adjusting the resolution settings to a higher value for crisper screenshots. Additionally, saving your screenshots in a lossless image format, such as PNG, can help maintain their quality.
By following these steps and utilizing the various methods available, you can easily capture screenshots on your Microsoft Surface device. Whether for personal or professional use, screenshots are an invaluable tool for capturing and sharing important information. Remember to explore the editing and saving options to enhance your screenshots and troubleshoot any issues that may arise. Now, go ahead and capture those special moments or important information with confidence!
Enhance Your Screenshots with GIFCaster
Ready to take your Microsoft Surface screenshots to the next level? With GIFCaster, you can add a dash of fun and creativity to your captures. Transform a simple screen grab into an engaging, animated experience by incorporating GIFs that express your mood or message. Whether it’s a celebratory moment or just adding a touch of humor to your work messages, GIFCaster is the perfect tool for creative self-expression. Don’t settle for ordinary screenshots; make them extraordinary. Use the GIFCaster App today and start sharing your world with more flair!