In today’s digital age, taking screenshots has become an essential skill. Whether you want to capture a funny conversation with a friend, save an important piece of information, or simply document something interesting, knowing how to make a screenshot on your iPhone 13 is a must. In this article, we will guide you through the process and teach you some handy tips for editing and sharing your screenshots. So, let’s delve into the world of iPhone 13 screenshots!
Understanding the Basics of iPhone 13
Before we dive into the nitty-gritty of taking screenshots, it’s essential to familiarize ourselves with the basics of the iPhone 13. This powerful device is equipped with numerous features that make it a popular choice among tech enthusiasts. From its stunning Super Retina XDR display to its powerful A15 Bionic chip, the iPhone 13 boasts a seamless user experience. Now, let’s explore some of the key features that make this device stand out from the crowd.
Key Features of iPhone 13
1. Super Retina XDR Display: The iPhone 13’s vibrant display brings your content to life with incredible clarity and detail.
2. A15 Bionic Chip: This powerful chip ensures smooth performance and lightning-fast speeds, making multitasking a breeze.
3. Improved Camera System: With advanced features like Night mode and Cinematic mode, the iPhone 13 elevates your photography skills.
4. Enhanced Battery Life: The iPhone 13 offers all-day battery life, so you can stay connected without worrying about running out of power.
Navigating the iPhone 13 Interface
Now that we have a good understanding of the iPhone 13’s key features, let’s take a moment to familiarize ourselves with its intuitive interface. The iPhone 13 interface is designed to be user-friendly, allowing you to navigate through apps and settings with ease. By swiping and tapping on the screen, you can access various functions and features effortlessly. Whether you’re a seasoned iPhone user or new to the iOS ecosystem, getting around the iPhone 13 interface is a breeze.
When you first turn on your iPhone 13, you’ll be greeted by the vibrant Super Retina XDR display, which showcases your favorite apps and content with stunning clarity and detail. The A15 Bionic chip, the powerhouse behind the iPhone 13’s performance, ensures that everything runs smoothly and efficiently. Whether you’re browsing the web, playing games, or editing photos, the A15 Bionic chip delivers lightning-fast speeds and responsiveness.
One of the standout features of the iPhone 13 is its improved camera system. With advanced features like Night mode, you can capture stunning low-light photos with ease. The iPhone 13 also introduces Cinematic mode, which allows you to create professional-looking videos with depth-of-field effects. Whether you’re a photography enthusiast or just enjoy capturing special moments, the iPhone 13’s camera system will take your skills to the next level.
In addition to its impressive features, the iPhone 13 also offers enhanced battery life. With all-day battery life, you can use your iPhone 13 throughout the day without worrying about running out of power. Whether you’re streaming videos, playing games, or staying connected with friends and family, the iPhone 13 will keep up with your busy lifestyle.
Now, let’s talk about the intuitive interface of the iPhone 13. The iOS operating system is known for its user-friendly design, and the iPhone 13 is no exception. With a simple swipe and tap on the screen, you can easily navigate through your apps, settings, and notifications. The Control Center, accessible by swiping down from the top right corner of the screen, allows you to quickly access essential functions like Wi-Fi, Bluetooth, and screen brightness.
The Home Screen is where you’ll find all your apps and widgets. You can organize your apps into folders, rearrange them, or even hide them from view. To open an app, simply tap on its icon. To switch between apps, swipe left or right from the bottom of the screen. And if you ever need to return to the Home Screen, just swipe up from the bottom of the screen.
With its intuitive interface and powerful features, the iPhone 13 is a device that seamlessly integrates into your daily life. Whether you’re using it for work, entertainment, or staying connected with loved ones, the iPhone 13 is designed to enhance your experience and make every task a breeze.
Preparing to Take a Screenshot
Before we jump into the actual process of taking a screenshot on your iPhone 13, there are a few things you need to consider. These steps will ensure that your screenshots turn out just the way you want them.
When it comes to capturing moments on your iPhone 13, taking a screenshot is a quick and convenient way to save and share what’s on your screen. Whether it’s a funny meme, an important email, or a breathtaking landscape, you can easily capture and preserve these moments with just a few simple steps.
Checking Your Settings
Firstly, you’ll want to double-check your settings to ensure that everything is configured correctly. Open the Settings app on your iPhone 13 and scroll down until you find the “Screenshots & Camera” option. Here, you can customize various settings related to screenshots, such as enabling or disabling the screenshot sound and choosing where your screenshots are saved.
Customizing your screenshot settings allows you to personalize your screenshot experience. If you prefer a silent capture, you can easily disable the screenshot sound. Additionally, you have the flexibility to choose where your screenshots are saved, whether it’s in your Photos app or in a specific folder of your choice.
Opening the Desired Screen
Once you’ve verified your settings, it’s time to open the screen you want to capture. Whether it’s a funny meme, an important email, or a breathtaking landscape, make sure the content you want to screenshot is displayed on your iPhone 13 screen.
Imagine capturing the beauty of a stunning sunset or the excitement of a game-winning moment. With your iPhone 13, you have the power to freeze these memories in time with a simple screenshot. The possibilities are endless, whether you want to capture a memorable conversation, a recipe you want to try later, or a design inspiration that sparks your creativity.
Ensure that the desired screen is fully visible on your iPhone 13 display, allowing you to capture every detail with precision. Take a moment to adjust the positioning or zoom in if necessary, ensuring that you capture exactly what you want in your screenshot.
The Process of Taking a Screenshot on iPhone 13
Now that you’ve prepared everything, it’s finally time to capture the moment and take a screenshot on your iPhone 13. There are two methods you can use: the button method and the AssistiveTouch method.
Using the Button Method
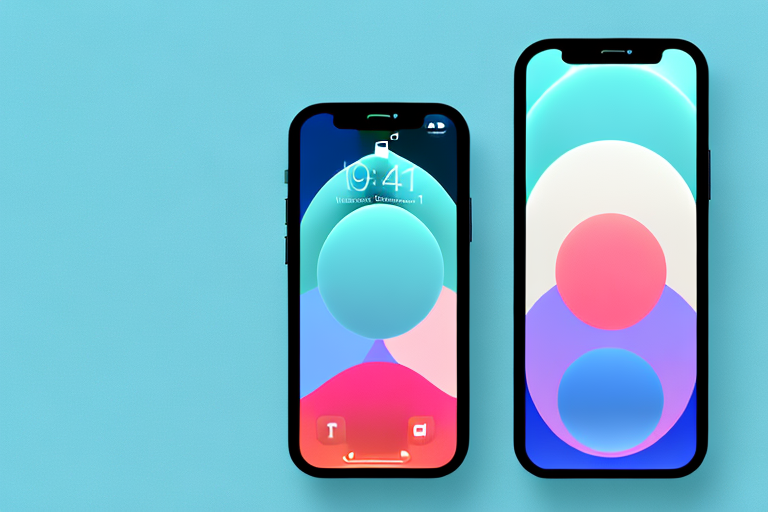
The button method is the most straightforward way to capture a screenshot. Simply press the Side button (located on the right side of your iPhone 13) and the Volume Up button (on the left side) simultaneously. You will see a flash on your screen, indicating that the screenshot has been successfully taken.
Using the AssistiveTouch Method
If you find it difficult to press the Side and Volume Up buttons simultaneously, there’s an alternative method you can use. AssistiveTouch is an accessibility feature on the iPhone 13 that allows you to perform various actions with a virtual button. To take a screenshot using AssistiveTouch, follow these steps:
- Open the Settings app on your iPhone 13 and go to “Accessibility.”
- Tap on “Touch,” then select “AssistiveTouch.”
- Enable AssistiveTouch by toggling the switch.
- A virtual button will appear on your screen. Tap on it, then choose “Device” and “More.”
- Select “Screenshot” to capture the screen. You can also customize the AssistiveTouch menu to add a dedicated screenshot button for easy access.
Editing Your Screenshot
Now that you’ve successfully taken a screenshot on your iPhone 13, you might want to make some adjustments or annotations to enhance the image before sharing it. Luckily, the iPhone 13 provides a convenient editing tool called Instant Markup.
Using the Instant Markup Tool
To access the Instant Markup tool, locate the thumbnail preview of your screenshot at the bottom left corner of the screen and tap on it. This will open the screenshot in the Markup editor, where you can draw, add text, crop, and make other adjustments to your screenshot. Once you’re satisfied with the edits, tap “Done” to save your changes.
Cropping and Resizing Your Screenshot
Suppose you want to focus on a specific area or remove unwanted elements from your screenshot. In that case, you can easily crop and resize the image using the built-in editing features of the Photos app. Simply open the screenshot in the Photos app, tap on “Edit,” and select the crop tool. From there, you can drag the corners of the frame to adjust the size and position of the cropped area.
Sharing and Saving Your Screenshot
After capturing and editing your screenshot, it’s time to share it with the world or save it for future reference. The iPhone 13 offers several options for saving and sharing your screenshots, ensuring that you can effortlessly distribute your captured content.
Saving Options for Your Screenshot
When you take a screenshot on your iPhone 13, it is automatically saved in the Photos app. You can access your screenshots by opening the Photos app and navigating to the “Screenshots” album. From there, you can organize, delete, or view your screenshots at any time.
Sharing Your Screenshot via Different Platforms
The iPhone 13 allows you to share your screenshots with others through various platforms and apps. Once you’ve opened your screenshot in the Photos app, tap on the share icon (a box with an arrow pointing up). This will bring up a menu containing different sharing options like Messages, Mail, social media platforms, and more. Choose the desired platform and follow the prompts to share your screenshot instantly.
And there you have it – a comprehensive guide on how to make a screenshot with the iPhone 13. With its powerful features and user-friendly interface, capturing and sharing screenshots has never been easier. Now you can document and share your favorite moments, valuable information, or hilarious conversations with just a few taps. So grab your iPhone 13 and start capturing the world around you!
Enhance Your Screenshots with GIFCaster
Ready to take your iPhone 13 screenshots to the next level? With GIFCaster, you can add a touch of personality and fun to your captures. Transform a simple screen grab into an engaging, animated experience by incorporating GIFs that reflect your mood or message. Whether it’s celebrating a work win with a burst of confetti or adding a laugh to a casual chat, GIFCaster is your go-to tool for creative self-expression. Don’t just share a screenshot—make it memorable with GIFCaster. Use the GIFCaster App today and start spreading the joy with your snapshots!