If you’re a Chromebook user, you may have wondered how to take a cropped screenshot on your device. Cropped screenshots can be useful for focusing on a specific area of your screen, removing unnecessary clutter, and highlighting important information. In this guide, we will walk you through the process of taking a cropped screenshot on a Chromebook, step by step.
Understanding the Basics of a Chromebook
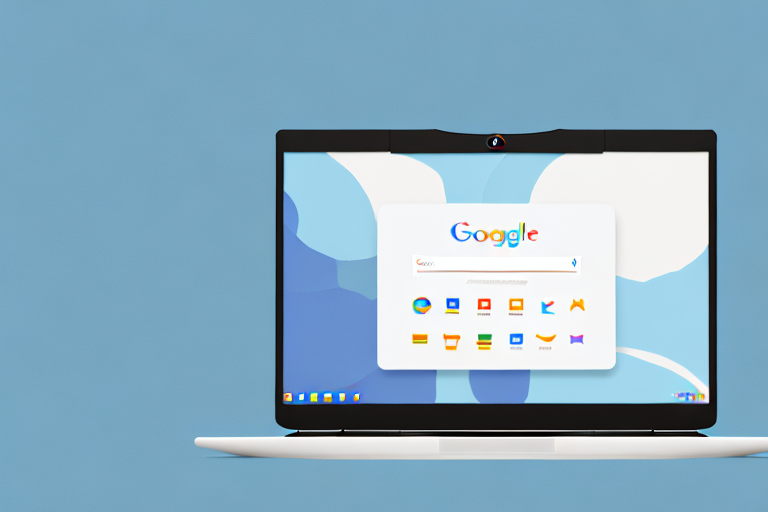
Before we delve into the details of taking a cropped screenshot on a Chromebook, let’s take a moment to understand the basics of what a Chromebook is. A Chromebook is a type of laptop that runs on Chrome OS, a lightweight operating system developed by Google. It is designed primarily for web-based computing and relies heavily on cloud services. Chromebooks are known for their fast boot times, long battery life, and affordability.
Chromebooks have gained popularity in recent years due to their unique features and advantages. They offer a seamless and efficient browsing experience, allowing users to quickly access their favorite websites and web applications. With Chrome OS, users can enjoy a secure environment that protects against malware and other online threats, giving them peace of mind while browsing the internet.
Key Features of a Chromebook
Chromebooks come with a range of features that make them popular among students, professionals, and everyday users. Let’s explore some of these key features:
- Fast and secure browsing experience: Chromebooks are built to provide a fast and smooth browsing experience. With their optimized hardware and software integration, web pages load quickly, allowing users to navigate the internet effortlessly.
- Integration with Google services: One of the major advantages of using a Chromebook is its seamless integration with Google services. With built-in apps like Google Drive and Google Docs, users can easily create, edit, and collaborate on documents, spreadsheets, and presentations.
- Automatic updates: Chromebooks receive regular automatic updates from Google, ensuring that your device is always up to date with the latest security patches and features. This eliminates the hassle of manually updating your operating system and keeps your device running smoothly.
- Support for Android apps: Chromebooks have the ability to run Android apps, expanding the functionality of the device. This means you can access a wide range of apps from the Google Play Store, such as productivity tools, entertainment apps, and games, making your Chromebook even more versatile.
Navigating the Chromebook Interface
When using a Chromebook, it is important to understand how to navigate the interface. The interface is minimalistic and easy to use, with a taskbar at the bottom of the screen and an app launcher in the bottom-left corner.
The taskbar provides quick access to essential functions and allows you to switch between open windows effortlessly. You can also manage your device’s settings, including Wi-Fi, sound, and display preferences, directly from the taskbar.
The app launcher, located in the bottom-left corner of the screen, is your gateway to all the apps installed on your Chromebook. It provides a convenient way to launch your favorite apps, whether they are web-based or Android apps.
Additionally, Chromebooks offer a variety of keyboard shortcuts that can help you navigate the interface more efficiently. For example, pressing “Ctrl + Alt + /” will display a list of available keyboard shortcuts, allowing you to perform tasks quickly without using the mouse.
Overall, the Chromebook interface is designed to be user-friendly and intuitive, making it easy for users of all levels of experience to navigate and utilize the full potential of their device.
The Importance of Screenshots
Screenshots are a valuable tool for various purposes, both personal and professional. They allow you to capture a still image of your screen, preserving important information or moments for future reference. Whether you’re troubleshooting an issue, sharing something interesting with others, or documenting a process, screenshots can be incredibly useful.
Imagine this scenario: you’re working on a project and suddenly encounter an error message that you’ve never seen before. Instead of frantically trying to jot down the message or describe it to someone else, you can simply take a screenshot. This visual record not only captures the exact wording of the error message, but also provides context by including the surrounding elements on your screen. This makes it easier to share the issue with others, whether it’s a colleague or a technical support team.
Benefits of Taking Screenshots
There are several benefits to taking screenshots on your Chromebook:
- Sharing information: Screenshots allow you to visually communicate information, making it easier to convey a message or demonstrate a problem. Instead of relying solely on written or verbal descriptions, a screenshot provides a clear and concise visual representation.
- Troubleshooting: Screenshots can be invaluable when troubleshooting technical issues. They provide a visual record of error messages, settings, or other relevant information that can help identify and resolve problems. By capturing the exact error message or the specific configuration settings, you can provide more accurate information to technical support teams, saving time and frustration for everyone involved.
- Documentation: Screenshots can serve as documentation for future reference. Whether you need to remember a specific configuration or refer back to a particular webpage, screenshots can help you recall information accurately. Instead of relying on memory or searching through endless notes, you can simply look at the screenshot and quickly find the information you need.
Now, let’s delve into the different types of screenshots you can take on your Chromebook, depending on your specific needs:
Different Types of Screenshots
There are different types of screenshots you can take on your Chromebook, depending on your specific needs:
- Full-screen screenshot: This captures the entire contents of your screen, including the taskbar and any open windows. This type of screenshot is useful when you want to capture everything that is currently displayed on your screen, providing a comprehensive snapshot of your digital workspace.
- Partial screenshot: This allows you to capture a specific portion of your screen, cropping out any unnecessary elements. Whether you want to highlight a particular section of a webpage or focus on a specific error message, a partial screenshot gives you the flexibility to capture only what is relevant.
- Window screenshot: This captures only the active window, excluding the rest of the screen. If you’re working with multiple windows or applications, and you want to capture just one specific window, this type of screenshot is perfect. It eliminates any distractions from other windows, allowing you to focus on the content that matters.
As you can see, screenshots are not just a simple image capture. They have the power to enhance communication, streamline troubleshooting, and provide reliable documentation. So, the next time you come across something noteworthy on your Chromebook, don’t forget to take a screenshot and unlock the full potential of this valuable tool.
Steps to Take a Cropped Screenshot on a Chromebook
Now that we’ve covered the basics, let’s dive into the step-by-step process of taking a cropped screenshot on a Chromebook:
Preparing Your Screen for a Screenshot
Before taking a cropped screenshot, it’s important to prepare your screen to capture the desired area. Here’s how you can do it:
- Navigate to the area of your screen that you want to include in the screenshot.
- Adjust the window size or zoom level if necessary to ensure the desired content fits within the screen area.
Using the Screenshot Tool
Once your screen is ready, follow these steps to take a screenshot:
- Press the Ctrl and Shift keys simultaneously.
- While holding down the Ctrl and Shift keys, press the Switch window key. The Switch window key is typically located in the top row of the keyboard, between the Full screen and Brightness down keys. It may appear as an icon that resembles two overlapping rectangles.
- Your screen will flash briefly, indicating that a screenshot has been captured.
Cropping Your Screenshot
Once you’ve taken a screenshot, you can crop it to remove any unwanted elements. Follow these steps to crop your screenshot:
- Open the Files app on your Chromebook.
- Navigate to the Downloads folder to find the screenshot you just took.
- Right-click on the screenshot file and select Open with.
- Choose an image editor such as Gallery or Drawing.
- In the image editor, select the Crop tool.
- Drag the handles of the crop tool to define the area you want to keep in the screenshot.
- Click Apply or Save to finalize the cropped screenshot.
Saving and Accessing Your Screenshots
Now that you’ve taken a cropped screenshot, you may wonder where it is saved on your Chromebook and how to access it later. Here’s what you need to know:
Where Do Screenshots Go on a Chromebook?
By default, screenshots on a Chromebook are saved in the Downloads folder. To access the Downloads folder, open the Files app and locate it in the sidebar. Alternatively, you can press Ctrl + T on the keyboard and type chrome://downloads in the address bar of the Chrome browser.
Organizing Your Screenshots
To keep your screenshots organized, you can create a dedicated folder within the Downloads folder or use a cloud storage service like Google Drive. This way, you can easily find and access your screenshots whenever you need them.
Troubleshooting Common Issues
If you encounter any issues while taking a cropped screenshot on your Chromebook, here are some common problems and their potential solutions:
Screenshot Not Working
If the screenshot shortcut isn’t working, try the following:
- Restart your Chromebook and try again.
- Ensure that you’re using the correct keyboard combination: Ctrl + Shift + Switch window.
- Check if the Screen capture option is enabled in your Chromebook’s settings. To do this, click on the system tray in the bottom-right corner of the screen, then click on the gear icon to open the settings menu. Under the Device section, select Keyboard and ensure that the Screen capture option is turned on.
Unable to Find Saved Screenshots
If you can’t locate your saved screenshots, try the following:
- Check the Downloads folder in the Files app, as this is the default location for saving screenshots.
- Use the search function in the Files app to search for the screenshot file by name or file type.
With this guide, you should now be able to confidently take a cropped screenshot on your Chromebook. Remember to adjust the screen area, use the screenshot tool, and crop the screenshot as needed. Whether you’re capturing important information, troubleshooting an issue, or simply sharing something interesting with others, taking screenshots can greatly enhance your Chromebook experience.
Enhance Your Screenshots with GIFCaster
Ready to take your Chromebook screenshots to the next level? With GIFCaster, not only can you capture the perfect cropped screenshot, but you can also add a touch of personality and fun by incorporating GIFs. Transform your work messages into delightful celebrations and express yourself creatively. Make your screenshots stand out and speak volumes with GIFCaster. Ready to get started? Use the GIFCaster App today and add a spark of joy to your captures!