If you’re wondering how to take a screenshot on your Galaxy A12, you’ve come to the right place. Capturing what’s on your screen can be incredibly useful for a variety of reasons, whether it’s to save important information or share something interesting with others. In this step-by-step guide, we’ll walk you through the process of taking screenshots on your Galaxy A12, as well as provide some useful tips and troubleshooting advice along the way. So, let’s get started!
Understanding the Basics of Galaxy A12
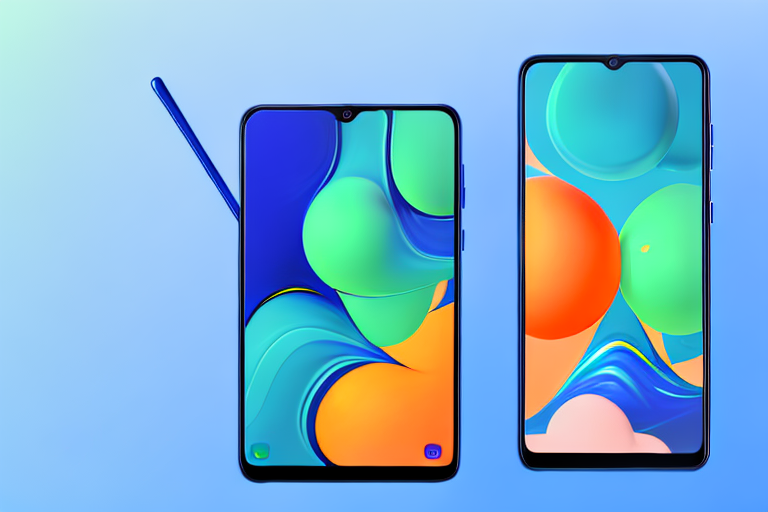
Before we dive into the details of taking screenshots, let’s take a moment to familiarize ourselves with the basics of the Galaxy A12. Released in [YEAR], the Galaxy A12 is a budget-friendly smartphone that offers a range of features and capabilities. With its large display, powerful processor, and impressive camera system, the Galaxy A12 is a fantastic device for both productivity and entertainment. Now that we have a general understanding of the device, let’s explore some of its key features!
Key Features of Galaxy A12
1. Display: The Galaxy A12 boasts a [SIZE] [RESOLUTION] display, providing vibrant colors and sharp details for an immersive viewing experience. Whether you’re watching movies, playing games, or browsing the web, the Galaxy A12’s display ensures that everything looks stunning and visually appealing.
2. Camera: Equipped with a [MP] rear camera and a [MP] front-facing camera, the Galaxy A12 allows you to capture stunning photos and videos with ease. The rear camera offers various shooting modes and features, such as portrait mode, night mode, and panorama, to enhance your photography skills. The front-facing camera ensures that your selfies are always on point, with beautification options and filters to add a touch of creativity.
3. Battery Life: With its [MAH] battery, the Galaxy A12 offers long-lasting usage, ensuring you can stay connected throughout the day. Whether you’re streaming videos, playing games, or multitasking, the Galaxy A12’s battery will keep up with your demands, allowing you to enjoy your device without worrying about running out of power.
4. Storage: The device comes with [GB] of internal storage, providing ample space for your apps, photos, videos, and more. You can store your entire media library, download your favorite apps, and keep all your important files without worrying about running out of space. Additionally, the Galaxy A12 also supports expandable storage, allowing you to add a microSD card for even more storage capacity.
Navigating the Galaxy A12 Interface
Now that we know about some of the key features of the Galaxy A12, let’s explore how to navigate its user-friendly interface. The device is powered by [OPERATING SYSTEM], which offers a seamless and intuitive user experience. The interface is designed to be easy to use, with a clean and organized layout that allows you to access your favorite apps and settings with just a few taps.
One of the standout features of the Galaxy A12’s interface is its customization options. You can personalize your home screen by adding widgets, changing wallpapers, and arranging your apps in a way that suits your preferences. The device also supports themes, allowing you to completely change the look and feel of your device with just a few taps.
In addition to customization, the Galaxy A12’s interface offers a range of useful features and shortcuts to enhance your productivity. You can use gestures to navigate the device, such as swiping down on the home screen to access the notification panel or swiping up to open the app drawer. The device also supports split-screen multitasking, allowing you to use two apps simultaneously for increased efficiency.
Furthermore, the Galaxy A12’s interface provides a range of accessibility options to cater to different users’ needs. You can adjust the font size, enable color inversion for better visibility, and even activate a one-handed mode for easier operation on larger screens.
Familiarize yourself with the interface to ensure a smooth navigation experience. Explore the settings, try out different gestures, and customize your device to make it truly yours. The Galaxy A12’s user-friendly interface makes it easy for anyone to use and enjoy all the features and capabilities it has to offer.
Preparing Your Galaxy A12 for Screenshots
Before you can start capturing screenshots on your Galaxy A12, there are a few things you need to do to prepare your device. Let’s go through the necessary steps to ensure everything is set up correctly.
Checking Your Device’s Software Version
It’s always a good idea to keep your device’s software up to date to ensure optimum performance and compatibility. Before you proceed, make sure your Galaxy A12 is running on the latest software version. Here’s how:
- Go to the “Settings” app on your Galaxy A12.
- Scroll down and tap on “Software update”.
- If an update is available, follow the on-screen prompts to download and install it.
Once your device is up to date, you’re ready to move on to the next step!
Enabling Necessary Settings
To capture screenshots on your Galaxy A12, you need to enable a couple of settings. These settings ensure that your device recognizes the screenshot gesture and saves the captured images correctly. Here’s what you need to do:
- Open the “Settings” app on your Galaxy A12.
- Scroll down and tap on “Advanced features”.
- Toggle on the “Palm swipe to capture” option. This feature allows you to capture a screenshot by swiping the edge of your hand across the screen.
- Scroll further down and tap on “Screenshots and screen recorder”.
- Ensure that the “Screen capture” option is enabled.
Once you’ve completed these steps, your Galaxy A12 is now prepared to take screenshots!
The Process of Taking a Screenshot on Galaxy A12
Now that you’ve set up your Galaxy A12 for screenshots, let’s explore the different methods you can use to capture what’s on your screen. The Galaxy A12 offers two primary methods for taking screenshots: the button method and the palm swipe method. Let’s take a closer look at each of these methods.
Using the Button Method for Screenshots
The button method is the most straightforward way to take a screenshot on your Galaxy A12. Follow these steps:
- Navigate to the screen you want to capture.
- Simultaneously press and hold the “Volume Down” button and the “Power” button.
- You’ll see a brief animation and hear a sound to indicate that the screenshot has been successfully captured.
- You can find the screenshot in your device’s Gallery app or the “Screenshots” folder.
That’s all there is to it! Now you can easily capture screenshots using the button method.
Using the Palm Swipe Method for Screenshots
If you find it more convenient to use gestures, you can utilize the palm swipe method to take screenshots on your Galaxy A12. Here’s how:
- Open the screen you wish to capture.
- Place the side of your hand vertically on either edge of the screen.
- Gently swipe your hand across the display, ensuring that your hand makes contact with the screen.
- Just like with the button method, you’ll see an animation and hear a sound to confirm the successful capture of the screenshot.
- The captured screenshot can be found in the Gallery app or the “Screenshots” folder.
Whether you prefer using buttons or gestures, the Galaxy A12 offers both options to make capturing screenshots a breeze!
Managing Your Screenshots on Galaxy A12
Once you’ve taken a screenshot on your Galaxy A12, you may want to organize, edit, or share your captured images. Let’s explore how you can manage your screenshots effectively.
Accessing and Viewing Your Screenshots
To access and view your screenshots, you have a couple of options:
- Open the “Gallery” app on your Galaxy A12. Look for the “Screenshots” album or folder, where your captured images will be stored.
- Alternatively, you can use a file manager app to navigate to the “Pictures” folder on your device. Inside, locate the “Screenshots” folder.
- Once you’ve found your screenshots, you can tap on them to view and explore each image.
Now you can easily find and access your screenshots whenever you need them!
Editing and Sharing Your Screenshots
The Galaxy A12 provides built-in editing tools that allow you to enhance your screenshots or make adjustments before sharing them. Here’s how you can edit and share your screenshots:
- Open the “Gallery” app or any image editing app of your choice.
- Select the screenshot you want to edit.
- Tap on the “Edit” or “Adjust” option to access the available editing tools.
- You can now crop, rotate, add filters, or make various adjustments to your screenshot.
- Once you’re satisfied with your edits, tap on the “Save” or “Apply” button to save the changes.
- To share your edited screenshot, simply tap on the sharing icon and select the desired platform or app.
With these editing and sharing options, you can truly make your screenshots stand out and share them with others effortlessly.
Troubleshooting Common Screenshot Issues
While taking screenshots on the Galaxy A12 is a straightforward process, there may be times when you encounter some common issues. Here are a few troubleshooting tips to help you overcome any problems you might face:
What to Do When Screenshot Isn’t Working
If you’re having trouble capturing screenshots on your Galaxy A12, try the following solutions:
- Restart your device: Sometimes, a simple restart can resolve minor software glitches.
- Check your settings: Make sure the necessary settings, such as “Palm swipe to capture” and “Screen capture,” are enabled.
- Free up storage space: If your device is running low on storage, it may hinder the screenshot functionality. Delete unnecessary files or apps to free up space.
By trying these troubleshooting steps, you should be able to get your screenshot feature up and running smoothly again.
Resolving Other Common Screenshot Problems
Here are some additional tips to address other common issues you may encounter:
- Screenshot quality: If your screenshots appear blurry or low-quality, ensure that your device’s screen resolution is set to the recommended level.
- Unwanted notifications: If you don’t want notifications to appear in your screenshots, enable the “Do not disturb” mode before capturing.
- Accidental screenshots: If you find yourself inadvertently taking screenshots, be mindful of your hand placement and adjust your grip accordingly.
With these tips and tricks, you can troubleshoot and fix common screenshot-related issues on your Galaxy A12.
That wraps up our step-by-step guide on how to take a screenshot on your Galaxy A12. Now you have all the knowledge and tools necessary to capture and manage screenshots on your device. Whether you’re documenting important information or simply sharing a funny meme, taking screenshots has never been easier. So go ahead, explore the possibilities, and unleash your creativity with your Galaxy A12!
Enhance Your Screenshots with GIFCaster
Ready to take your Galaxy A12 screenshots to the next level? With GIFCaster, you can add a burst of fun and creativity to your captures. Turn a simple screenshot into a lively message with the perfect GIF, making your communications more engaging and expressive. Whether it’s a celebratory moment or just adding a touch of humor to your day, GIFCaster is the tool you need. Ready to animate your screenshots? Use the GIFCaster App today and start sharing your enhanced images!