If you own a Motorola Edge smartphone and want to learn how to capture screenshots, you’re in the right place. In this guide, we will walk you through the process step-by-step, ensuring that you are equipped with all the necessary knowledge to capture and edit screenshots on your device. So, let’s dive in and explore the different methods to take a screenshot on the Motorola Edge.
Understanding the Basics of Motorola Edge
Before we delve into the details of taking a screenshot, let’s familiarize ourselves with the key features and interface of the Motorola Edge. This will help you navigate through the device smoothly and maximize your screenshot-taking experience.
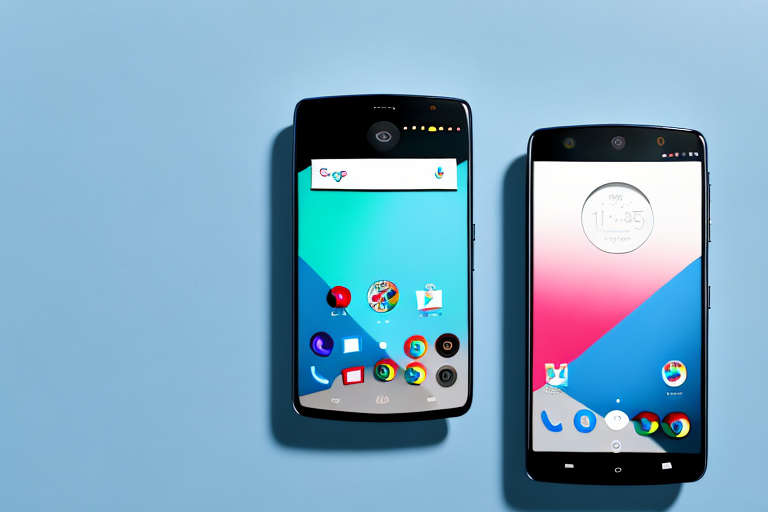
The Motorola Edge is a flagship smartphone that combines sleek design with cutting-edge technology. It is equipped with a range of features that enhance your mobile experience, making it a popular choice among tech enthusiasts.
One of the standout features of the Motorola Edge is its stunning display. The device boasts a 6.7-inch OLED display with a resolution of 2340 x 1080 pixels. This means you can expect vibrant colors, sharp details, and immersive visuals when using your smartphone.
In addition to its impressive display, the Motorola Edge is powered by a Qualcomm Snapdragon 765G processor. This ensures smooth performance and seamless multitasking, allowing you to switch between apps and tasks effortlessly.
When it comes to photography, the Motorola Edge doesn’t disappoint. It features a triple camera setup on the rear, consisting of a 64-megapixel main camera, a 16-megapixel ultra-wide-angle lens, and an 8-megapixel telephoto lens. This versatile camera system allows you to capture stunning photos and videos in various scenarios.
Key Features of Motorola Edge
The Motorola Edge boasts an array of impressive features that set it apart from other smartphones on the market. With its stunning display, powerful processor, and advanced camera capabilities, the Motorola Edge is designed to provide an exceptional user experience.
One of the standout features of the Motorola Edge is its 90Hz refresh rate display. This means that the screen refreshes 90 times per second, resulting in smoother scrolling, faster animations, and an overall more fluid user experience.
In addition to its high refresh rate display, the Motorola Edge also supports HDR10+. This technology enhances the dynamic range of the display, allowing for more vibrant colors and greater detail in both bright and dark areas of the screen.
Another notable feature of the Motorola Edge is its 5G connectivity. With 5G support, you can experience faster download and upload speeds, lower latency, and improved overall network performance. This means you can stream high-quality videos, play online games, and download large files in a matter of seconds.
Navigating the Motorola Edge Interface
Understanding the interface of your device is crucial in optimizing your overall smartphone usage. Familiarize yourself with the navigation options, home screen setup, and app drawer organization to effortlessly find the functions you need.
The Motorola Edge runs on Android 10, with Motorola’s custom user interface on top. This interface offers a clean and intuitive user experience, making it easy to navigate through the various menus and settings.
One of the key navigation options on the Motorola Edge is the edge display. This feature allows you to access your favorite apps, contacts, and shortcuts by swiping from the curved edge of the screen. It provides quick and convenient access to your most-used functions, saving you time and effort.
Customizing your home screen is another aspect of the Motorola Edge interface that you can explore. You can add widgets, rearrange app icons, and create folders to personalize your home screen and make it more efficient for your needs.
When it comes to organizing your apps, the Motorola Edge offers an app drawer where you can find all your installed applications. You can arrange your apps alphabetically, by category, or manually organize them to suit your preferences.
Preparing to Take a Screenshot
Before diving into the screenshot-taking process, there are a few preparations you should make to ensure a smooth experience.
First and foremost, it’s important to have a clear understanding of why you need to take a screenshot. Are you capturing an important moment in a video game? Are you documenting a software bug for troubleshooting purposes? Knowing the purpose behind the screenshot will help you approach the process with clarity and focus.
Once you have a clear goal in mind, it’s time to check your screen settings. Reviewing and adjusting your screen settings can greatly impact the quality of your screenshots. Brightness, resolution, and other display settings can make a significant difference in the clarity and detail captured by your screenshots. Take a moment to ensure that your screen settings are optimized for the best screenshot quality.
Checking Screen Settings
To guarantee optimal screenshot quality, it’s essential to review your screen settings. Adjusting brightness, resolution, and other display settings can greatly impact the clarity of your screenshots.
Another important consideration is the aspect ratio of your screen. Different devices and applications may have varying aspect ratios, so it’s crucial to be aware of this when taking screenshots. If you’re capturing a screenshot for a specific purpose, such as sharing it on social media or using it in a presentation, you may need to adjust your screen settings accordingly to ensure the screenshot fits the desired aspect ratio.
Furthermore, it’s worth mentioning that some devices and operating systems offer built-in screenshot tools with additional options and settings. Exploring these tools can provide you with more control over your screenshots, allowing you to customize the capture area, add annotations, or even record screen activity.
Ensuring Adequate Storage Space
Before capturing screenshots, it’s crucial to ensure that your device has enough storage space available. Running out of storage can hinder the screenshot-saving process and lead to frustration. Clearing unnecessary files and organizing your data will help prevent storage issues.
Additionally, consider the file format in which you want to save your screenshots. Different file formats, such as PNG or JPEG, have varying levels of compression and quality. Depending on your needs, you may want to choose a file format that strikes a balance between file size and image quality.
Lastly, it’s worth mentioning that organizing your screenshots can save you time and effort in the long run. Creating dedicated folders or albums for different types of screenshots can help you easily locate and manage your captured images. This is especially useful if you frequently take screenshots for various purposes, such as work-related tasks or personal projects.
Different Methods to Capture a Screenshot
Now that you are familiar with the basics and have prepared your device, let’s explore the different methods available to capture a screenshot on the Motorola Edge.
Using the Hardware Buttons
The Motorola Edge offers a convenient hardware button combination to capture screenshots. By pressing and holding the power button and volume down button simultaneously, you can quickly capture a screenshot of your screen. Practice this gesture a few times to ensure accurate timing and avoid accidental presses.
Utilizing the Screenshot Toolbar
Another handy method to capture a screenshot is by utilizing the screenshot toolbar. Access the toolbar by swiping down from the top of your screen and selecting the “Screenshot” option. This feature provides additional screenshot options such as scrolling screenshots, which allow you to capture long web pages or conversations.
Taking a Screenshot through the Notification Panel
If you prefer a more streamlined approach, you can take a screenshot directly from the notification panel. When the desired screen is displayed, simply swipe down from the top of your screen and tap the “Screenshot” icon. This method ensures quick and effortless screenshot capturing.
Editing and Sharing Your Screenshot
After successfully capturing a screenshot, you may want to edit it or share it with others. Let’s explore the different options available for editing and sharing your Motorola Edge screenshots.
Accessing Your Screenshots
Your captured screenshots are automatically saved in the device’s gallery or dedicated screenshots folder. To access your screenshots, simply open the gallery app or file manager and navigate to the designated folder. Here, you can view and manage your screenshots as desired.
Basic Editing Tools for Screenshots
The Motorola Edge offers basic editing tools right within the gallery app, allowing you to crop, rotate, add text, or apply filters to your screenshots. These simple yet powerful tools enable you to enhance your screenshots before sharing them.
Sharing Screenshots on Social Media
Sharing screenshots on social media platforms has become increasingly popular. With a few taps, you can showcase your screenshots on platforms like Instagram, Facebook, or Twitter. Simply select the desired screenshot from your gallery and choose the social media platform on which you wish to share it. With Motorola Edge’s seamless integration, sharing your screenshots has never been easier.
Troubleshooting Common Screenshot Issues
While taking screenshots on the Motorola Edge is generally a smooth process, you may encounter some common issues along the way. Let’s address a few of these potential pitfalls and provide solutions.
Dealing with Blurry Screenshots
If your screenshots are turning out blurry or unclear, it may be due to motion blur or improper timing. Ensure you are holding your device steady and pressing the buttons simultaneously to capture a crisp screenshot.
Addressing Storage Issues
If you frequently encounter storage issues while capturing screenshots, consider transferring your existing screenshots to a cloud storage service or computer. This will free up space on your device and prevent future storage-related problems.
Resolving Screenshot Not Working Issues
In rare cases, you may experience issues where the screenshot function does not work. To resolve this, try restarting your device and ensure that you are using the correct button combination or method for taking screenshots. If the issue persists, consult the device’s user manual or contact Motorola support for further assistance.
Conclusion
Capturing screenshots on your Motorola Edge is a handy feature that allows you to save and share important information, memorable moments, or interesting content with ease. By familiarizing yourself with the various methods, exploring editing options, and troubleshooting common issues, you can master the art of taking screenshots on your Motorola Edge smartphone. So unleash your creativity and start capturing those memorable screens today!
Enhance Your Screenshots with GIFCaster
Ready to take your Motorola Edge screenshots to the next level? With GIFCaster, not only can you capture your screen, but you can also add a touch of personality and fun by incorporating GIFs. Transform a standard work message into a delightful celebration or express your creativity in a way that stands out. Make your screenshots more engaging and shareable today by using the GIFCaster App. Start infusing your captures with excitement and let your creativity shine!