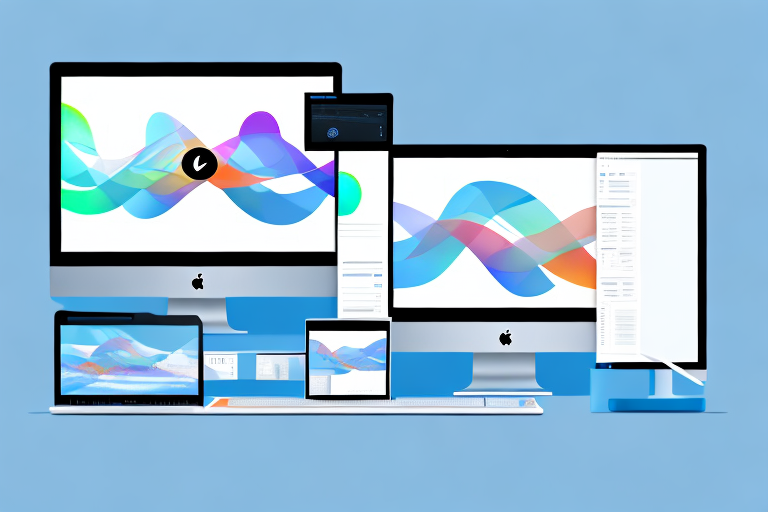
In today’s tech-savvy world, screenshots have become an essential aspect of our daily digital lives. Whether you need to capture an important moment, share information with others, or troubleshoot an issue, knowing how to take and edit screenshots on your Mac can be incredibly useful. In this article, we will guide you through the process of capturing screenshots on your Mac, exploring different types of screenshots, and provide you with editing tips to enhance your captured images. Additionally, we will discuss the best formats for saving your screenshots and easy ways to share them with others. Lastly, we will address any common troubleshooting issues you may encounter along the way.
Understanding Screenshots on Mac
The Importance of Screenshots:
Screenshots play a vital role in various aspects of our lives. Whether you are a student, a professional, or simply someone who enjoys sharing experiences, screenshots allow you to capture and preserve important information, conversations, and memorable moments.
Imagine you are a student attending an online lecture. The professor presents a complex diagram that you need to refer to later for studying. Instead of frantically taking notes, you can simply take a screenshot of the diagram and save it for future reference. This not only saves time but also ensures that you have an accurate representation of the information.
Similarly, professionals often use screenshots to document software bugs or errors they encounter. By capturing the exact moment when the issue occurs, they can provide detailed information to developers or support teams, facilitating faster resolution.
Different Types of Screenshots:
When it comes to capturing screenshots, Mac offers several options to cater to different needs. You have the flexibility to choose between capturing the entire screen, selected windows, or specific areas.
Let’s say you want to share a funny conversation you had with a friend on social media. Instead of copying and pasting the text, you can take a screenshot of the conversation and upload it as an image. This not only adds visual appeal but also ensures that the context remains intact.
Moreover, Mac allows you to capture specific areas of the screen. This feature comes in handy when you want to highlight a particular section of a webpage, an image, or a document. By selecting the desired area, you can focus the viewer’s attention and provide a more precise representation of what you want to convey.
But that’s not all! Mac goes a step further and offers the ability to record videos of your screen. This feature is especially useful for creating informative tutorials, demonstrating troubleshooting steps, or showcasing gameplay. By capturing the screen in motion, you can provide a more immersive and engaging experience for your audience.
Imagine you are a content creator who wants to teach others how to use a specific software. Instead of relying solely on written instructions, you can record a video of your screen while demonstrating the steps in real-time. This not only enhances the learning experience but also allows viewers to follow along more easily.
In conclusion, screenshots on Mac are not just a simple tool for capturing images of your screen. They offer a wide range of possibilities and benefits, from preserving important information to creating engaging content. So next time you need to capture something on your Mac, explore the various options available and make the most out of this powerful feature.
Steps to Take a Screenshot on Mac
Are you looking to capture a screenshot on your Mac? Whether you want to save a funny meme, capture an important document, or share a beautiful moment from a video, taking a screenshot is a useful tool. Fortunately, Mac provides several methods to capture screenshots effortlessly. Let’s explore two popular methods: using keyboard shortcuts and the Screenshot app.
Using Keyboard Shortcuts
Mac offers convenient keyboard shortcuts that make capturing screenshots a breeze. With just a few simple keystrokes, you can capture the entire screen or select a specific area. Here’s how:
- Capture the entire screen: To capture the entire screen, press Command + Shift + 3 simultaneously. This will instantly capture the entire contents of your screen, including multiple displays if you have them connected.
- Select a specific area: If you only want to capture a specific area of your screen, use the Command + Shift + 4 shortcut. This will turn your cursor into a crosshair, allowing you to click and drag to select the desired area. Once you release the mouse button, the screenshot will be captured.
- Additional options: You can further enhance your screenshot capabilities by combining the above shortcuts with the Control key or Space bar. For example, pressing Command + Shift + Control + 3 will copy the screenshot to your clipboard instead of saving it as a file. Similarly, using Command + Shift + Control + 4 will copy the selected area to the clipboard.
Using keyboard shortcuts to take screenshots on Mac is not only quick but also efficient. It allows you to capture the desired content without interrupting your workflow.
Using the Screenshot App
If you prefer a more visual approach or need additional features, macOS provides a built-in Screenshot app. This app offers an intuitive interface for capturing screenshots and provides more flexibility in selecting the content you want to capture. Here’s how to use it:
- Open the Screenshot app: To access the Screenshot app, press Command + Shift + 5. This will open the app and display a toolbar at the bottom of the screen.
- Select capture options: The toolbar offers various options for capturing screenshots. You can choose to capture the entire screen, selected windows, or specific areas. Simply click on the corresponding button to select your preferred option.
- Utilize the delay feature: The Screenshot app also provides a delay feature, allowing you to set a timer before the screenshot is taken. This can be useful when you need to capture a specific moment in a video or want to prepare your screen before capturing it.
The Screenshot app on Mac offers a user-friendly interface and additional features that can enhance your screenshot-taking experience. Whether you need to capture a specific window or want to time your screenshot perfectly, this app has got you covered.
In conclusion, capturing screenshots on a Mac is a simple and efficient process. Whether you prefer using keyboard shortcuts or the Screenshot app, you have multiple options to choose from. So go ahead, capture and share those memorable moments, important information, or anything else you find interesting on your screen!
Editing Your Screenshots on Mac
Basic Editing Tools:
After capturing a screenshot, Mac provides you with a range of basic editing tools to enhance your images. These tools include options to crop, rotate, resize, and annotate your screenshots. Additionally, you can adjust the brightness, contrast, and colors of your images to make them visually appealing and easy to understand.
When it comes to cropping, Mac offers a user-friendly interface that allows you to easily select the portion of the screenshot you want to keep. Whether you need to remove unwanted elements or focus on a specific area, the cropping tool gives you the flexibility to achieve the desired composition.
In addition to cropping, Mac also allows you to rotate your screenshots. This feature comes in handy when you need to adjust the orientation of an image or correct any accidental tilts. With just a few clicks, you can effortlessly rotate your screenshot to align it perfectly.
Resizing is another essential editing tool offered by Mac. Whether you want to make your screenshot smaller for easy sharing or enlarge it for a detailed analysis, the resizing feature ensures that your image fits your specific requirements. You can easily adjust the dimensions while maintaining the aspect ratio to avoid any distortion.
To make your screenshots more informative, Mac provides annotation tools. These tools allow you to add text, arrows, shapes, and even freehand drawings to highlight important details or provide explanations. By annotating your screenshots, you can effectively communicate your message and ensure clarity for your audience.
Advanced Editing Techniques:
If you desire more advanced editing capabilities, there are several third-party applications available for Mac. These applications offer an extensive array of features such as filters, effects, layers, and fine-tuning controls. By exploring these applications, you can truly unleash your creativity and produce stunning screenshots.
With third-party applications, you can take your editing skills to the next level. These tools provide a wide range of filters and effects that can transform your screenshots into works of art. Whether you want to give your image a vintage look or add a dramatic touch, the possibilities are endless.
Layers are another powerful feature offered by advanced editing applications. With layers, you can work on different elements of your screenshot separately, making it easier to make precise adjustments and create complex compositions. This flexibility allows you to experiment with different ideas and achieve the desired visual impact.
Fine-tuning controls are essential for those who want to have full control over the editing process. These controls allow you to adjust every aspect of your image, from color balance and saturation to sharpness and noise reduction. By mastering these controls, you can achieve professional-looking screenshots that stand out from the crowd.
In conclusion, Mac provides a range of basic editing tools that allow you to crop, rotate, resize, and annotate your screenshots. However, if you want to explore more advanced editing techniques, there are third-party applications available that offer a plethora of features such as filters, effects, layers, and fine-tuning controls. By utilizing these tools, you can unleash your creativity and produce visually stunning screenshots that captivate your audience.
Saving and Sharing Your Screenshots
Best Formats for Saving Screenshots:
When it comes to saving your screenshots, it is important to choose the optimal format to ensure the best quality and compatibility. JPEG or PNG formats are commonly used and provide a good balance between image quality and file size. However, if you require transparency or need to preserve the highest image quality, consider saving your screenshots in the PNG format.
Easy Ways to Share Your Screenshots:
Sharing your screenshots has never been easier on Mac. With just a few clicks, you can quickly share your captured images via various platforms such as email, messaging apps, social media, or cloud storage services. Mac offers integrations with popular sharing services, making it a breeze to spread information or share memorable moments with others.
Troubleshooting Common Issues
Screenshot Not Working:
If you encounter issues while capturing screenshots on your Mac, several troubleshooting steps can help you resolve the problem. These steps may include adjusting system settings, updating your macOS, or resetting your keyboard shortcuts. By following these troubleshooting techniques, you can swiftly regain the functionality of capturing screenshots.
Issues with Editing Tools:
While editing your screenshots on Mac, you may encounter challenges or difficulties utilizing certain tools or features. In such cases, it is essential to ensure that you have the latest version of your editing software and that your system meets the minimum requirements. Additionally, exploring online resources and forums can provide valuable insights and solutions to specific editing issues.
By mastering the art of taking and editing screenshots on Mac, you open up a world of possibilities and enhance your overall digital experience. Whether it’s for personal, educational, or professional purposes, screenshots serve as a powerful tool to capture, communicate, and troubleshoot. Start exploring the vast potential of screenshots on your Mac today!
Enhance Your Screenshots with GIFCaster
Ready to take your screenshot game to the next level? With GIFCaster, you can easily add a touch of personality and animation to your captures. Make your screenshots more fun and engaging by incorporating GIFs that express your creativity and turn ordinary screen captures into lively conversations. Whether it’s a celebratory moment or just adding a spark to your daily communications, use the GIFCaster App and start transforming your images today!